Occasionally my back reminds me I’m not as young as I once was. I can still do most things but the message is clear: think about downsizing the bonsai.
Large bonsai look spectacular. There’s no doubt where the eyes go at any bonsai show and it is usually backed up by the peoples choice votes. Bigger bonsai give us the potential to catch eyes with thick trunks and real ramification but the downside is the effort needed to move and repot such trees, not to mention the cost of large pots to suit them.
Smaller bonsai are more of a challenge. Harder to keep alive through summer as the tiny pots dry out so much quicker. Styling is also a challenge – giving the impression of an entire old tree in less than 25 cm is a real challenge.
I’ve finally worked out the techniques and care needed to keep these little guys alive and healthy and accepted the challenge to develop some real quality shohin bonsai. Shohin is a size classification in bonsai which is accepted as around 25cm tall (from rim of pot).
One of the downsides to shohin bonsai is that they are rarely shown as individual trees because they get lost among the larger trees on a show bench. Shohin sized bonsai are often shown as a collection of 5 or 7 trees on a multi- layer stand so that means having more small bonsai in order to be able to pick out enough in prime condition for a show.
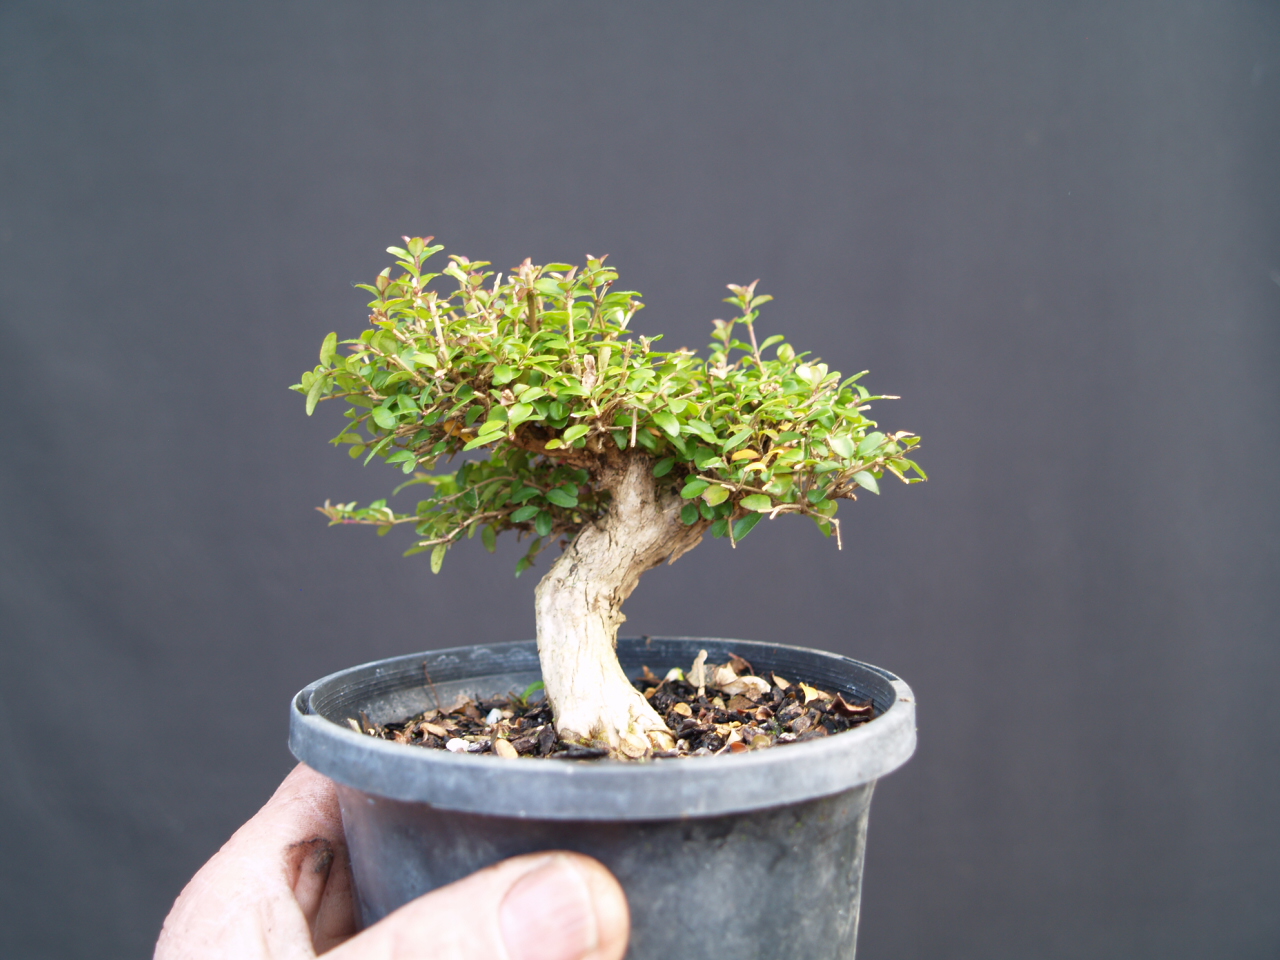
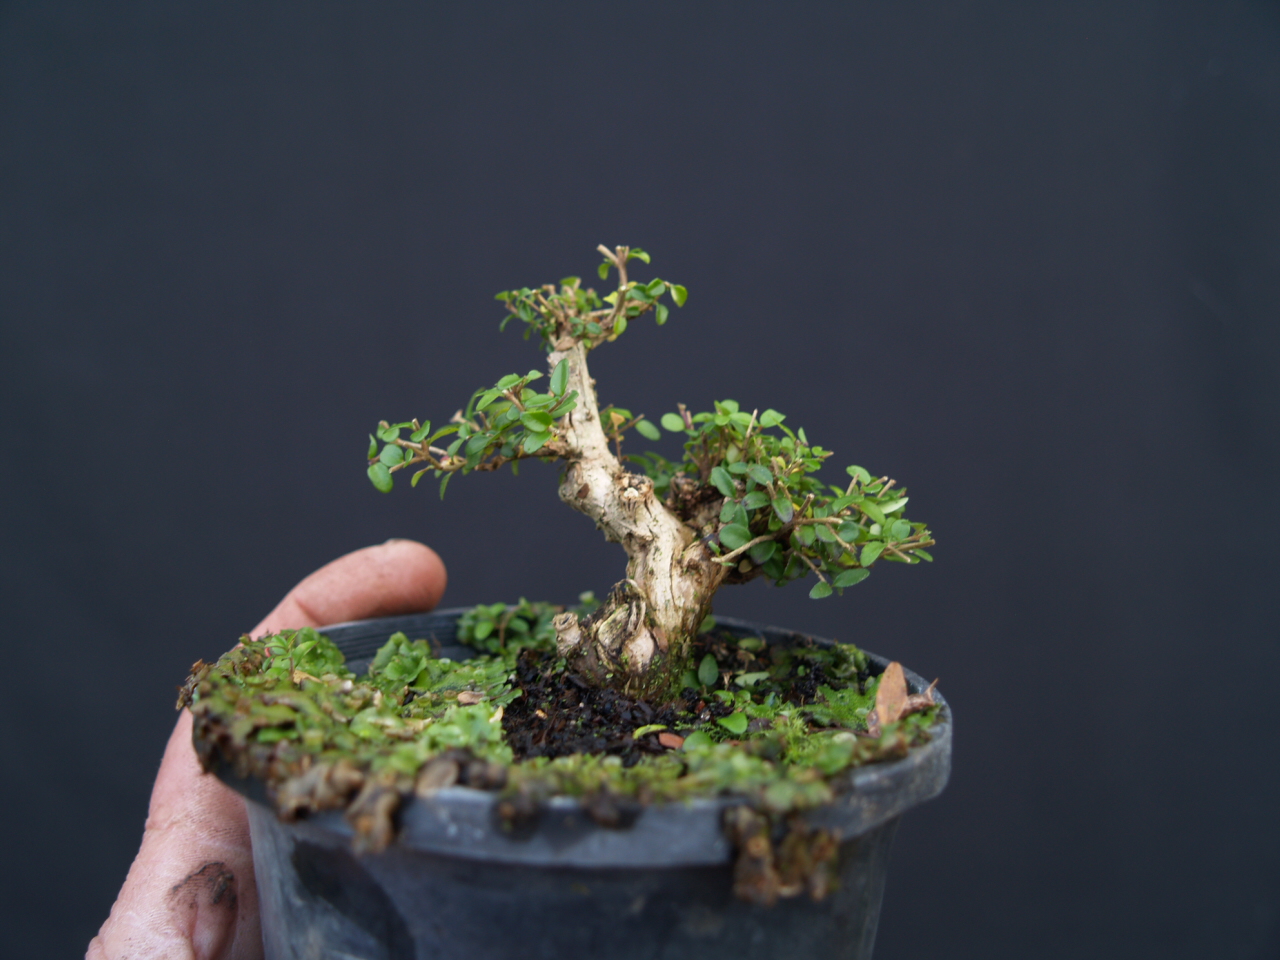
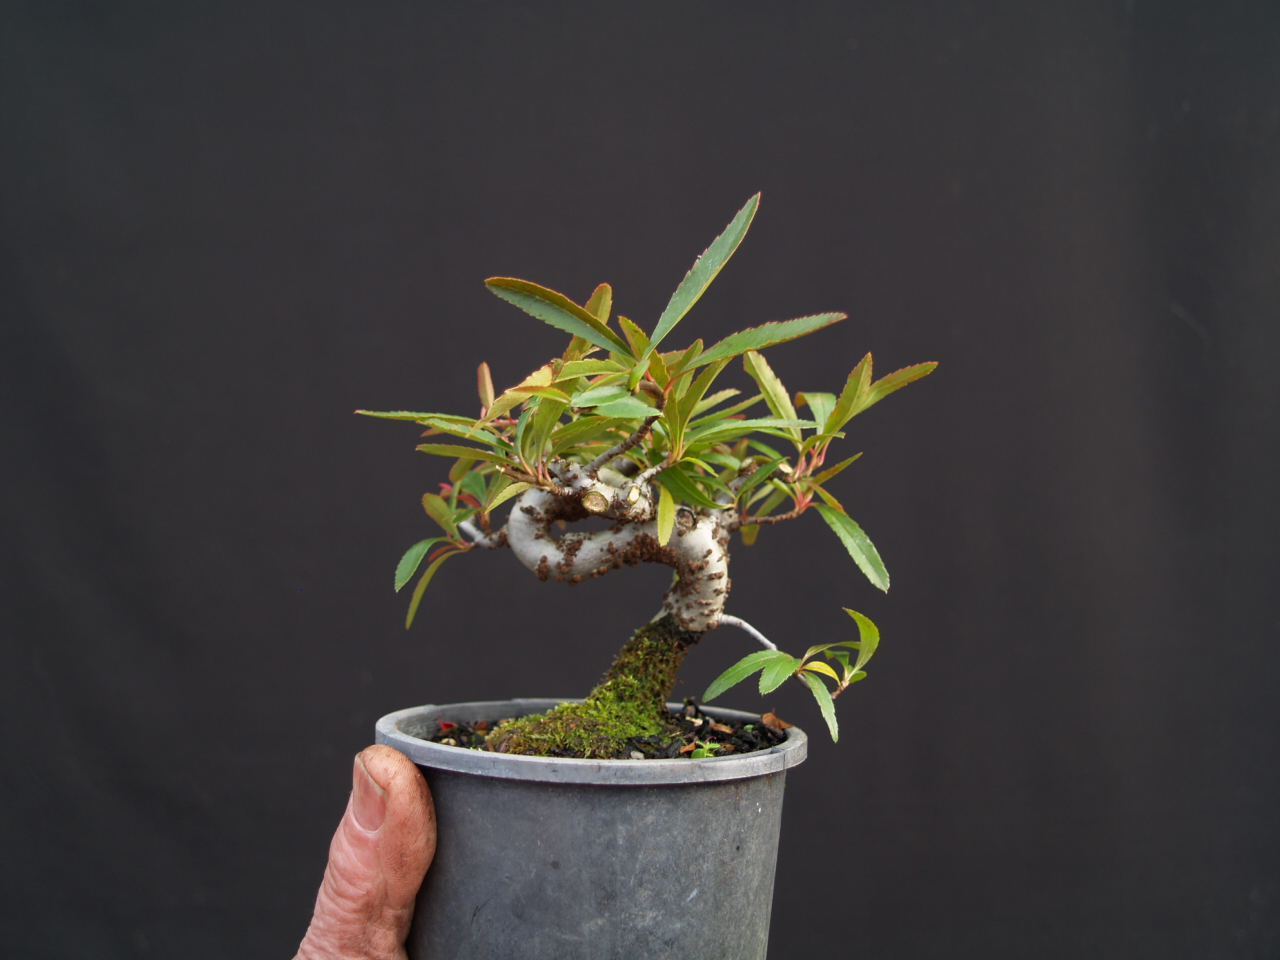
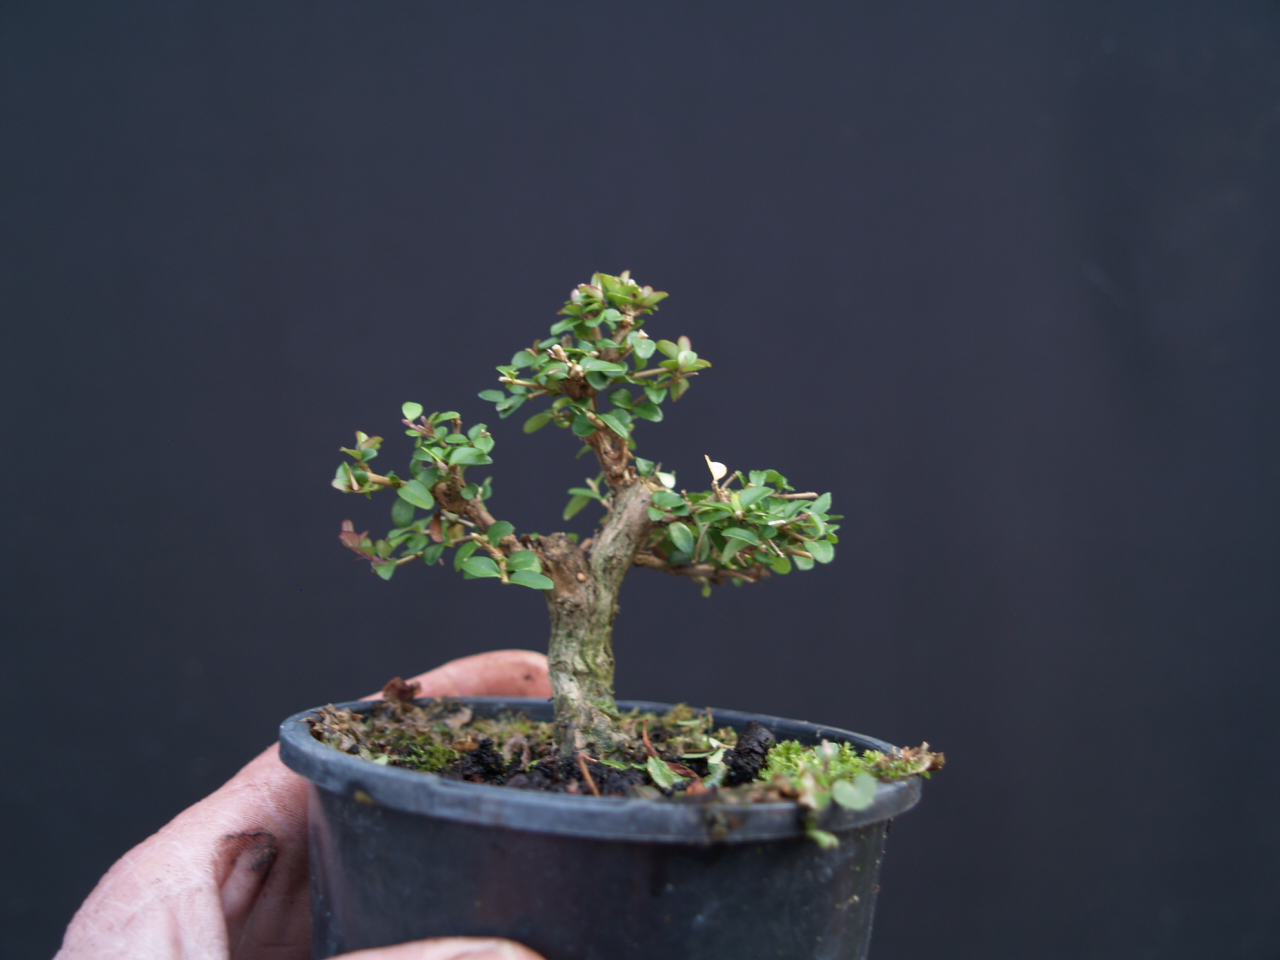
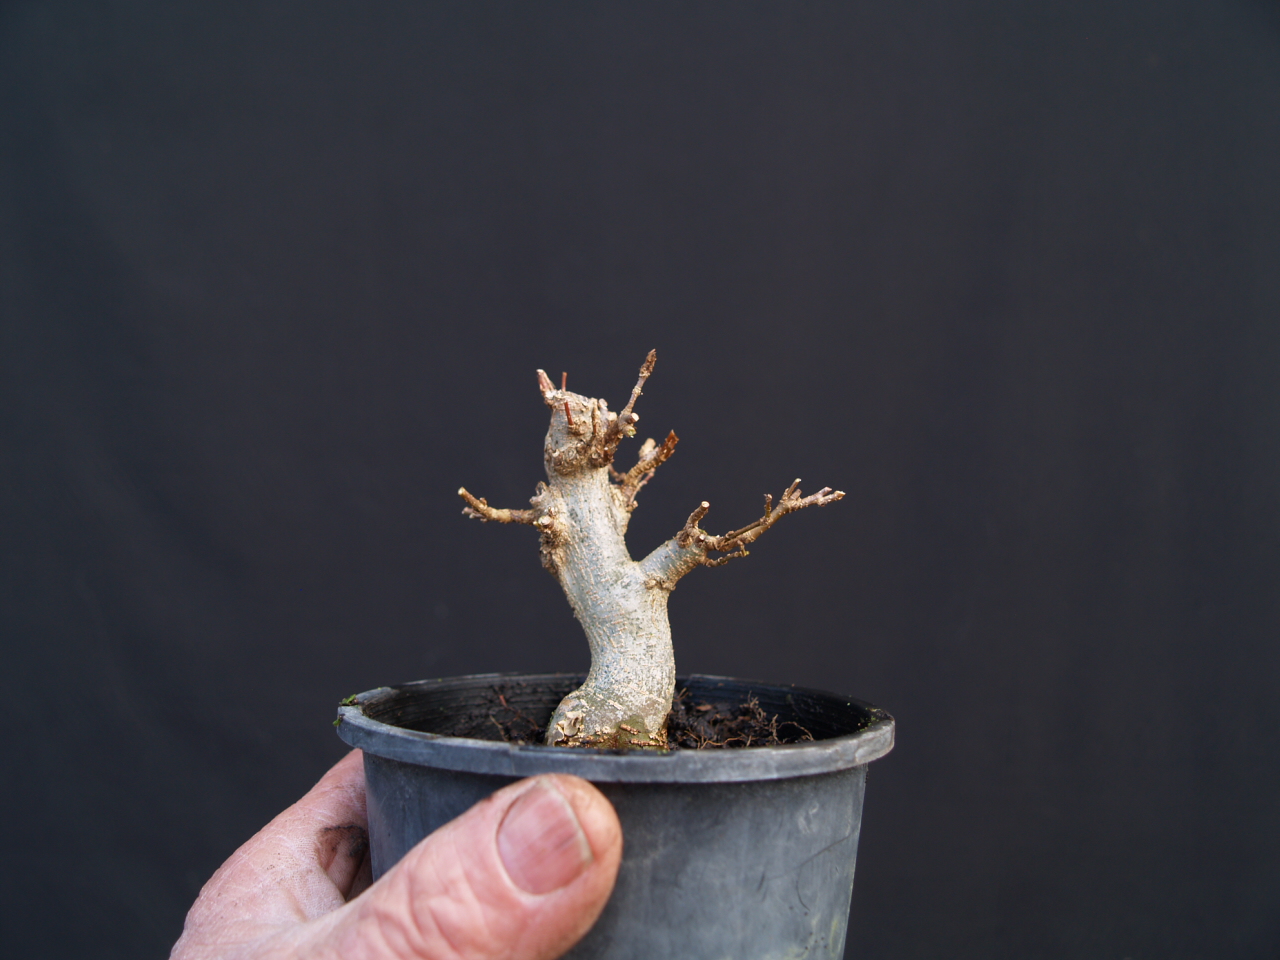
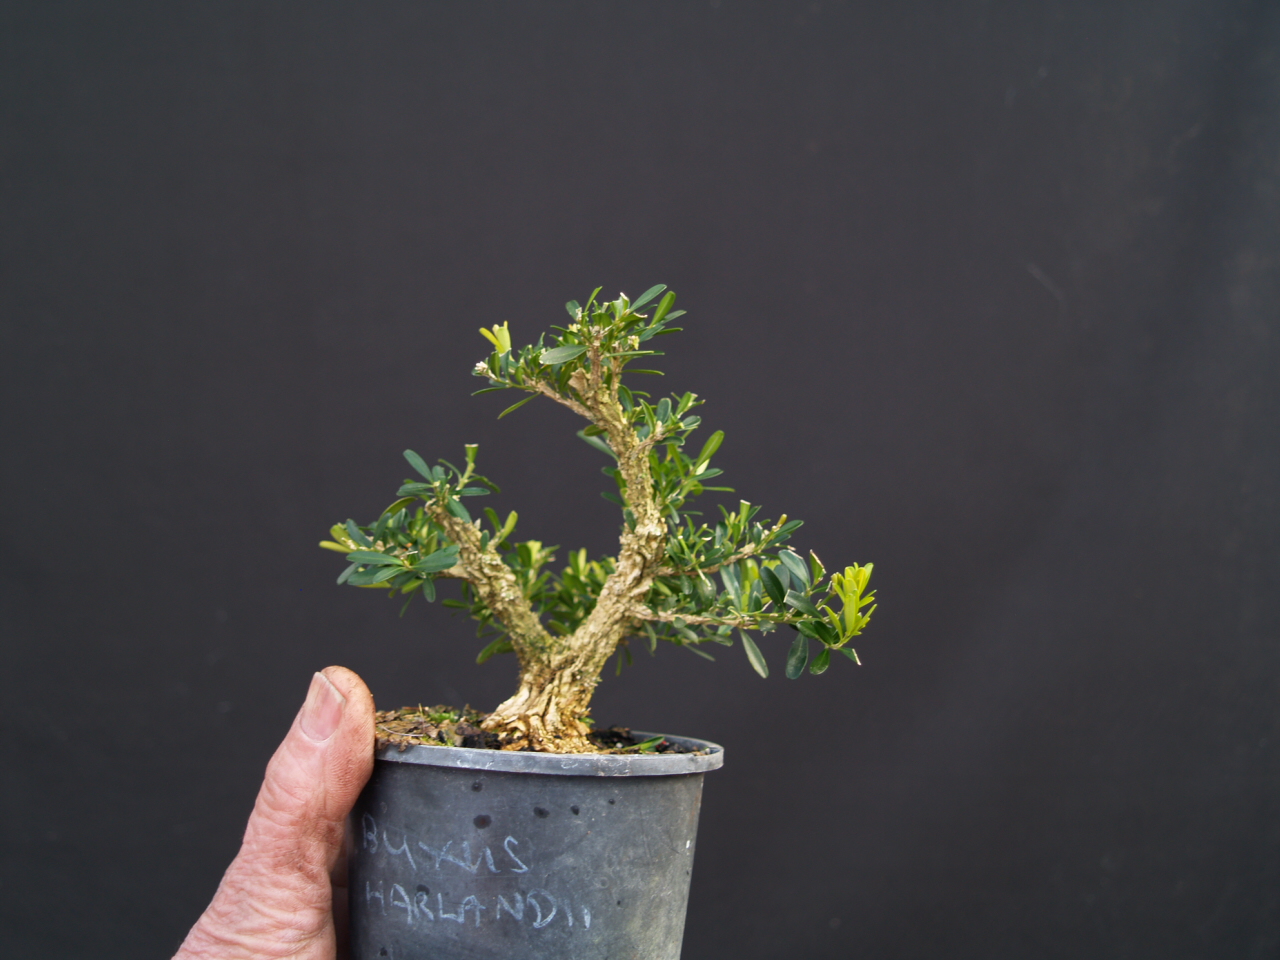
Today I’m sharing some of the trees I’ve been developing for the Shibui Bonsai shohin stable.
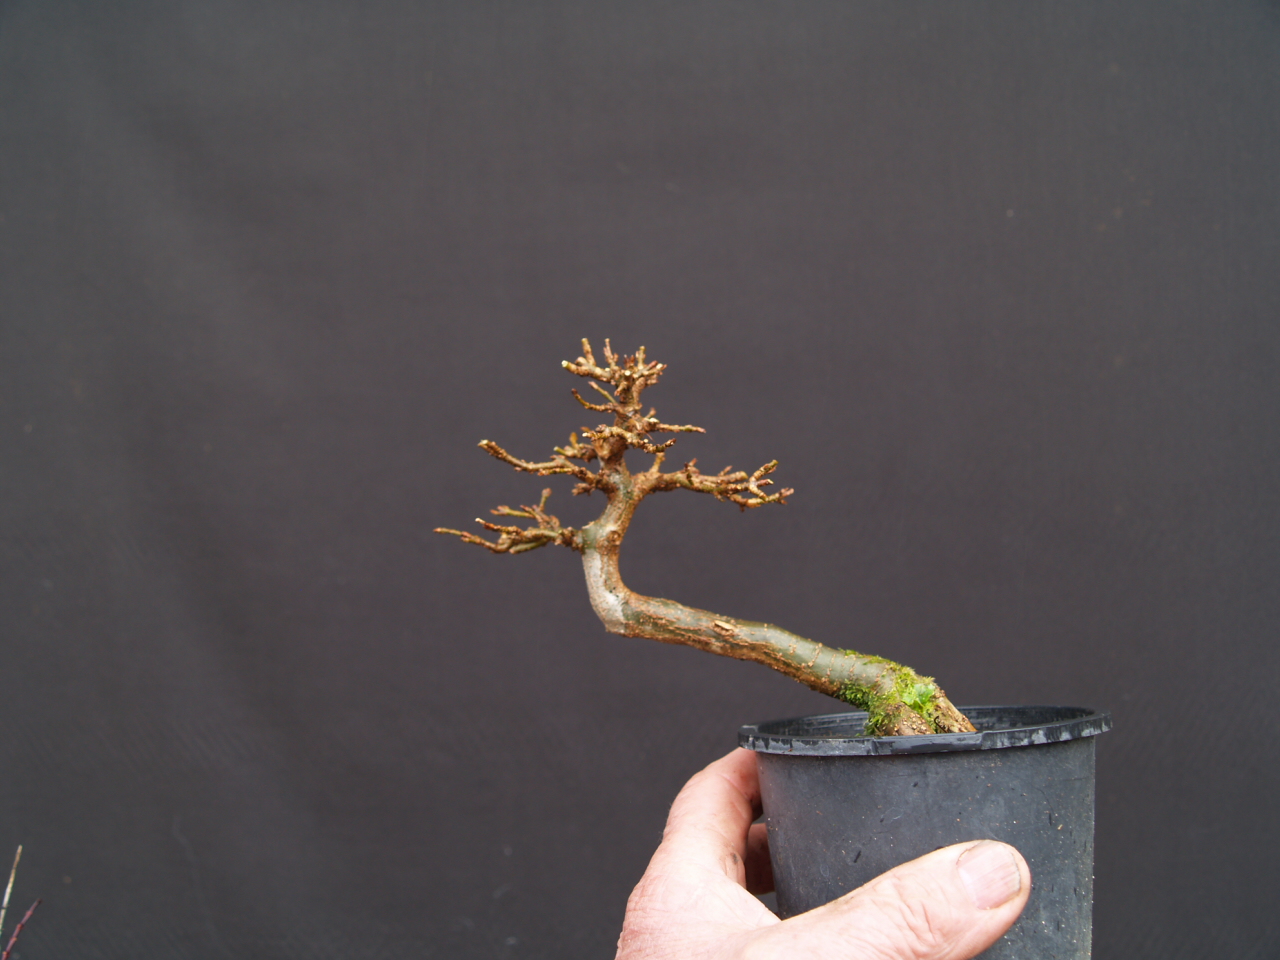
I’m really enjoying the challenges that shohin bonsai pose – containing long shoots, styling well ramified branching is limited space, growing trunks with good taper in less than 20 cm, etc.
The next challenge is finding suitable pots. I’ve contacted several of our Aussie bonsai potters and asked them to design and make some pots for me to use with these and other developing shohin bonsai. I’ll let you know what turns up when they do.
Please note these trees are NOT FOR SALE. If you want to get on the small bonsai wagon I do have plenty of smaller trees with trunks with good potential to develop your own shohin but for now the trees I’ve shown today will stay on the Shibui Bonsai show benches.
I’ve done some previous posts about starting a group planting but posting this year’s offer of seedlings https://shibuibonsai.com.au/?p=2338 prompted me to put together the group shown here.
I’ve found bonsai groups a great way to get a reasonably acceptable bonsai specimen in just a few years. No waiting for decades for the trunk to grow or branches to develop. Lots of trunks together help to provide the visual bulk and canopy so your group can look presentable relatively quickly.
Bonsai groups can be any size and have any number of trees but more trees together tends to look better sooner.
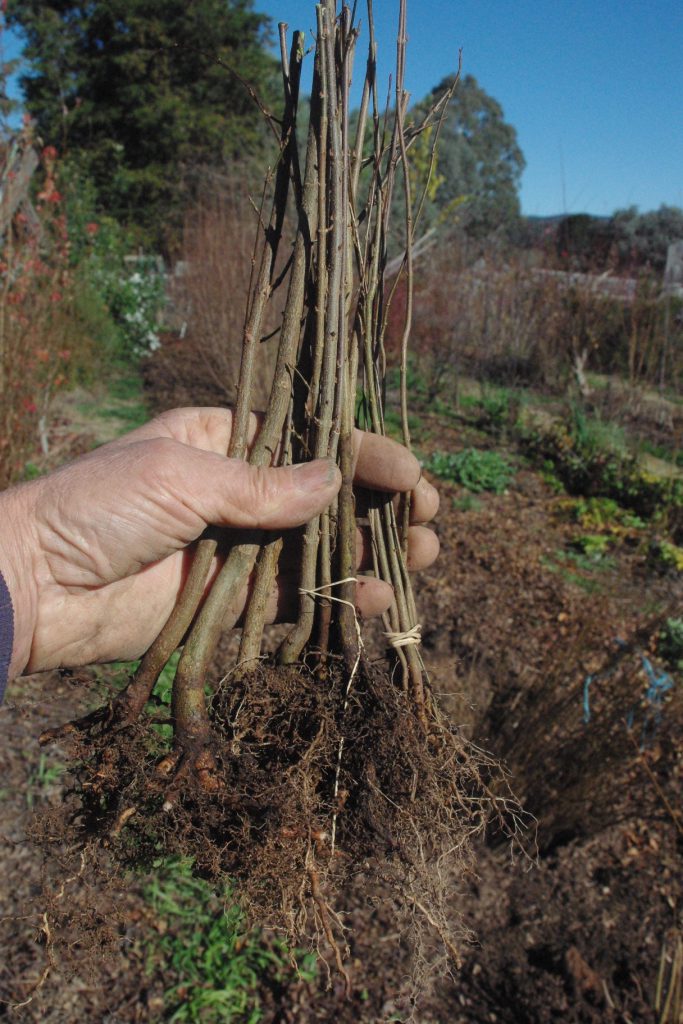
I’ve started here with the group pack shown in the previous post. Shibui Bonsai forest packs consist of a mix of trunk sizes. If you are finding your own seedlings try to get a similar range of trunk thicknesses – a few thicker ones and a range of thinner ones to fill out the forest. there’s around 20 trees in the forest pack but you don’t have to use all of them. Spares can be used for other projects.
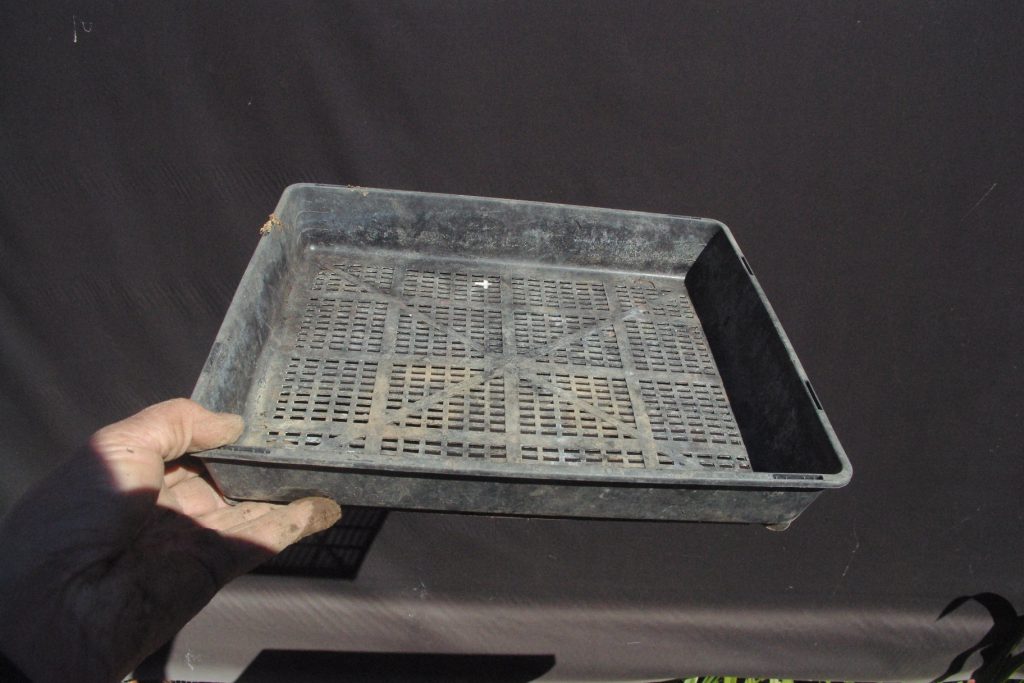
As well as the seedlings you’ll need a tray. I use these nursery seedling trays because they are easy to get and a convenient size, durable and easy to get but any convenient container will do. For different sized groups consider an appropriate sized tray. Your container does not need to be as shallow as this. My older trident groups were established and grown on in much deeper polystyrene fruit boxes. Larger, deeper containers will allow your trees to grow and develop quicker if you want to speed up evolution.
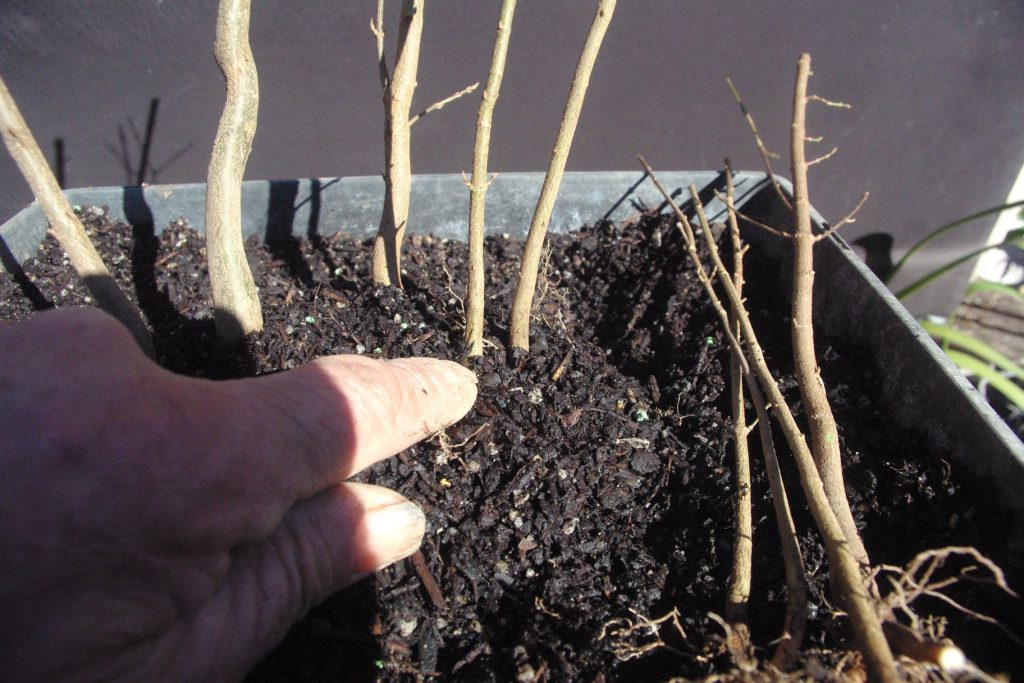
Start by sorting an root pruning the seedlings if they have not already been done. tridents are really resilient and pruning thick roots short will help promote more finer and surface roots vital to good bonsai.
before root pruning
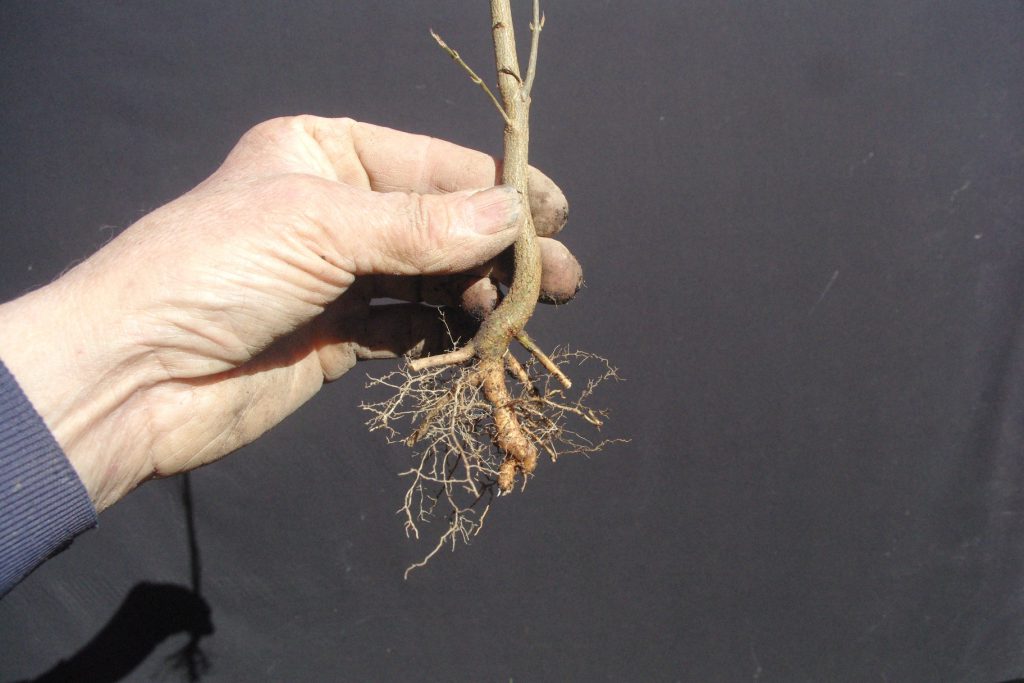
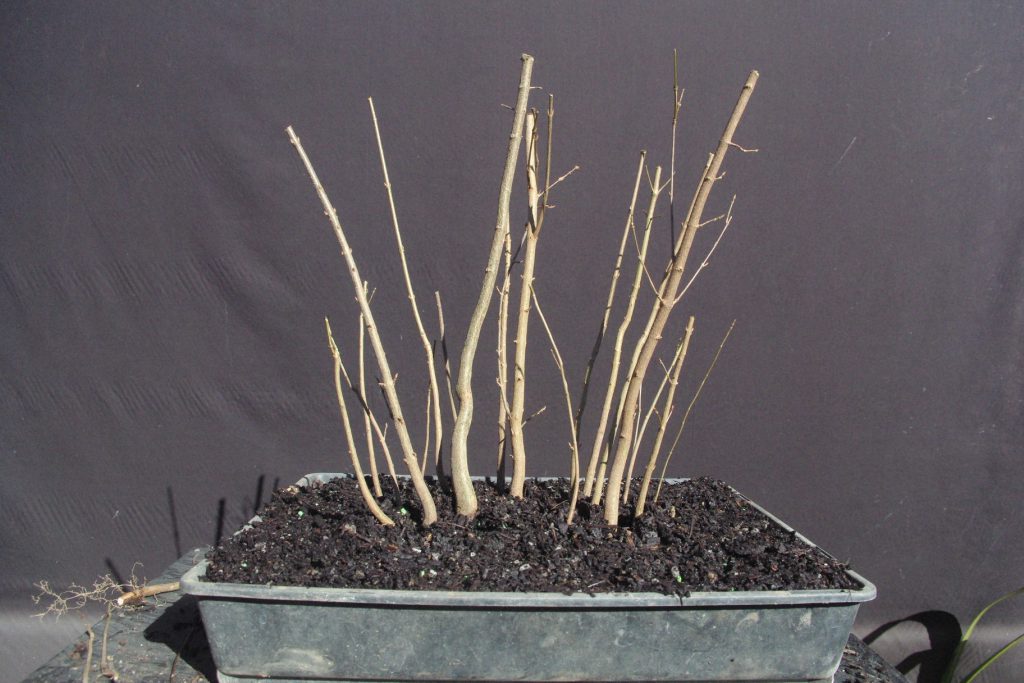
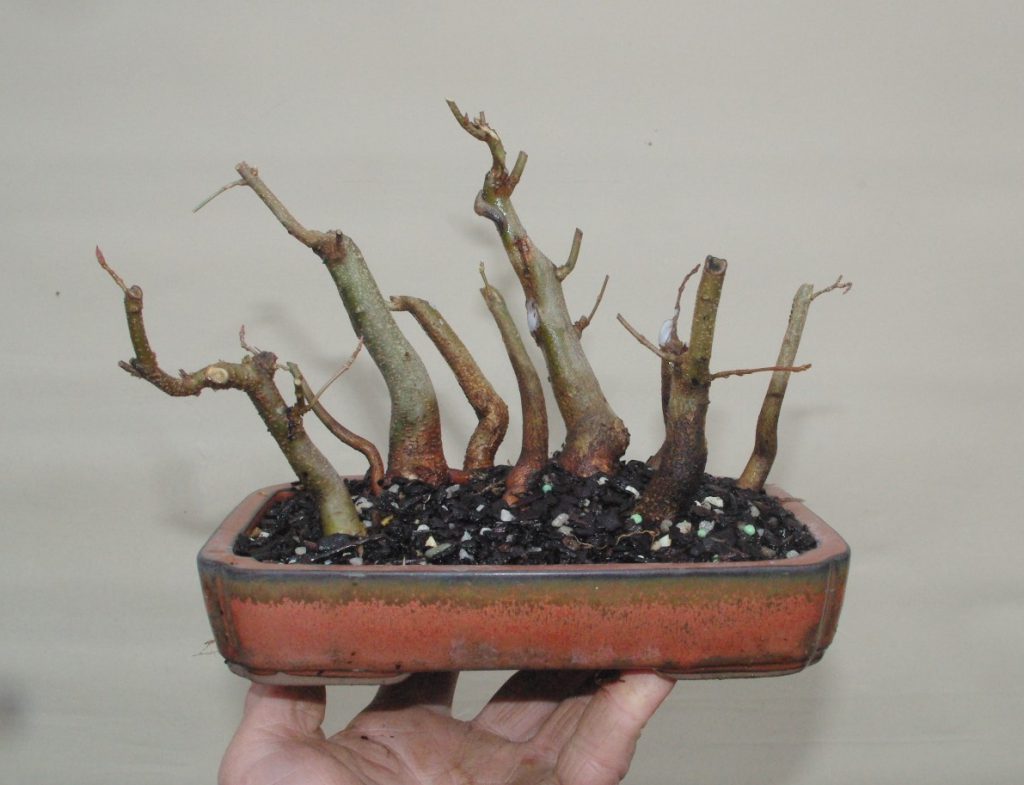
Some of the trees for this project after root pruning
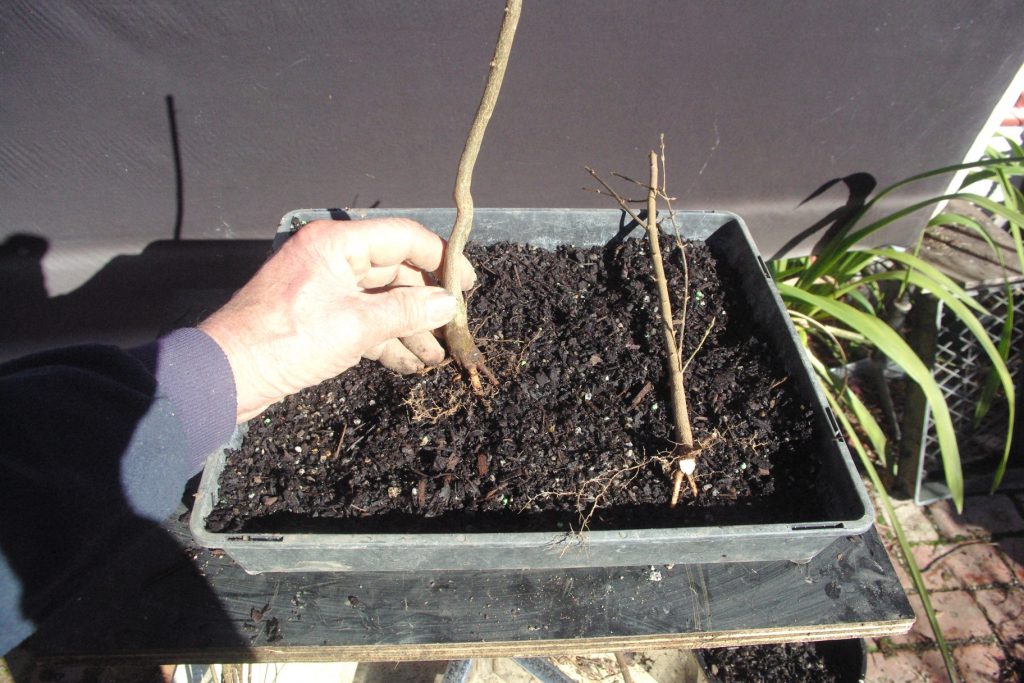
The thickest, tallest tree becomes the focal point for the group. Usually placed around 1/3 from either left or right and just in front of the mid-line front to back. I’ve gone with a 1/3 left placement this time as shown.
Now add the other thicker trunks. This is where you can add your own creativity to the group but they will generally be towards the front and closer to the middle than the edges. It is easier if all your trees are relatively straight but if you have trunks with some movement you will also need to try to create harmony by arranging the bends so they look similar.
Pay particular attention to spacing. I’ve found this is particularly difficult as we seem to have a natural tendency to plant things equally spaced so I have to think carefully and force myself to put some trunks quite close together to create a random spacing within the group of trunks. intertwining roots of adjacent trees is no problem but if your trees have lots of roots don’t be frightened to cut roots on one side so you can get the trunks close.
Keep adding trunks with smaller ones mostly toward the outer edges and back. Thinner trunks at the rear helps build an impression of greater depth and size. If some of the trees have branches try to place those so the branches grow into spaces or out of the group. That won’t always be possible so keep branch cutters handy to remove any that are growing close to other trees.
Keep checking that you are not making rows of trees. It seems to be another human trait to line things up but nature is more random so if you see rows forming just move trunks a little to break up lines.
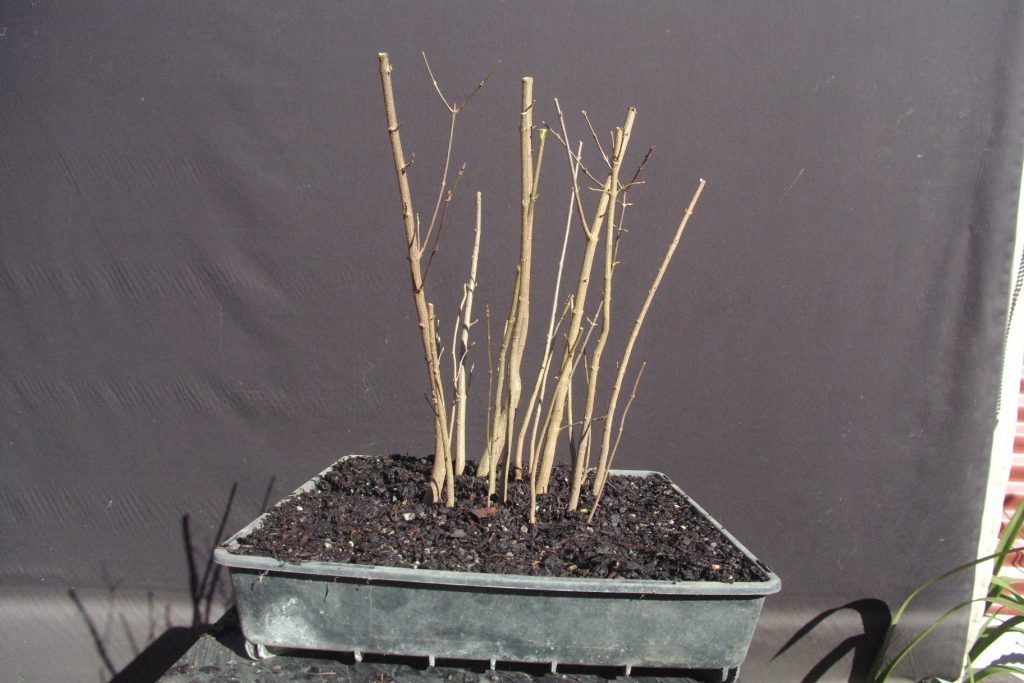
view from the front
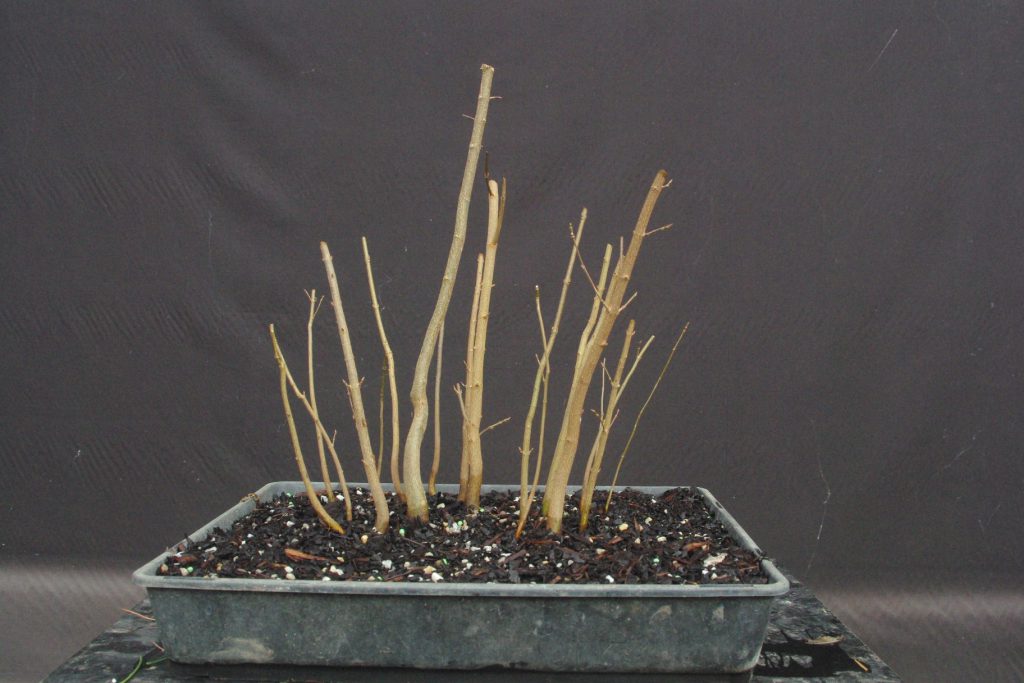
Check from the side as well. Look for lines forming and check that all the trees are standing at a similar angle to create harmony. I often need to add more potting soil to prop up trees as they don’t have many roots for support yet.
view from the side
After I’m happy with placement and angles I trim the trunks to final height. Try to make the thickest focal tree the tallest then work out toward the edges, pruning each tree a little shorter so the overall outline will be a rounded dome. Don’t forget that your trees will always grow up so pruning shorter than required now can be a good thing.
After watering your group into the fresh soil do another check and reposition any trunks that have sagged or leaned over. Now put your new forest in a protected place to settle in. Check occasionally to make sure trunks have not fallen over. Just push any problems back into position and add some more potting mix if required.
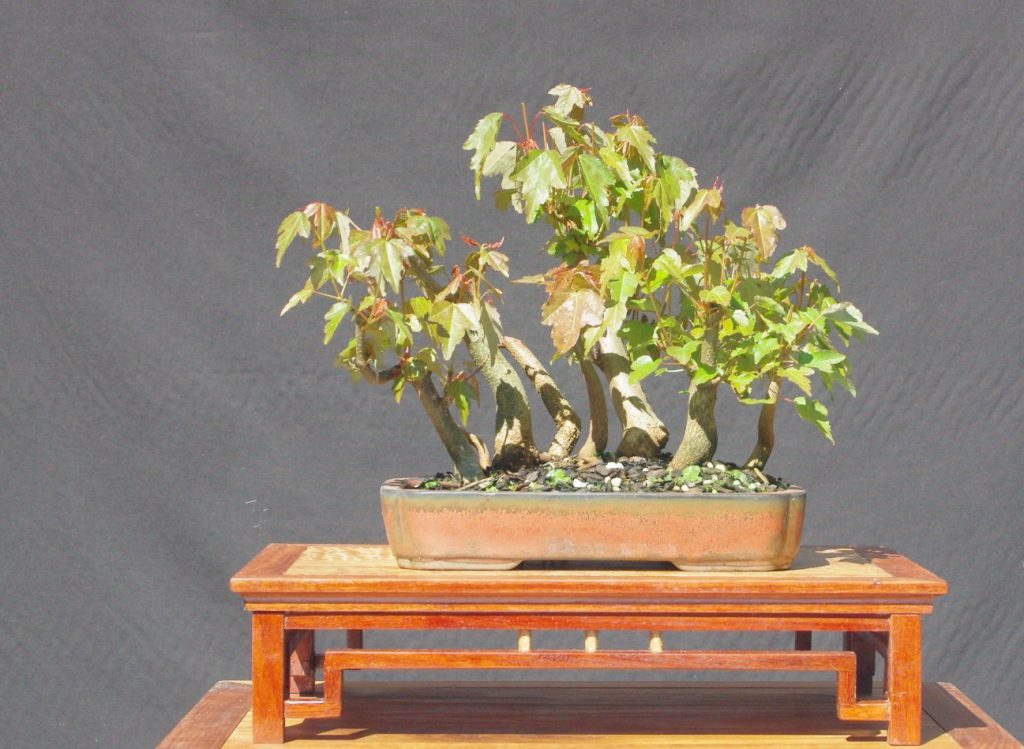
Another trident group planting a few months after assembly.
I generally find some faults during the first year. Things I should have seen but didn’t. Spaces that don’t look great and trunks at odd angles that clash with the overall look. Any of these things can be corrected next spring when the group can be chopped into sections and re positioned or new trees added to enhance the composition.
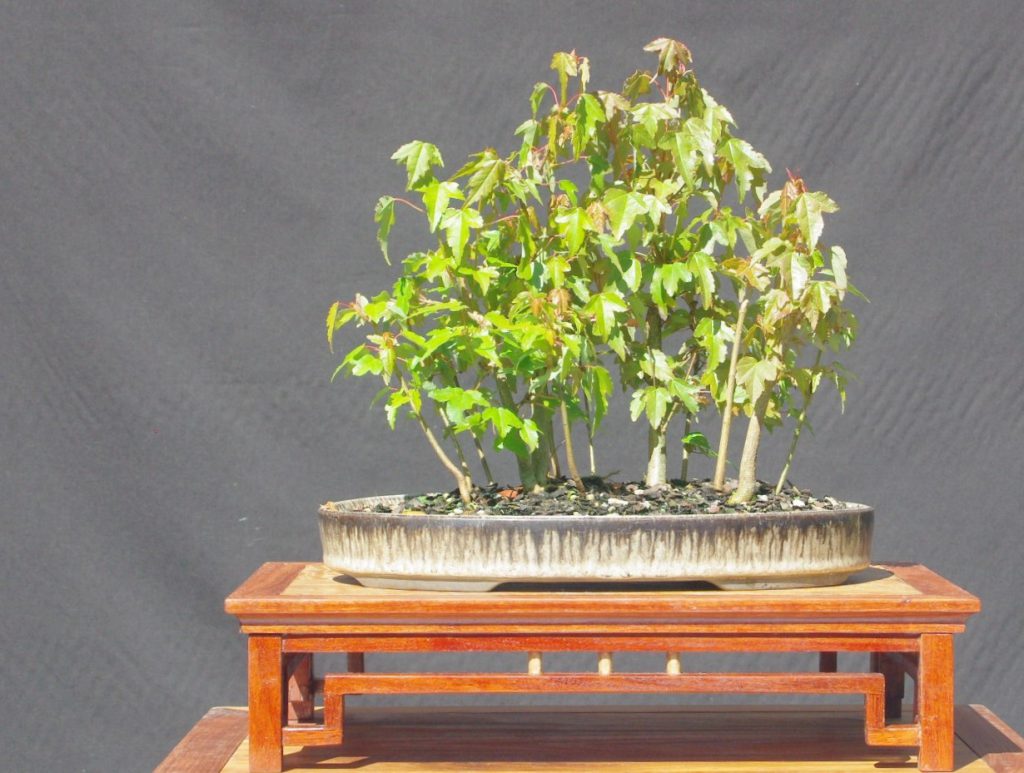
The groups above have been assembled from relatively young trees but groups can be made from more mature trunks which will give an even better look sooner. Here’s a shohin (under 20cm) trident group I put together last winter with trees from the Shibui Bonsai sales tables.
If you would like to create a trident group from more advanced trunks talk to Neil to see what we have available that would suit. I’ve supplied larger trees for client group projects and I’m happy to select trees that I think would work well together.
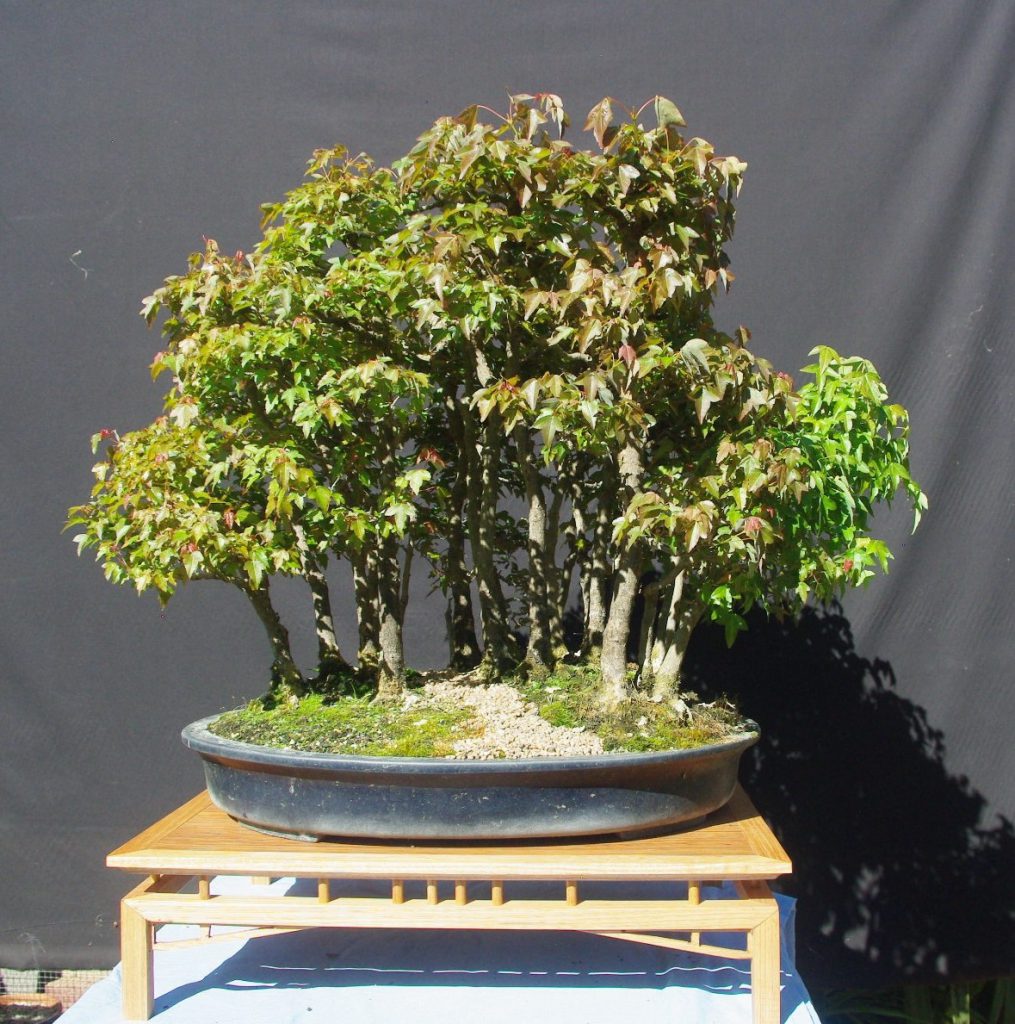
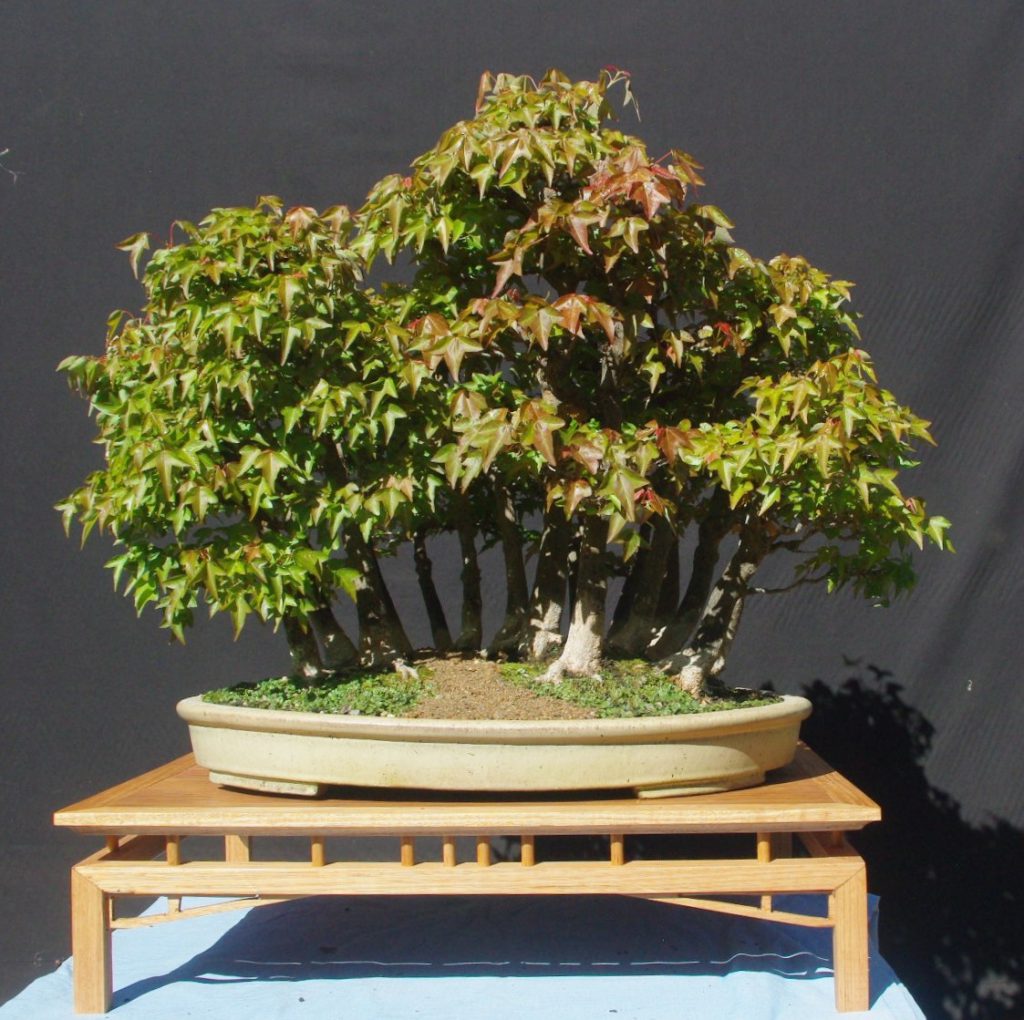
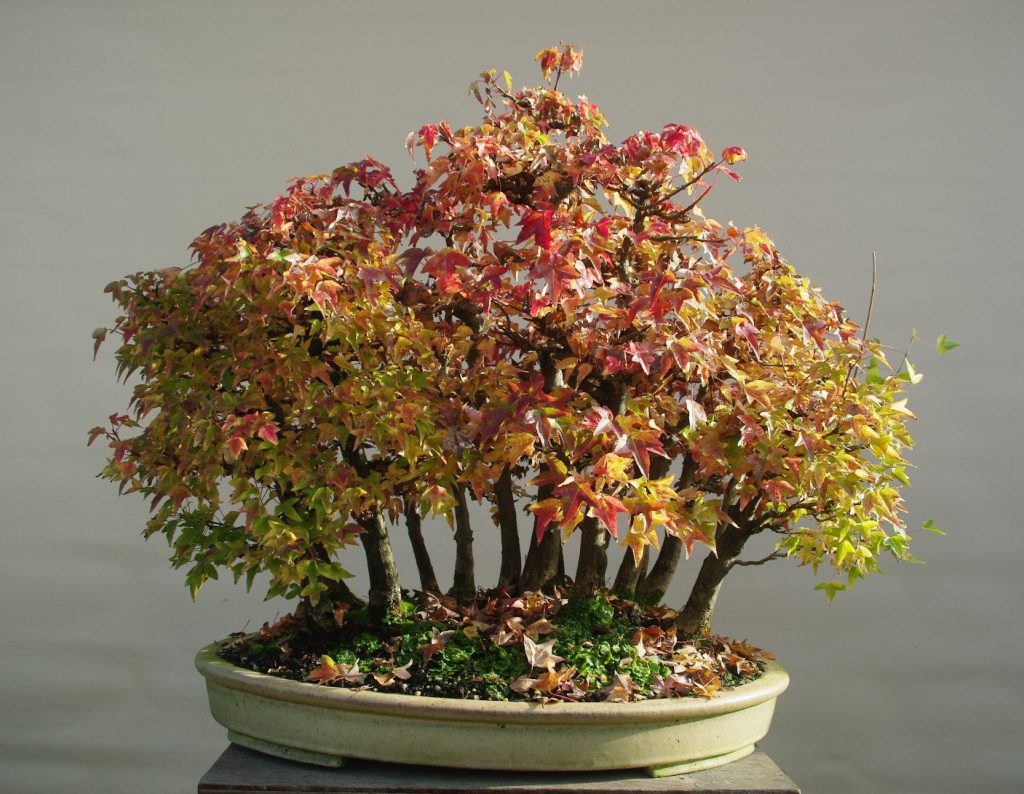
Eventually your trident group could end up looking something like these.
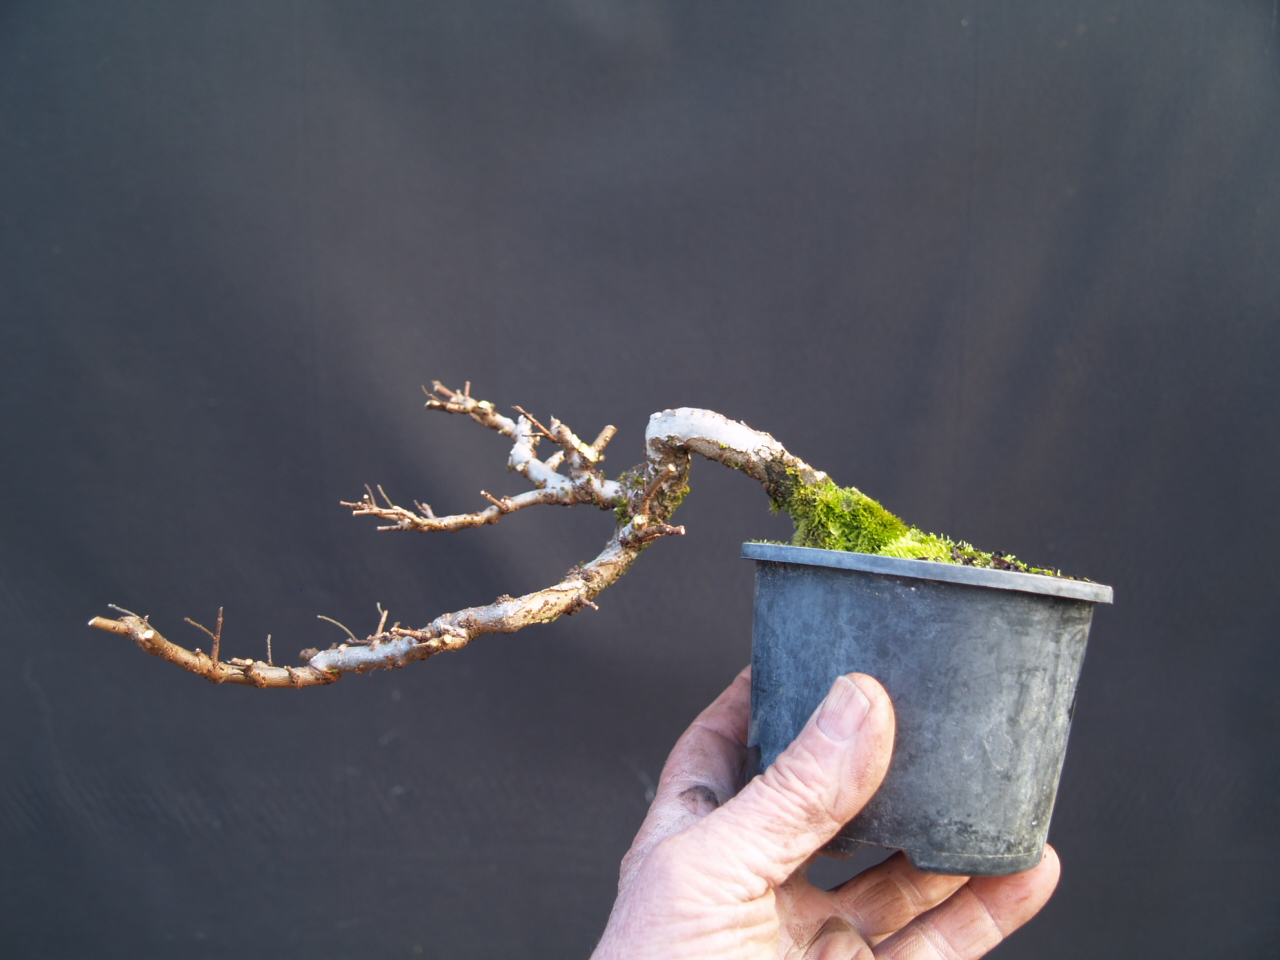
The leaves have fallen so it is time to trim and prune the maples. There are quite a lot of small tridents being grown on at Shibui Bonsai. Over summer they are allowed to grow with only occasional rough trims to limit the height of the new shoots. Now it is time to look more closely and prune for direction and taper.
There is not just one way to create bonsai. Much will depend on what style you want to grow, how big the bonsai will be and how well it has grown. With most developing trees there are a number of legitimate alternatives when pruning for shape.
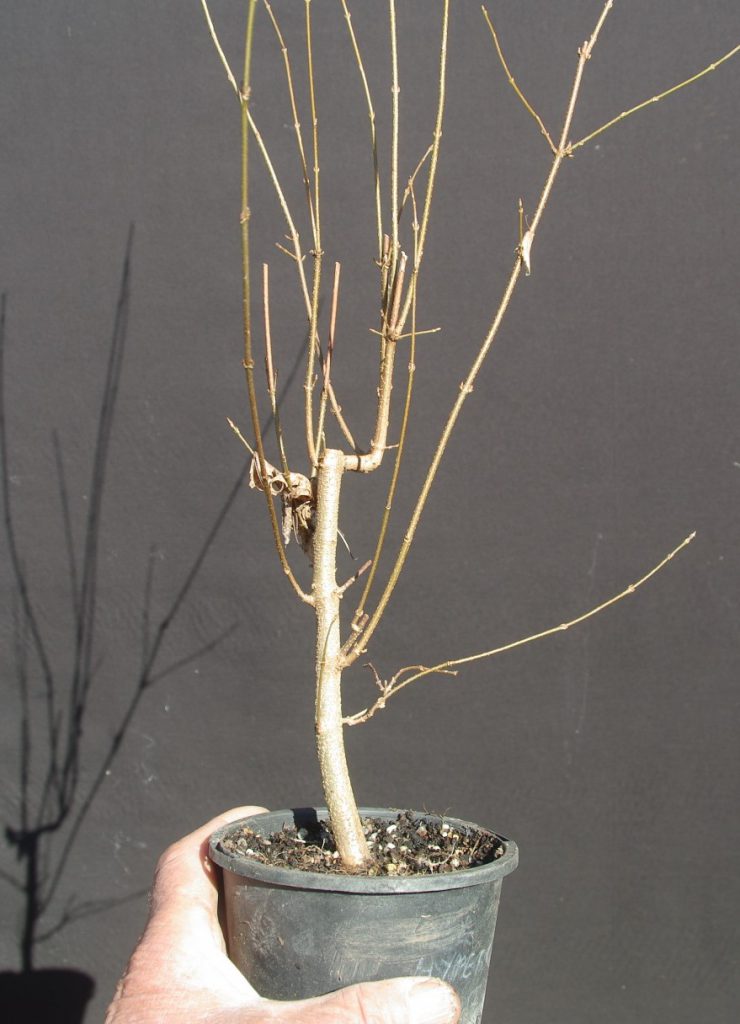
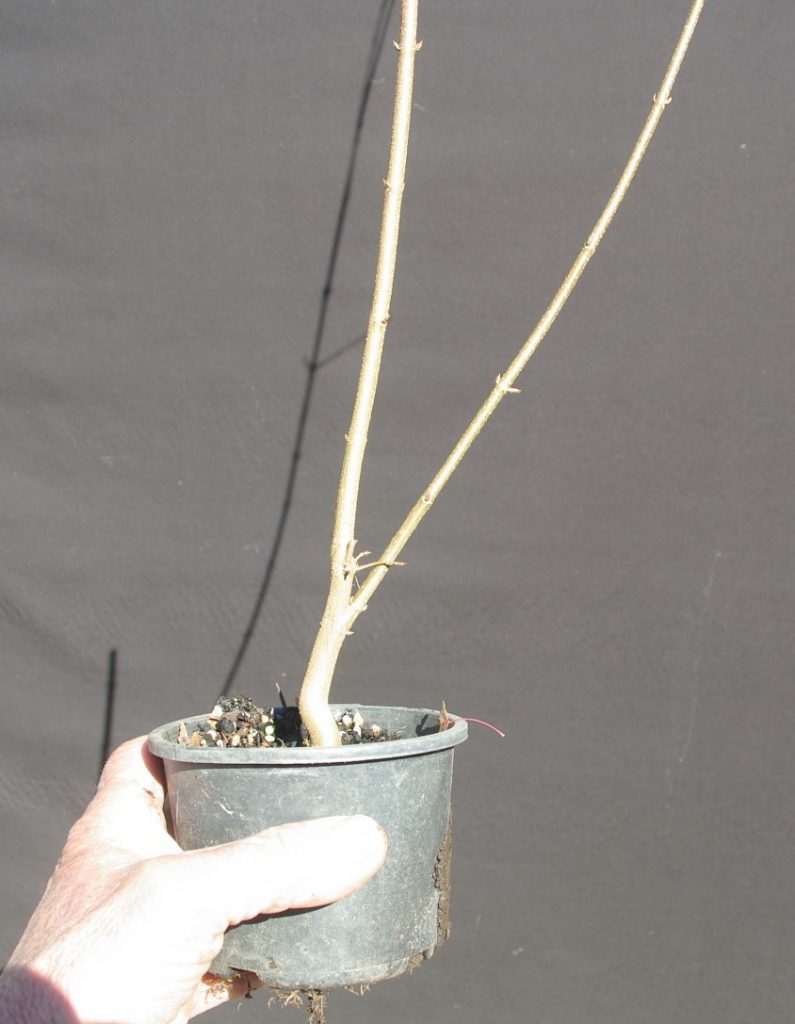
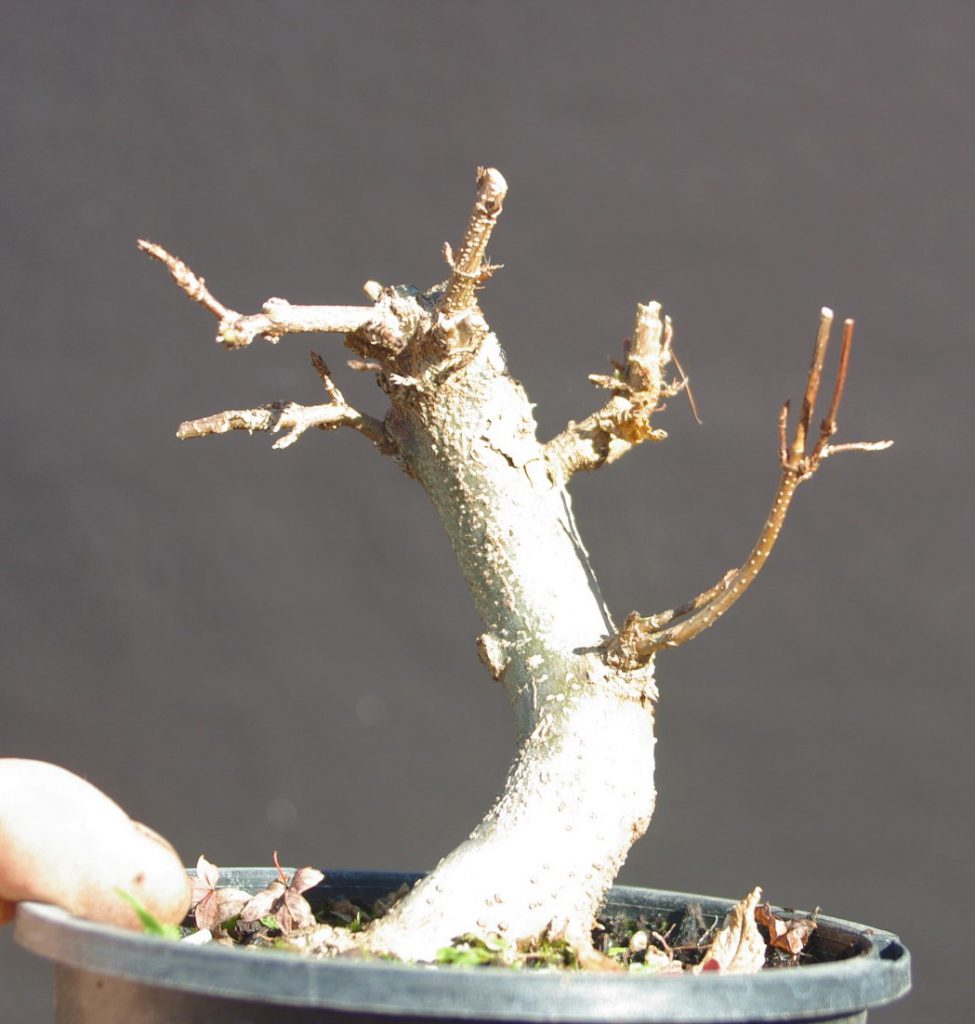
This series shows one of the small tridents I pruned today.
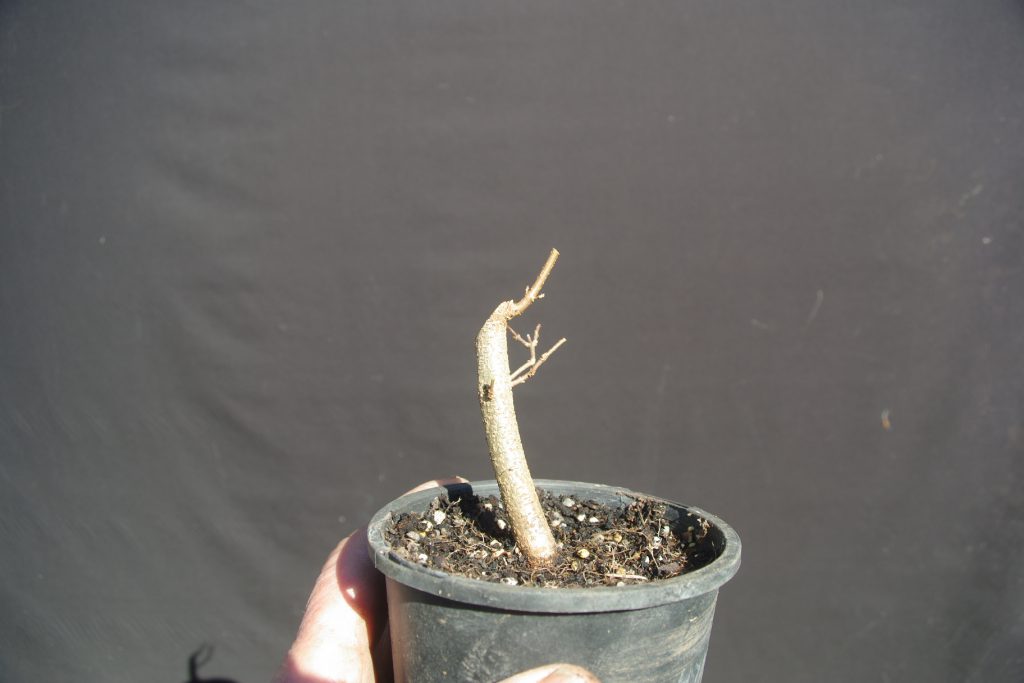
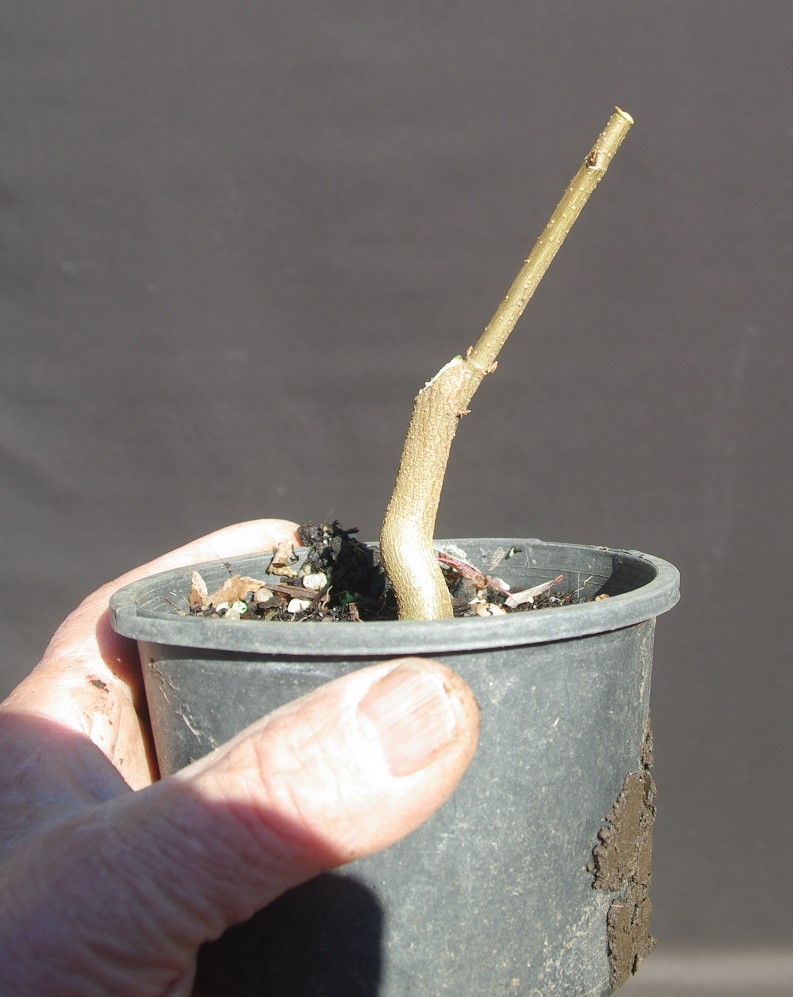
The original tree has a right angle bend at the top which will not give an attractive trunk line so I cut back to a lower shoot with better line. Now the trunk has a slight change of direction and better taper above that cut. That cut would be quite suitable to grow on as a larger sized bonsai. Further down the trunk is another suitable side shoot with good angle. The lower cut provides even better trunk bends and taper starting lower. It can now be grown on as a larger tree or as a possible shohin sized bonsai.
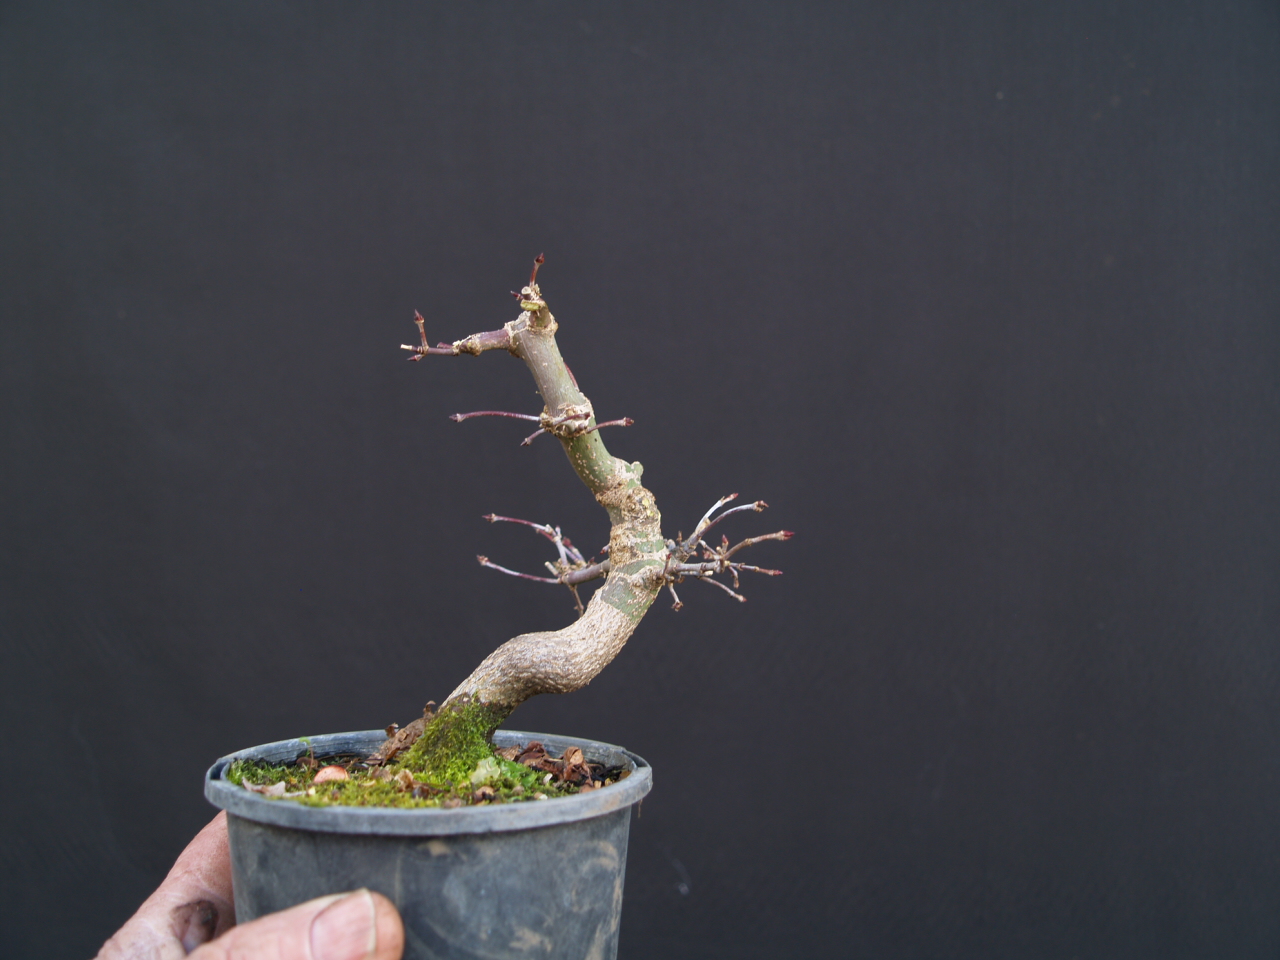
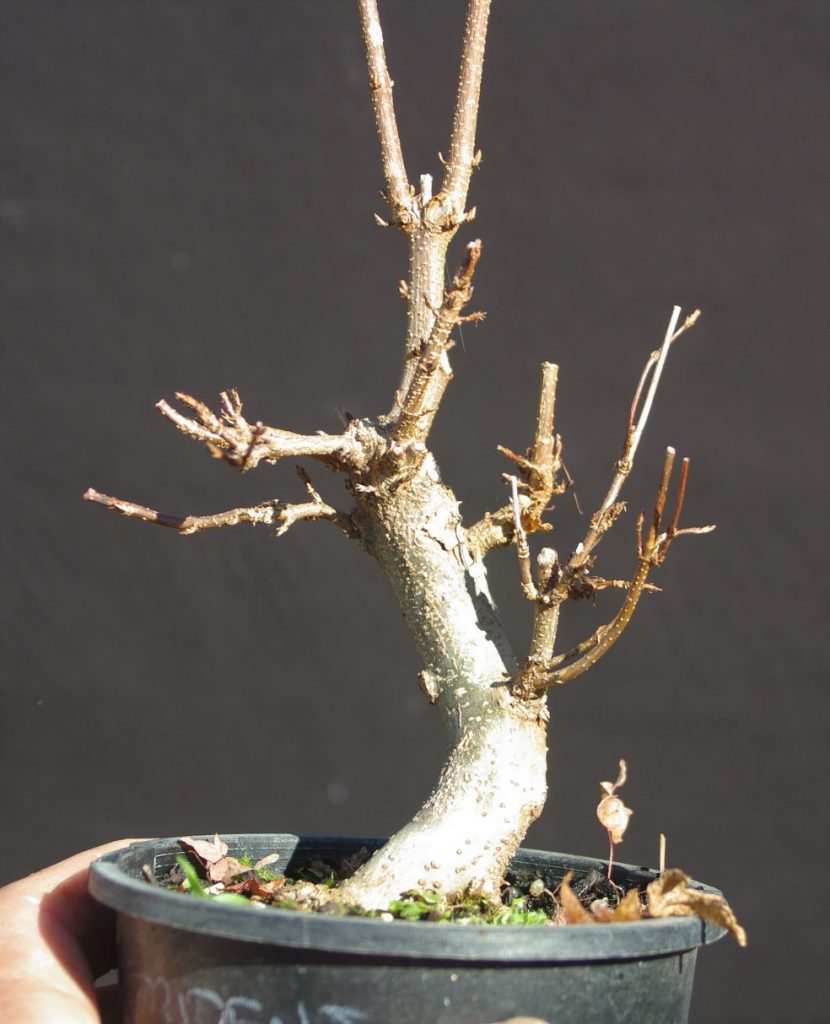
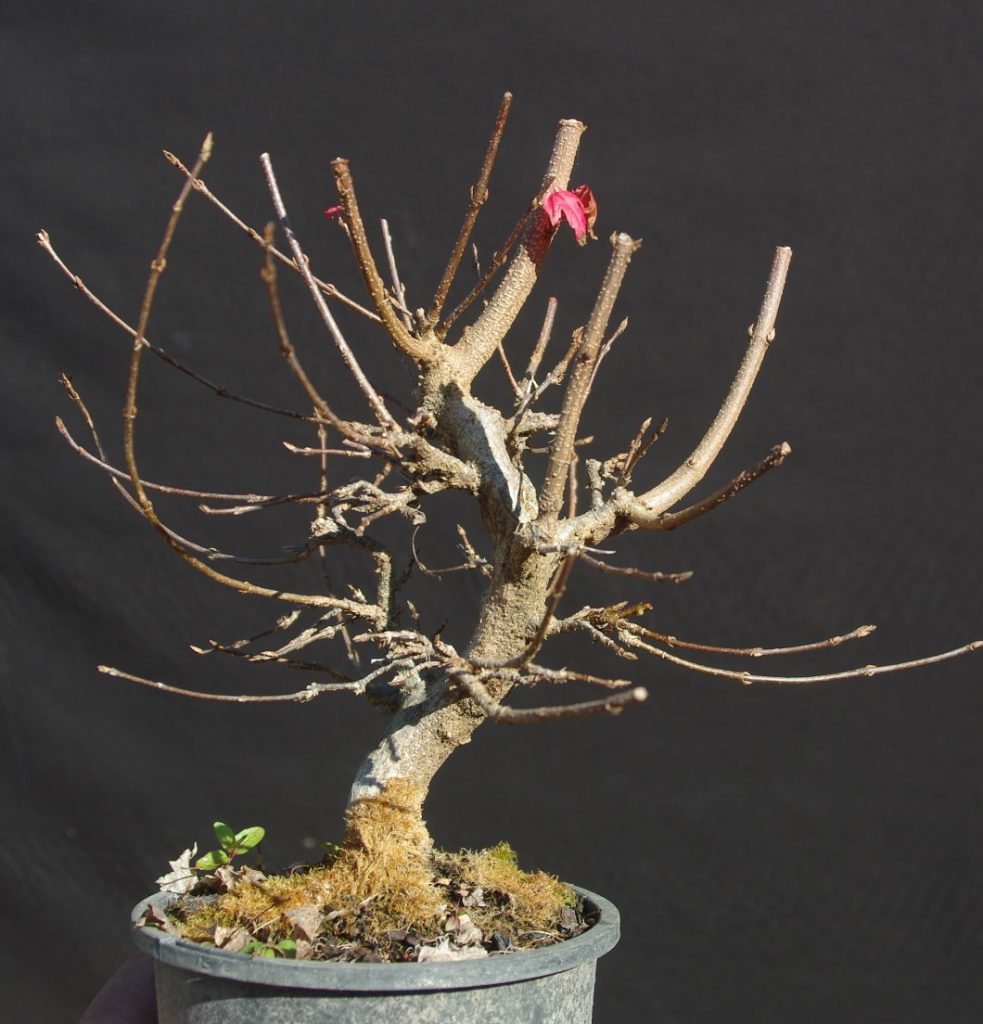
Another young trident pruned for taper and changes of direction in the developing trunk.
Those tridents will be allowed to grow again next summer. If all goes well some of the new shoots will be selected to develop beginning branches.
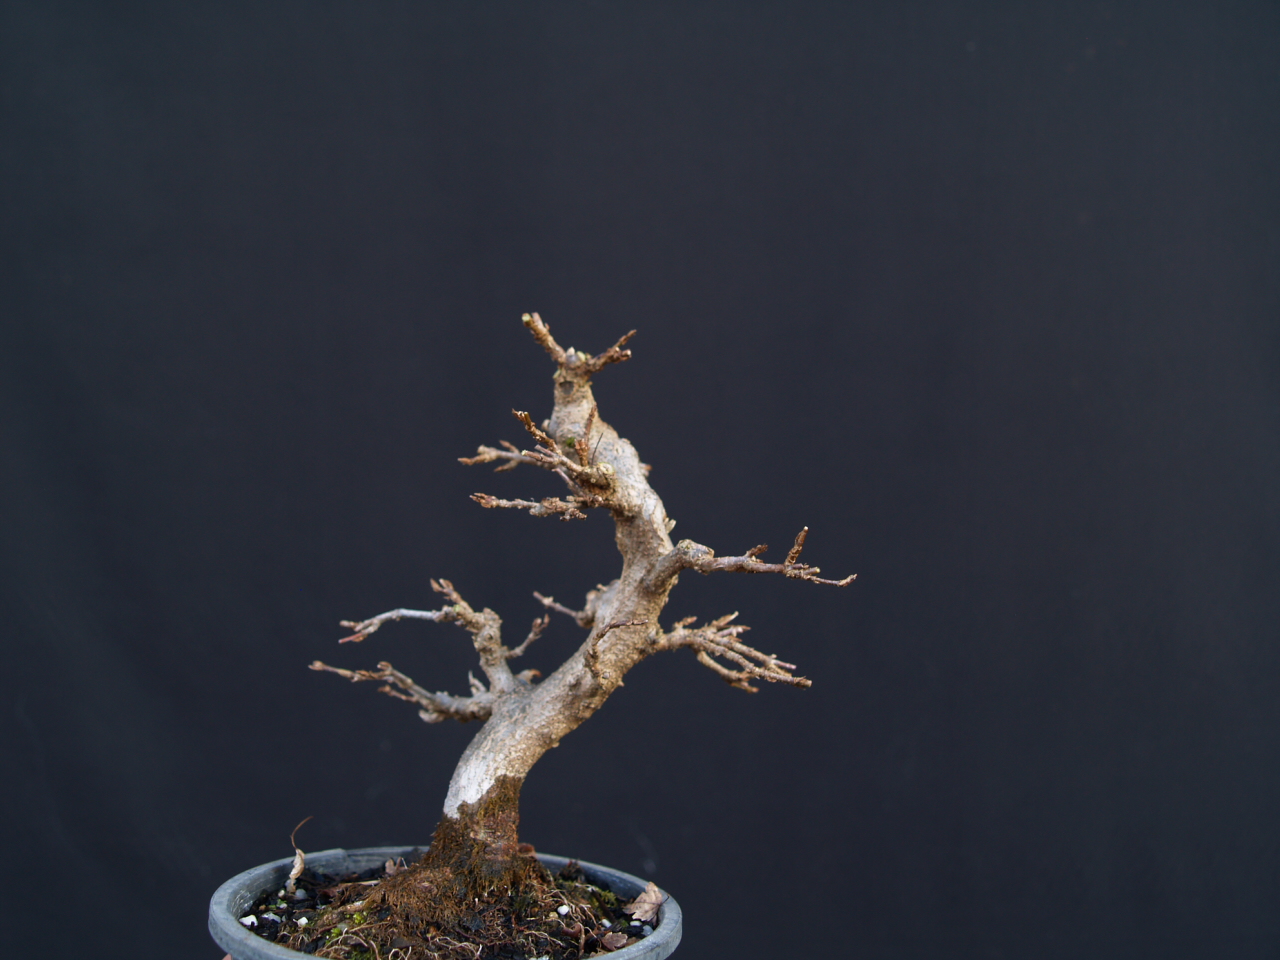
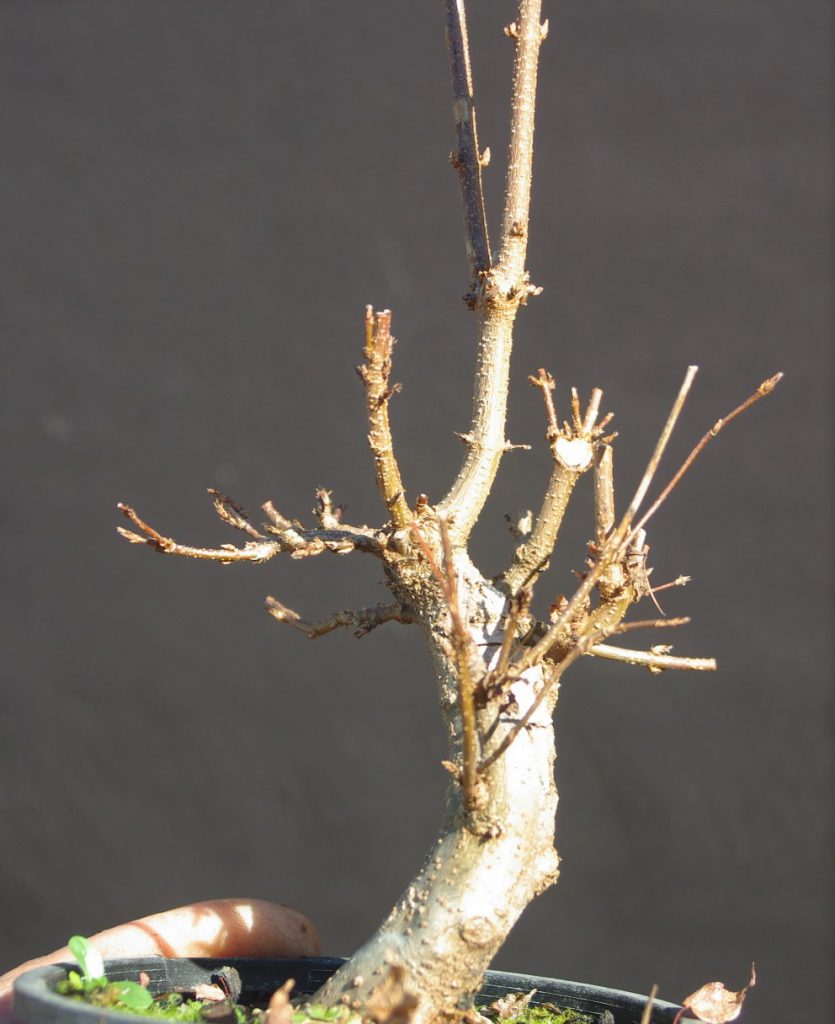
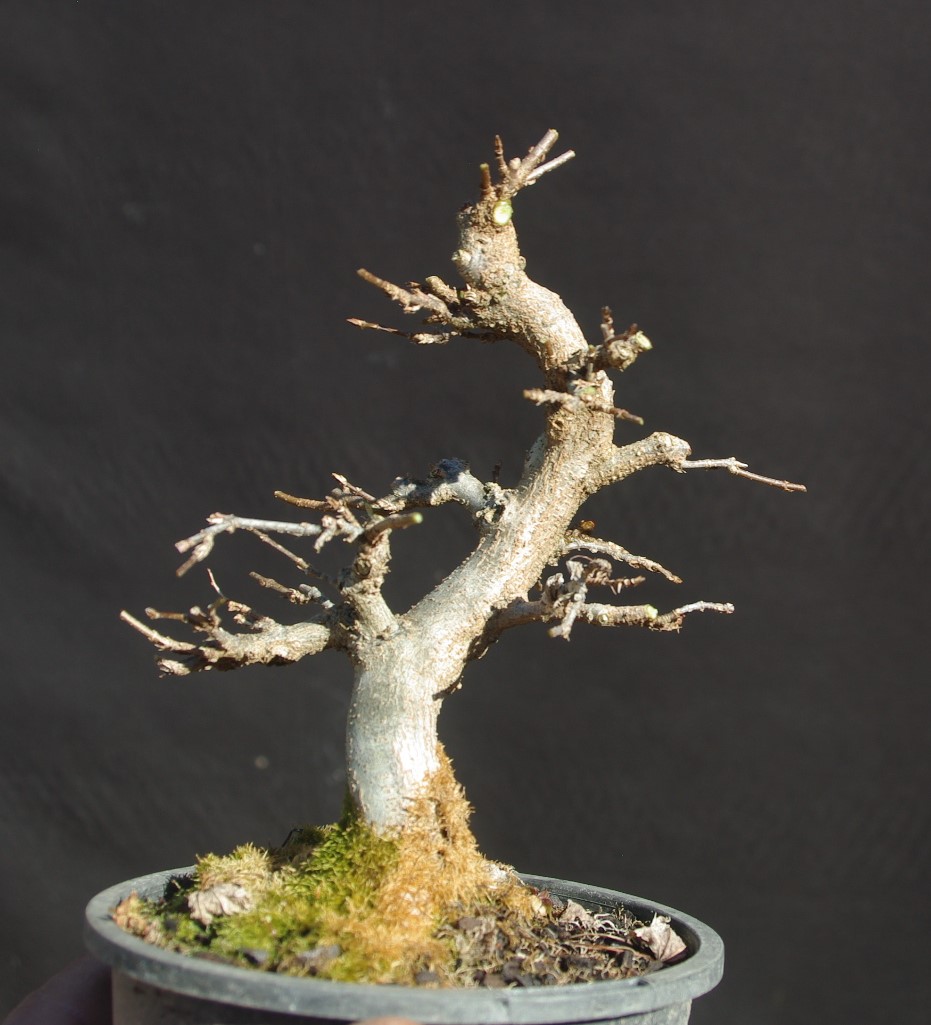
Another year on and branches have started. Some shoots are again allowed to grow to add more thickness to both trunk and some of the branches. Selected shoots are trimmed occasionally through summer to produce ramification.
This time I am selecting carefully for shorter internodes. As this is intended to become a shohin sized maple bonsai pruning is rigorous. Any straight sections are removed. All long internodes are removed, even if they are growing in desirable locations and angles. Remember that buds can only grow from nodes so long internodes severely restrict ramification of branches. This is particularly important when aiming for smaller sized bonsai where everything must be reduced. The lowest branch on the right above curves up and out and still has a long internode. I have left it this year to strengthen and thicken the start of that branch. With luck some smaller side shoots will emerge from the nodes at the base. If they develop with shorter internodes I will cut back the stronger one next winter. If nothing emerges next summer the long internode will be chopped anyway and the branch developed the following year from new buds.
These photos show a small trident another year on from the previous example. You can see that branches have started to form. Again some shoots were allowed to grow long to thicken selected areas of branches or the trunk. Those thick shoots are now pruned right at the base. Again, long internodes are rigorously removed to give better structure to the developing branches. To save wiring, shoots growing in desirable directions are kept while those growing up or down are generally removed. I try to select thinner shoots further out on branches and near the apex to provide taper where possible. Development of this trident is advanced enough to think about finding a proper bonsai pot for the spring repot.
The final workshop will now be under way at Bonsai week in Canberra and I’m sure today’s group will get as much out of it as we did yesterday.
Saturday’s group had representatives from across NSW and Victoria, representing a range of bonsai clubs. We presented a range of tree species and development for the visiting instructors to work with.
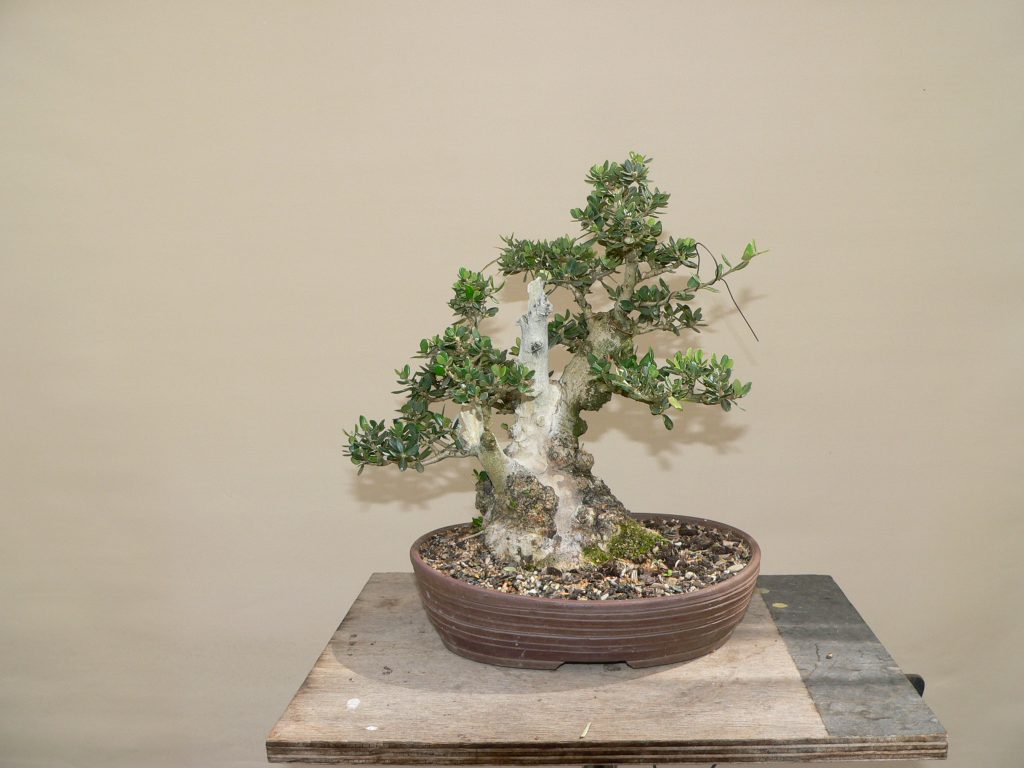
Our bonsai club has access to some areas with lots of feral olives so we have had several ‘digs’ to obtain advanced material. One of the paddocks is quite steep and rocky so I suppose these are literally ‘yamadori’ (Japanese word meaning from the mountain).
club members at an olive dig
Here’s one a couple of years ago. You can see that the original middle trunk was converted to dead wood to leave room for the better trunk to develop. A small stub was also left on the smaller left trunk.
A couple of years ago
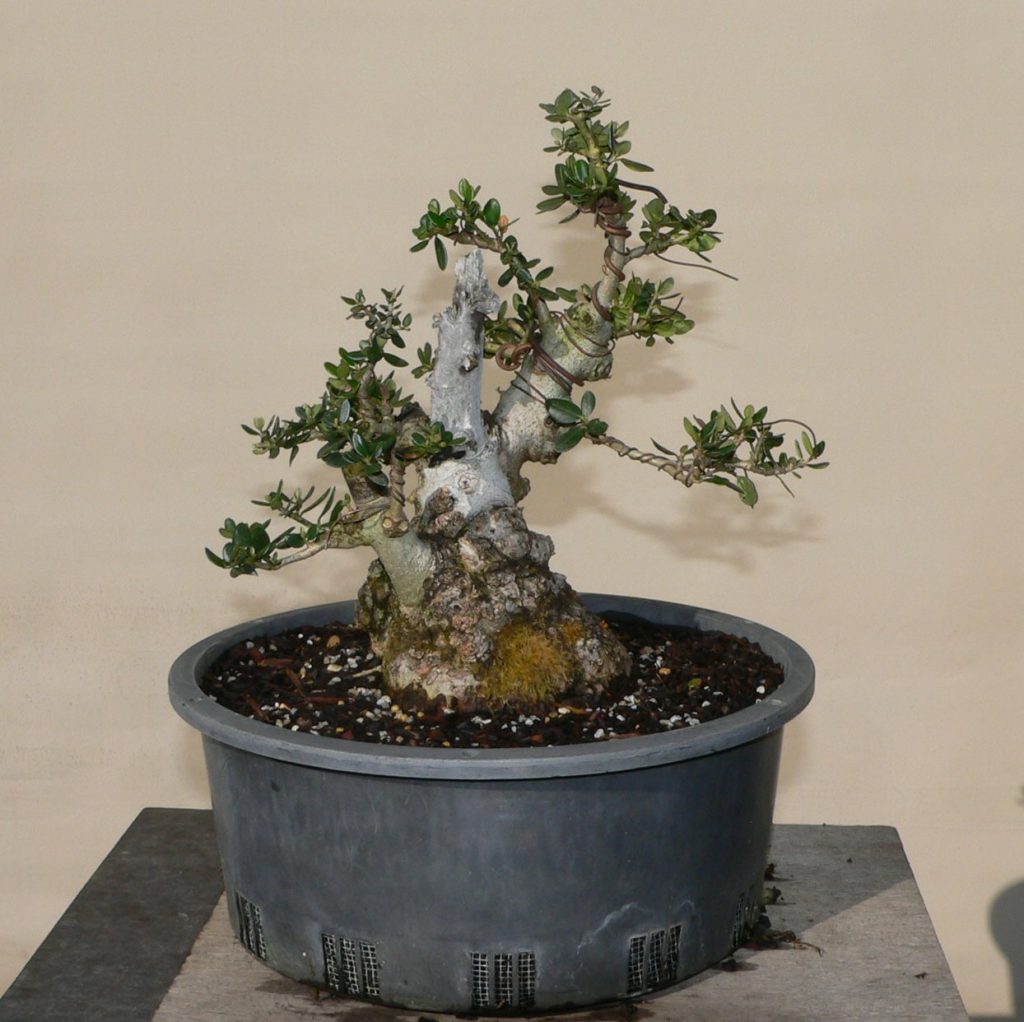
Last year I felt that the branches had developed enough structure to merit a proper bonsai pot.
I also decided the jin was just a bit boring. Looking at images of ancient olives I saw impressive old trunks with hollows and dead wood. A little carving on the trunk below the jin adds a whole new dimension to this tree.
I can see an opportunity to add some more texture and character to the jinned branch itself but that will have to wait for another day.
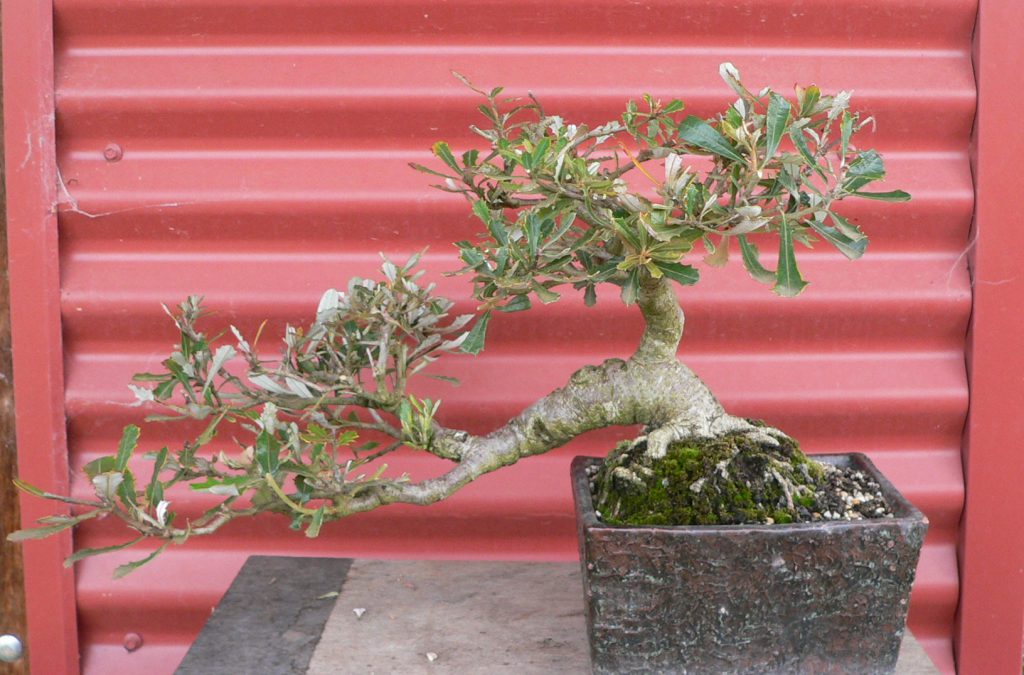
While checking another of these developing olives I noticed a dead patch on the trunk
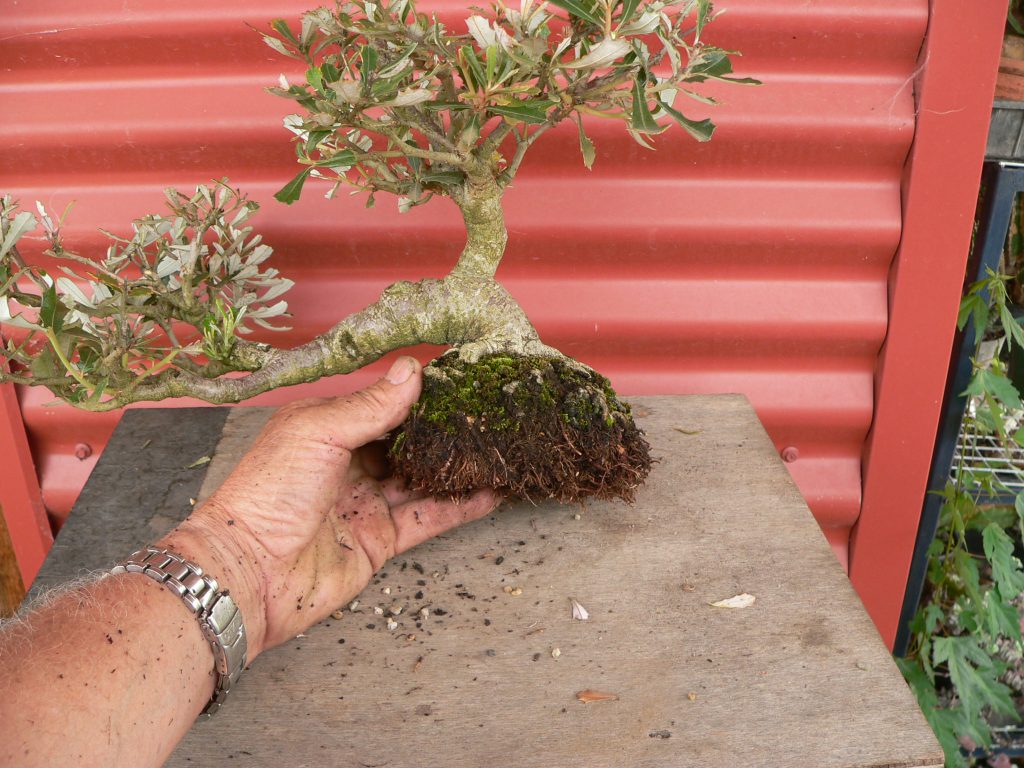
A couple of my smaller bonsai banksias started to develop dieback in some twigs toward the end of spring.
Many people would assume that, because these are banksias, the dead shoots would be the result of phosphorus toxicity. My experience with this genus led me to a completely different conclusion.
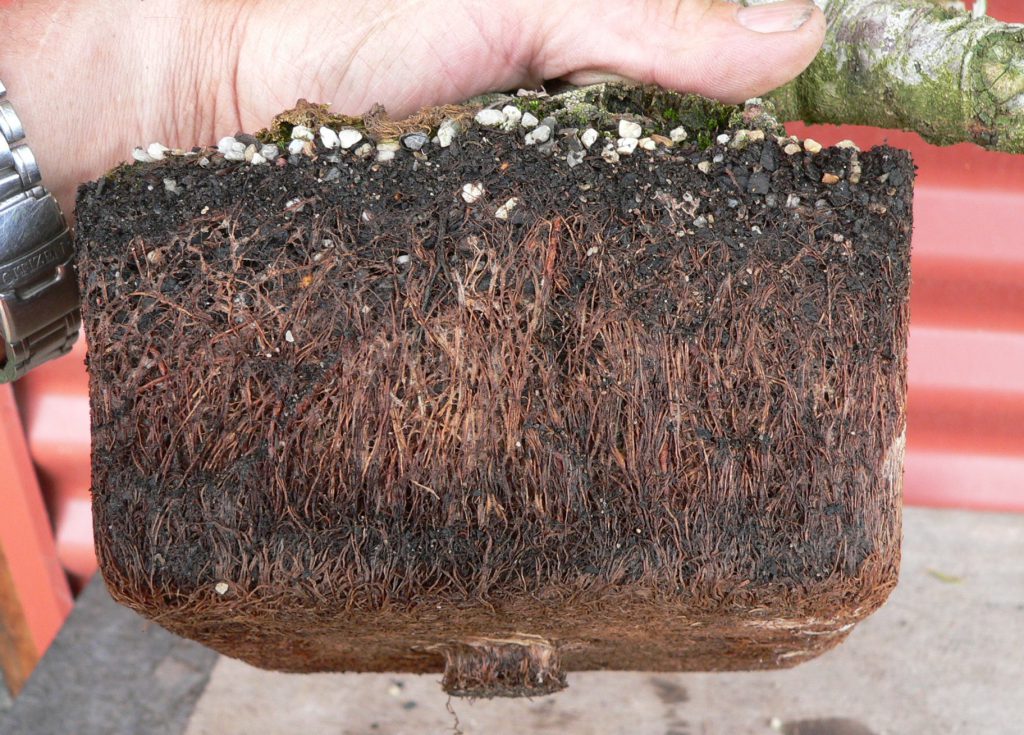
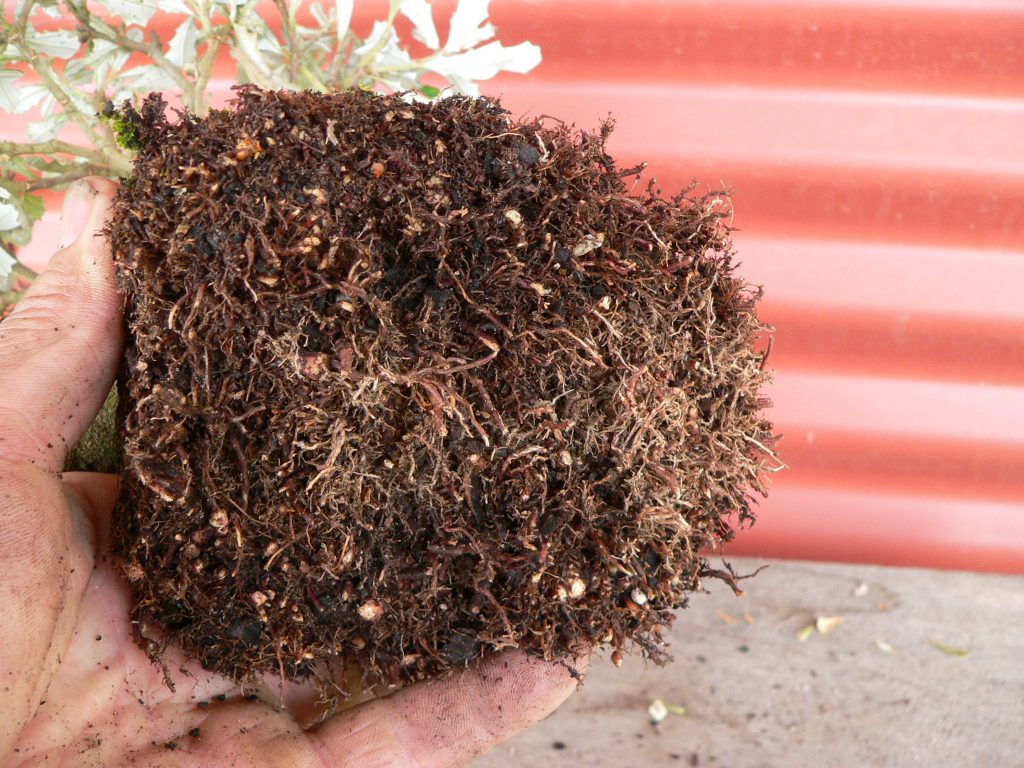
I have noticed that banksias have very dense fine roots that develop very quickly. Here’s what I found when this one was removed from the pot.
It definitely needs repotting.
First, trim back any long, fresh shoots.
When I cut through the root ball I found exactly what I was expecting – a dry patch in the middle.
That area is dry despite a thorough water last night and again this morning. The roots are so crowded that water has great difficulty penetrating which means the tree starts each day without a full pot of water. The dead shoots have nothing to do with P toxicity. They simply show a lack of water.
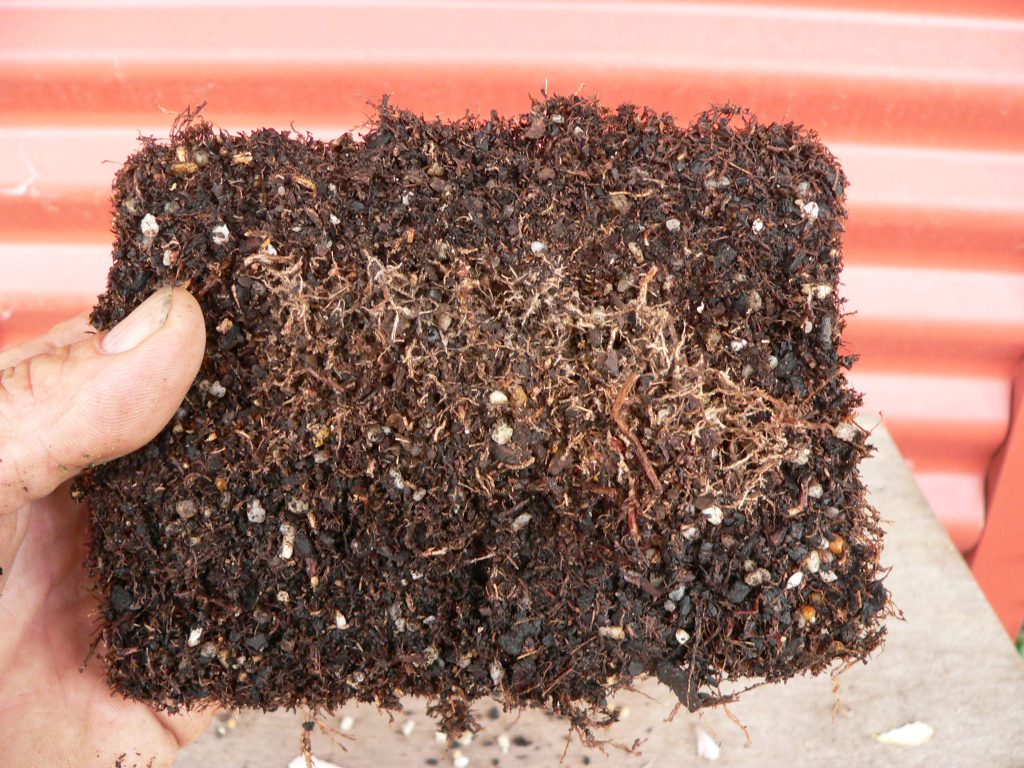
The remaining roots were trimmed quite a lot.
Note that there are no visible proteoid roots on this banksia because it gets regular fertiliser. Proteoid roots appear when banksias are short of nutrients and tend to disappear when the trees are fertilised regularly so paradoxically, regular fertiliser actually helps reduce the chance of P overdose for banksias.
Then back into the pot with fresh mix.
My experience with banksias as bonsai shows that the roots grow so fast that these need repotting every year to prevent them becoming root bound and having difficulties with water absorption. Fortunately they also seem very tolerant of the repotting process during the warmer months. This repot was carried out during a string of 40+C days in early January. New shoots continued to grow and more buds have sprouted since the repot. As usual, the freshly repotted tree went straight back to its usual position on the bench. The area is covered with light shade cloth this year but no other ‘aftercare’ was given.
Canberra Bonsai show was held over the weekend of October 13 and 14.
Shibui Bonsai again had a trade table this year. Sales were even more brisk than usual and we took home very few plants after the show.
Canberra Bonsai Society always put on a great show and the quality of the trees continues to improve each year. Here are a couple of the trees that took my eye. Continue reading →
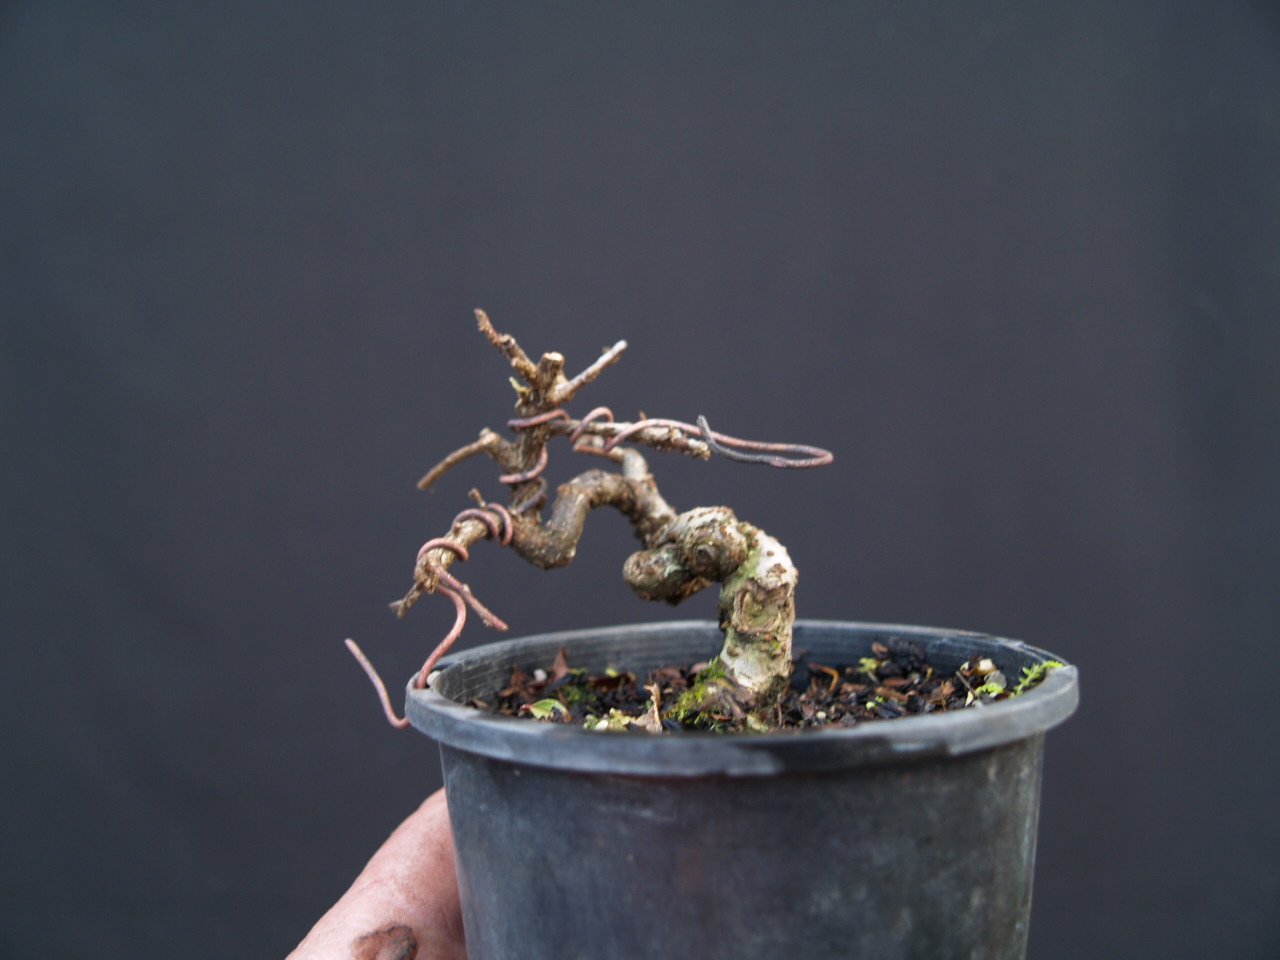
The recent workshop with Joe Morgan-Payler has re-inspired me to keep developing these small, contorted junipers.
While not everyone appreciates this style of bonsai, especially here in Australia where our relatively mild climate does not produce such trees in the mountains, they seem to be valued by Japanese bonsai artists. These trees simulate the types of trunks that the severe winters and harsh growing conditions in the Japanese mountains naturally produce.
The trident maples in the garden at Shibui Bonsai produce huge quantities of seed each year. This results in lots of seedlings growing in the garden beds. We usually leave a few hundred to grow on for use as bonsai.
You can germinate your own seedlings under controlled conditions but I find it far easier to let nature do that for me and I just harvest the seedlings I need from our garden beds.
Today I used some to put a trident group together. It will take a few year for this group to develop into show quality bonsai but groups are one of the quickest ways to get good results from immature material. Continue reading →