I don’t usually start digging the grow beds until July but a Shibui Bonsai customer has been keen to learn more by volunteering to help. Jim had a couple of days off work due to wet weather so we picked a dry day and got started a week early.
Jim is younger and enthusiastic. He started on the shovel and kept me so busy pruning that I did not get any photos of the actual dig.
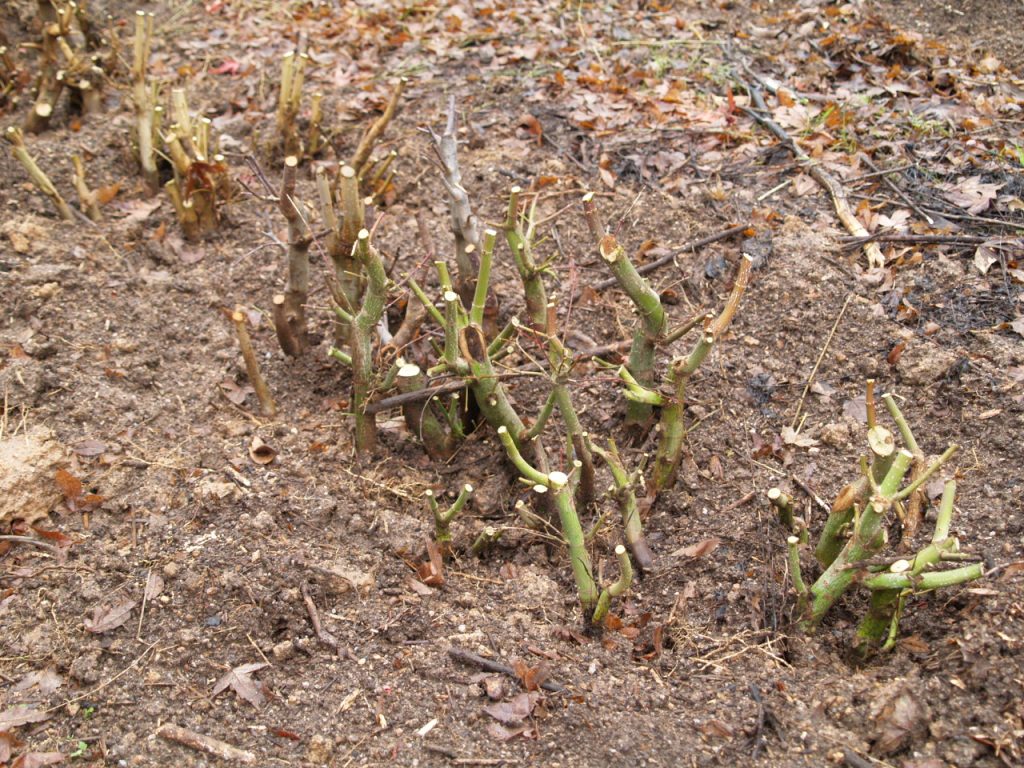
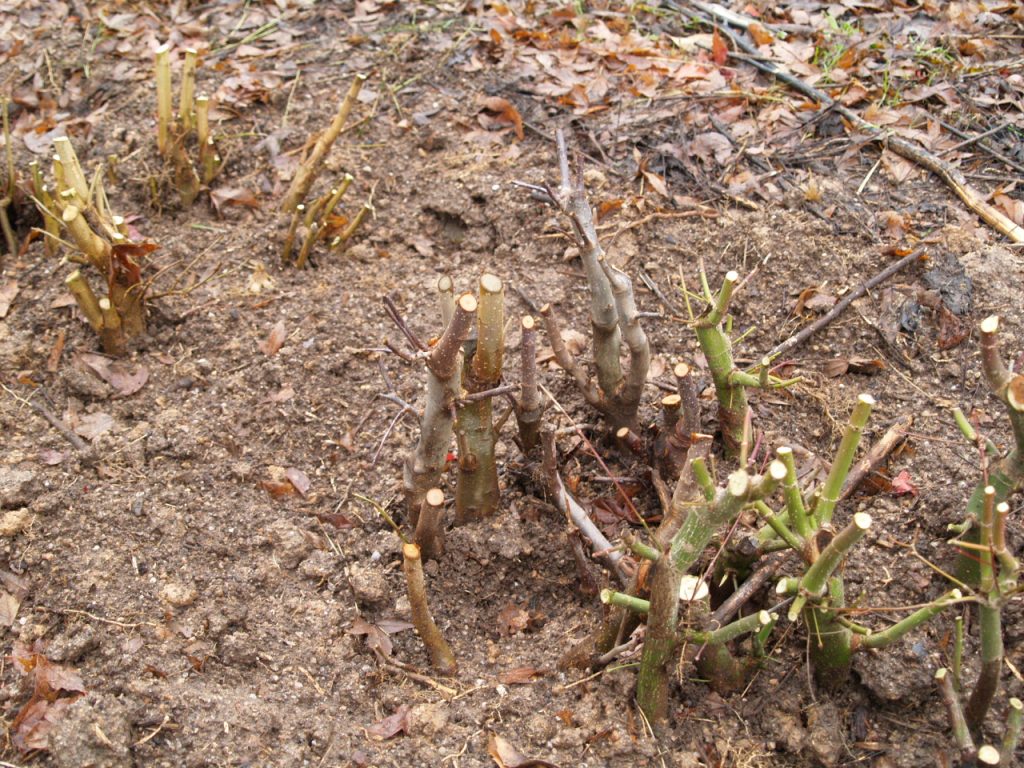
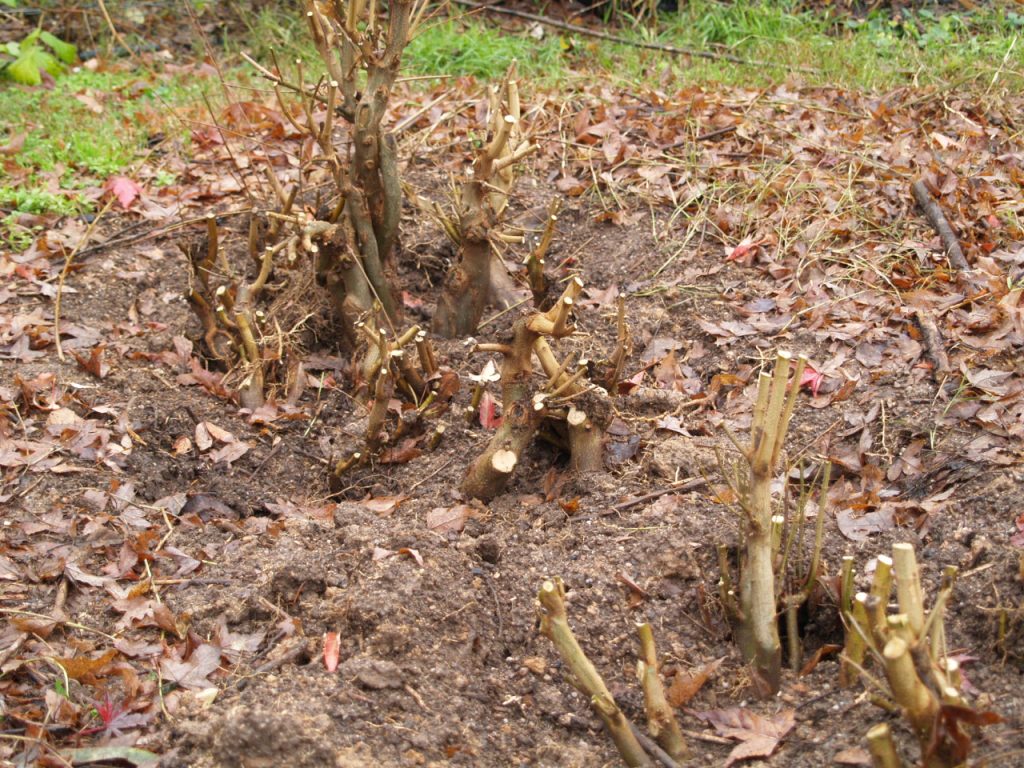
In a few hours we managed to dig and do a rough top and root prune on most of the larger trident maples, some Japanese maples, a few crab apples and some of the first year tridents.
Japanese maplesCrab applesTridents
They have all been ‘heeled in’ to a spare patch where they can wait until I’m ready to do a final inspection to decide if they get potted for sale, put back in the grow beds for more growth or go on the scrap heap.
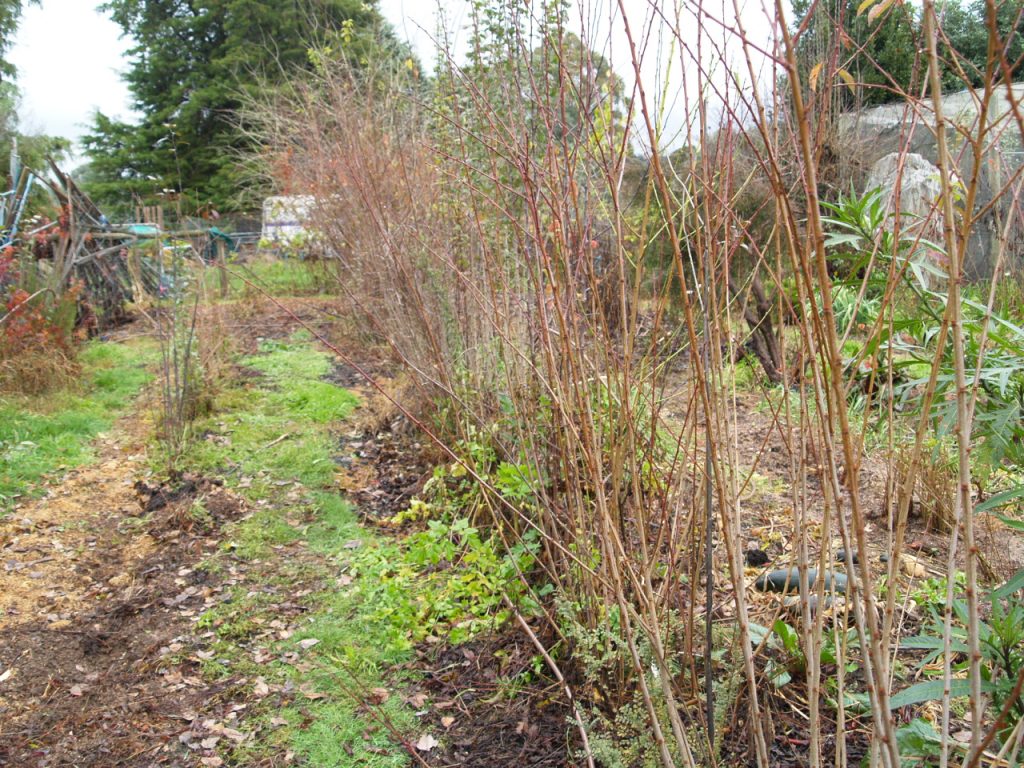
Still plenty of trees to do but I have all winter so I just do a few any time I can. The trees pictured are Prunus ‘Elvins’, Hawthorn and more crab apples with a couple of Seiju elms for good measure.
The trees in the picture were all chopped and root pruned last winter so nearly all of the 2m of growth shown has emerged through last summer.
Now that the roots have been thinned and adjusted it’s time to take a more thorough look at the overall shape in case trunk lines need any work.
When I initially planted these I tried to match trunk shape to the shapes of the rocks while also trying to get good root lines. Since then strong growth of new shoots and trunk thickening have often changed the appearance so they need to be reassessed. Some will obviously need to have slight adjustments, others may need more radical pruning and a few will just be so bad I’ll scrap them.
Many readers will already be able to assess and prune for developing trunk lines but for newer growers I’ll try to work through some of my decisions with the following tree.
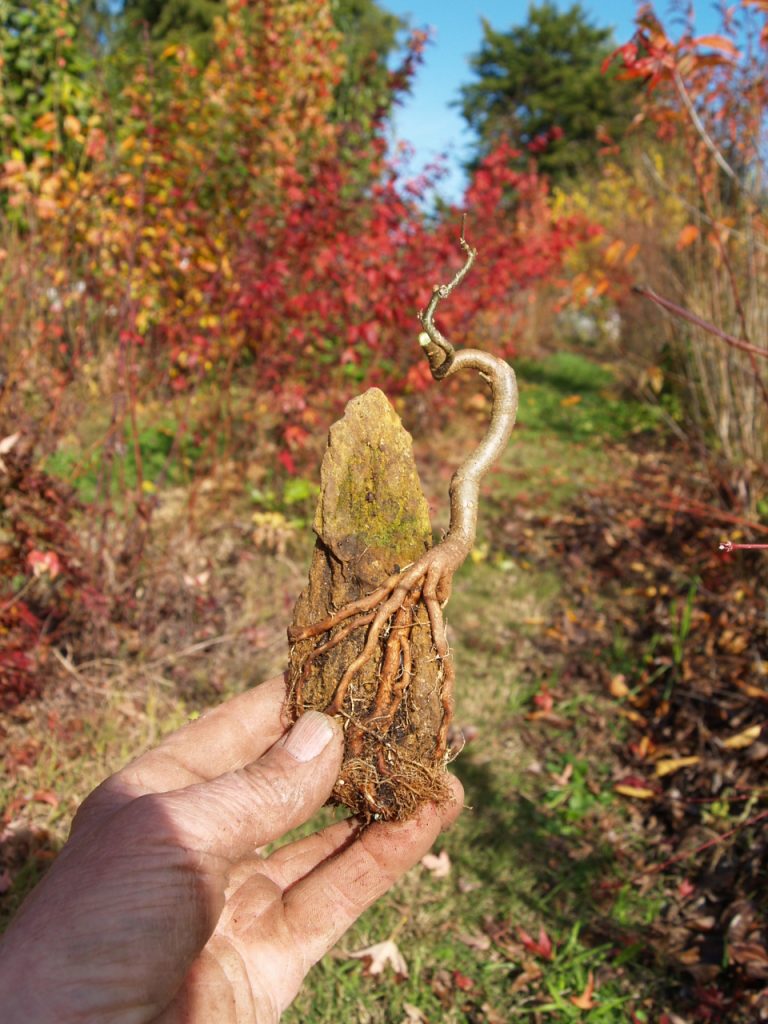
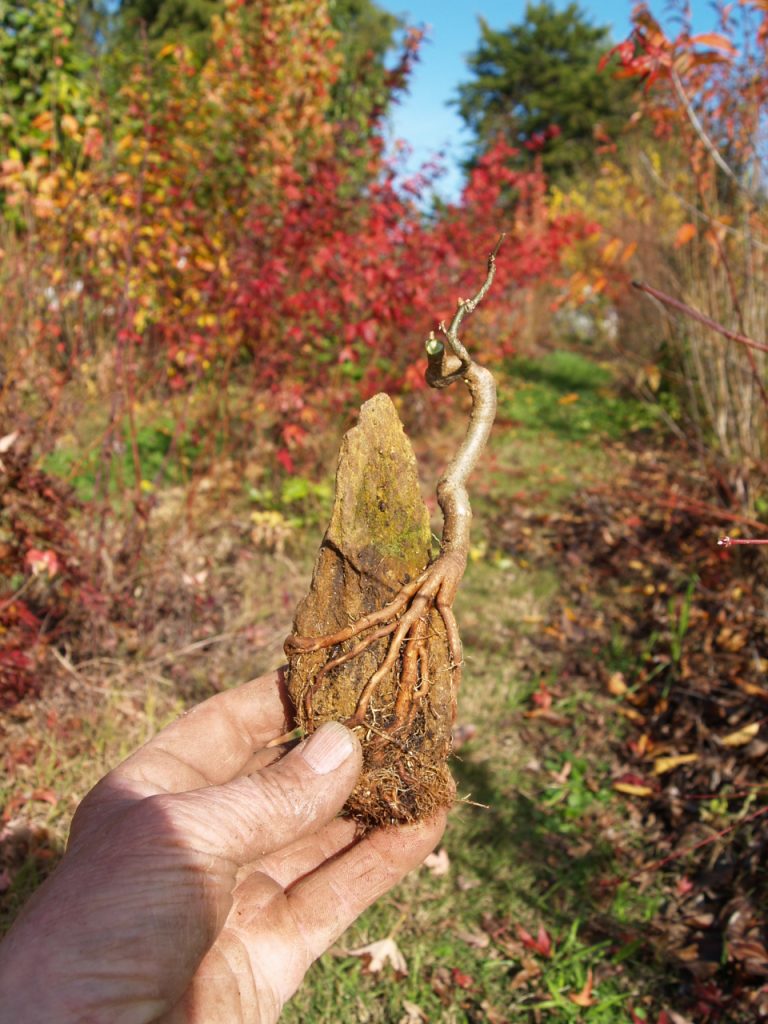
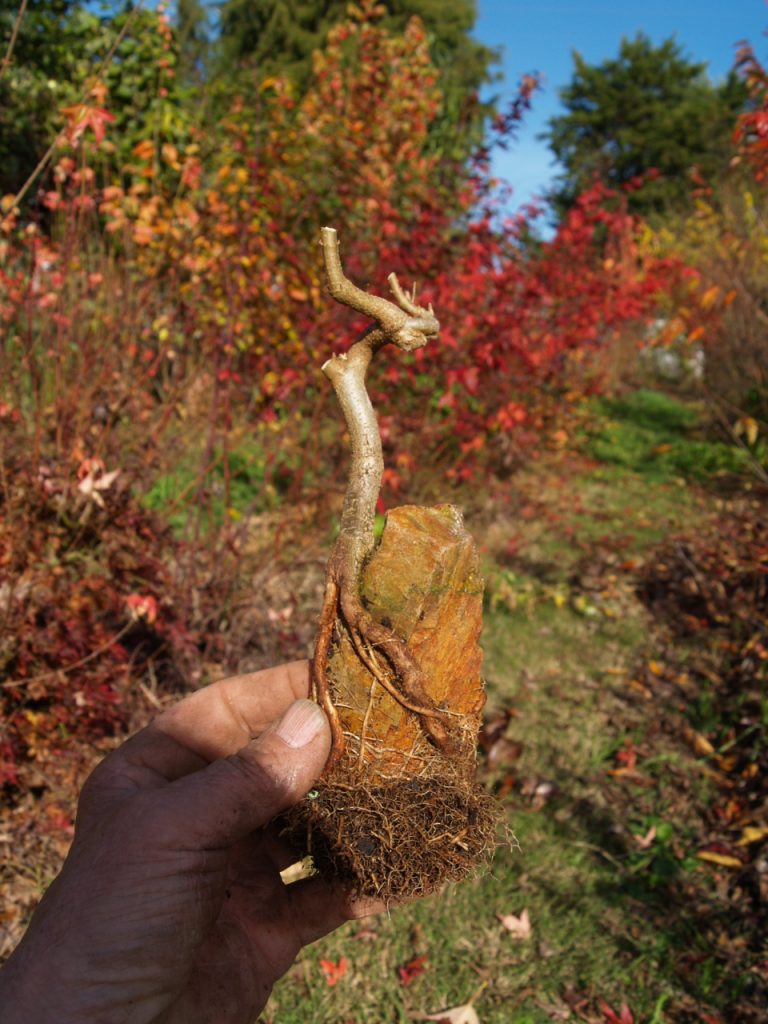
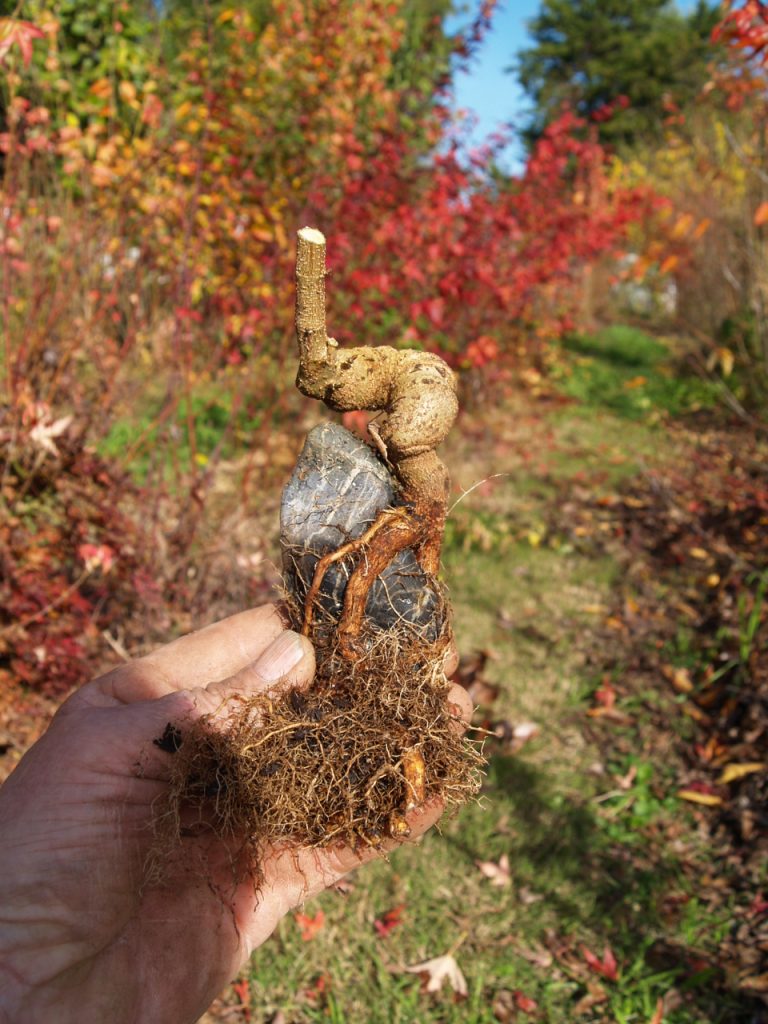
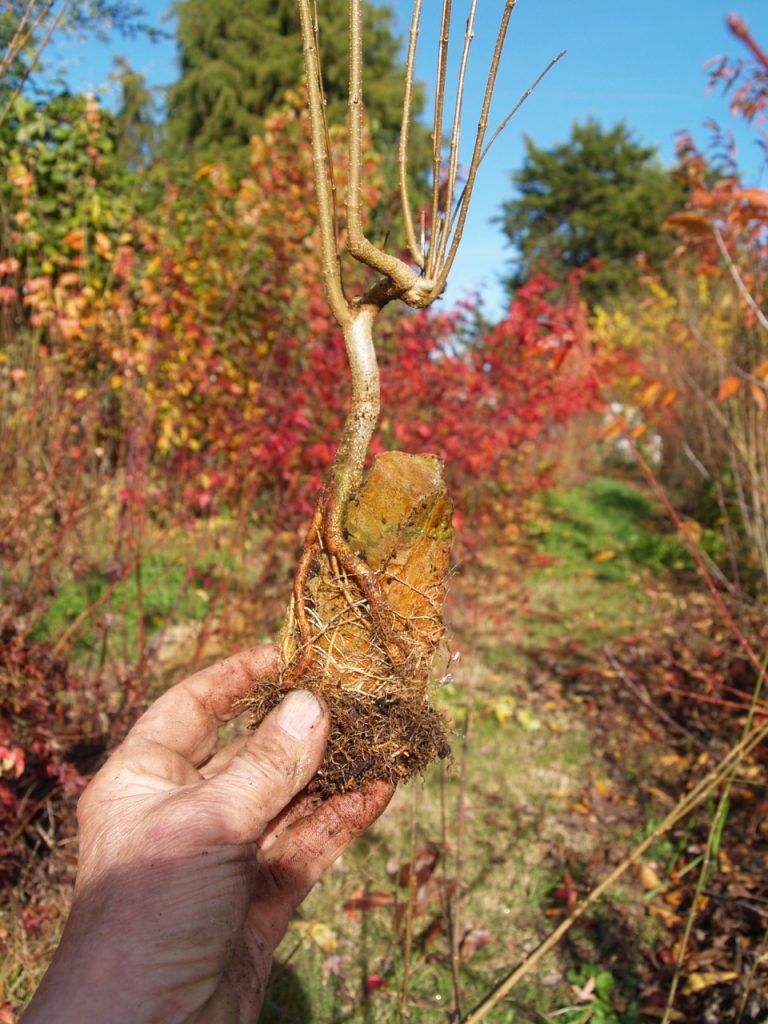
Check the appearance, roots, rock, trunk line and any branching from all sides and angles.
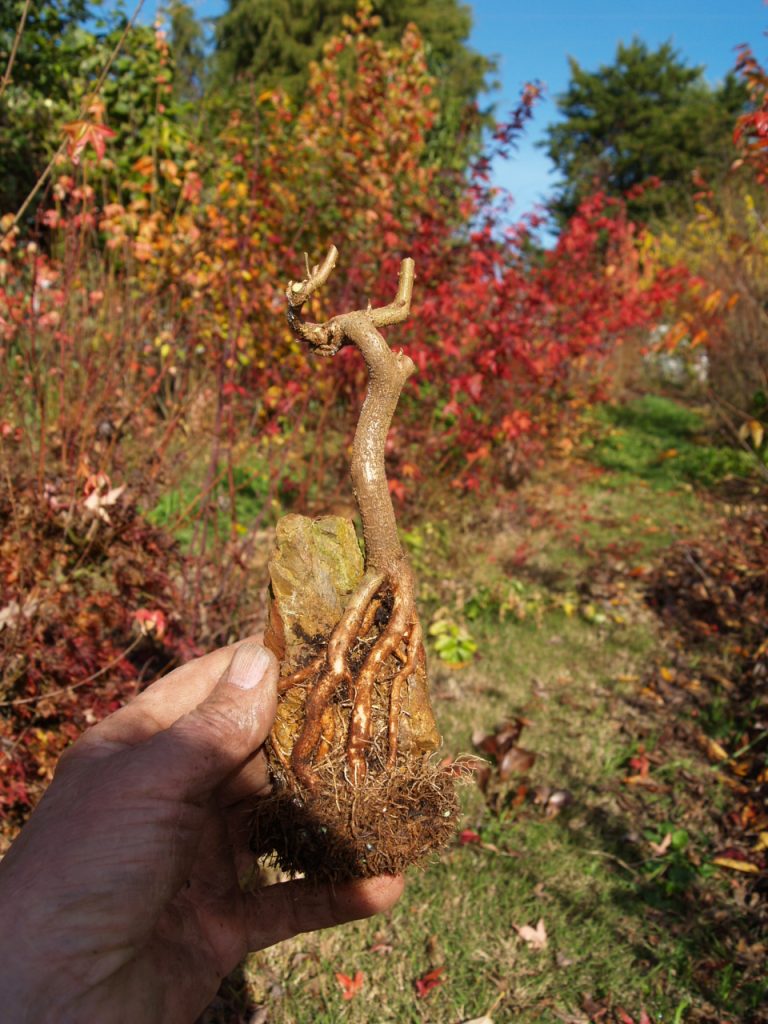
The main trunk line seems to compliment the shape of the rock from a couple of viewing points so that’s a good start. I can see that the original trunk was wired and bent (thinner upper section) but a new shoot has grown strongly vertical. Both those lines would be Ok as a trunk but the new, thicker shoot is almost the same thickness of the lower trunk meaning almost no taper in the trunk. Also that new shoot has long, relatively straight internodes so I would not be able too develop branches where I want them if that’s chosen as the main trunk. I decide to chop that new part just above the first node. New buds will sprout and grow in the coming growing season and I’ll reassess again next year.
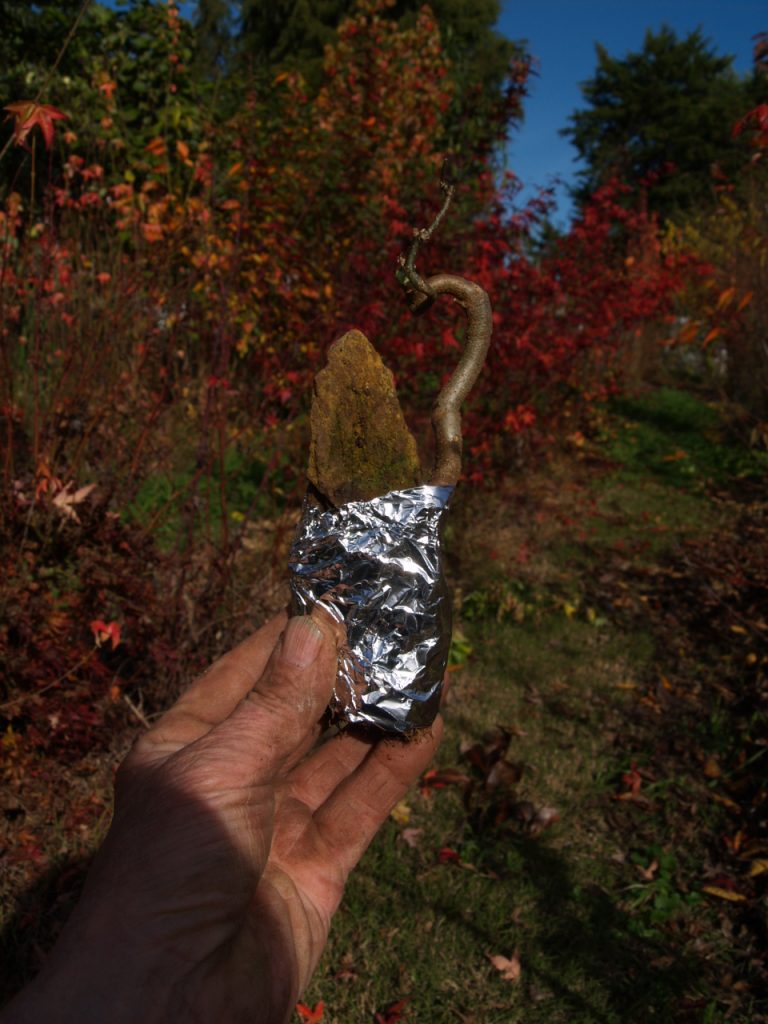
Both trunk and roots would be better with some more thickening so I decide to rewrap and plant it in a grow box for another season.
Next subject
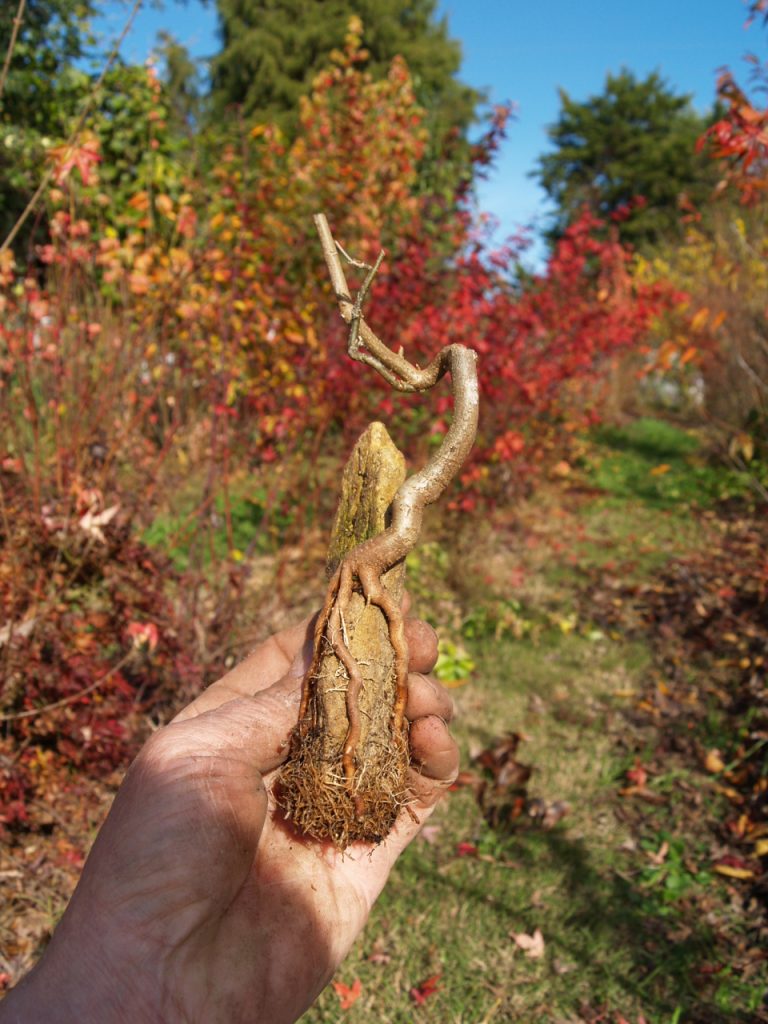
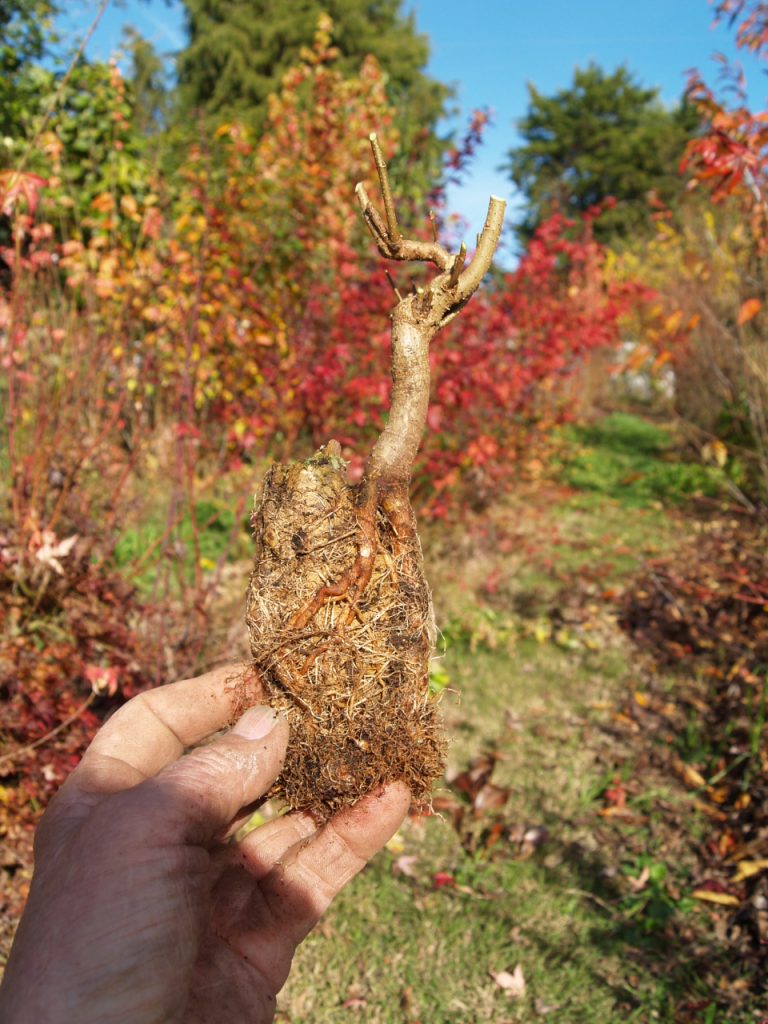
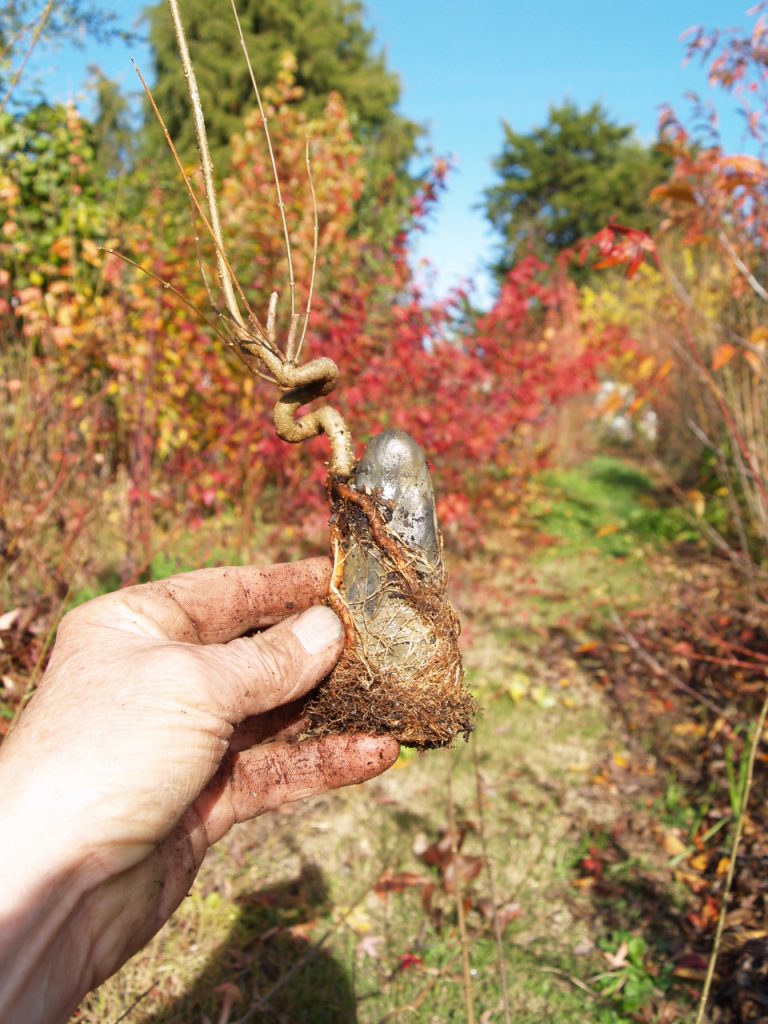
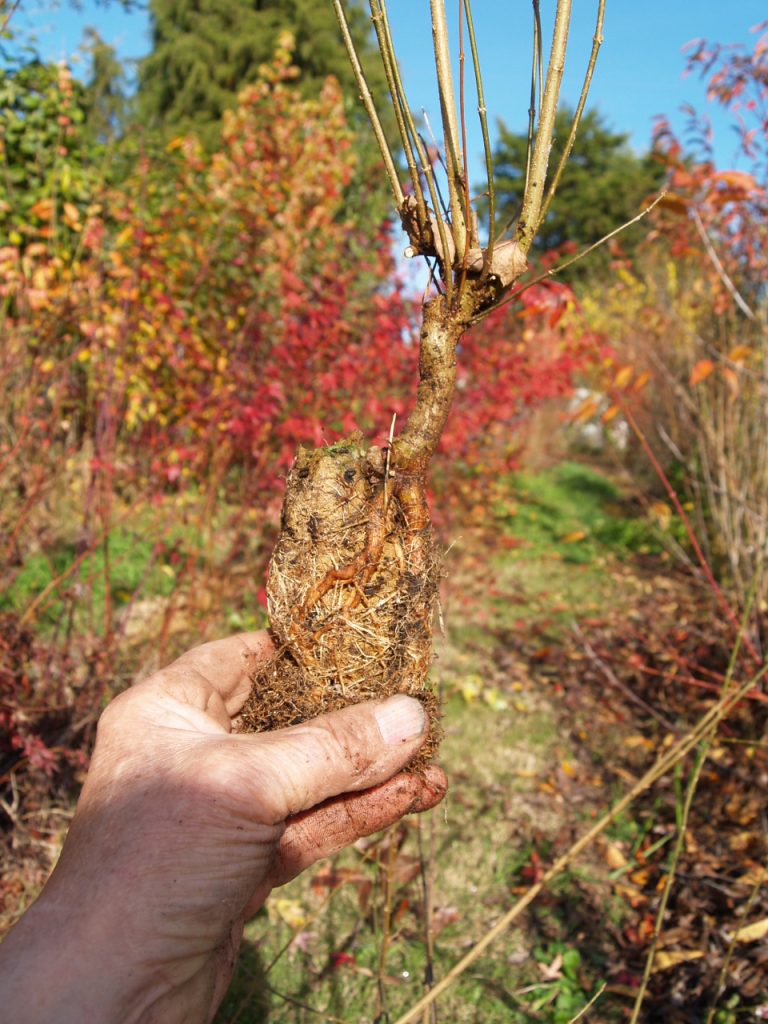
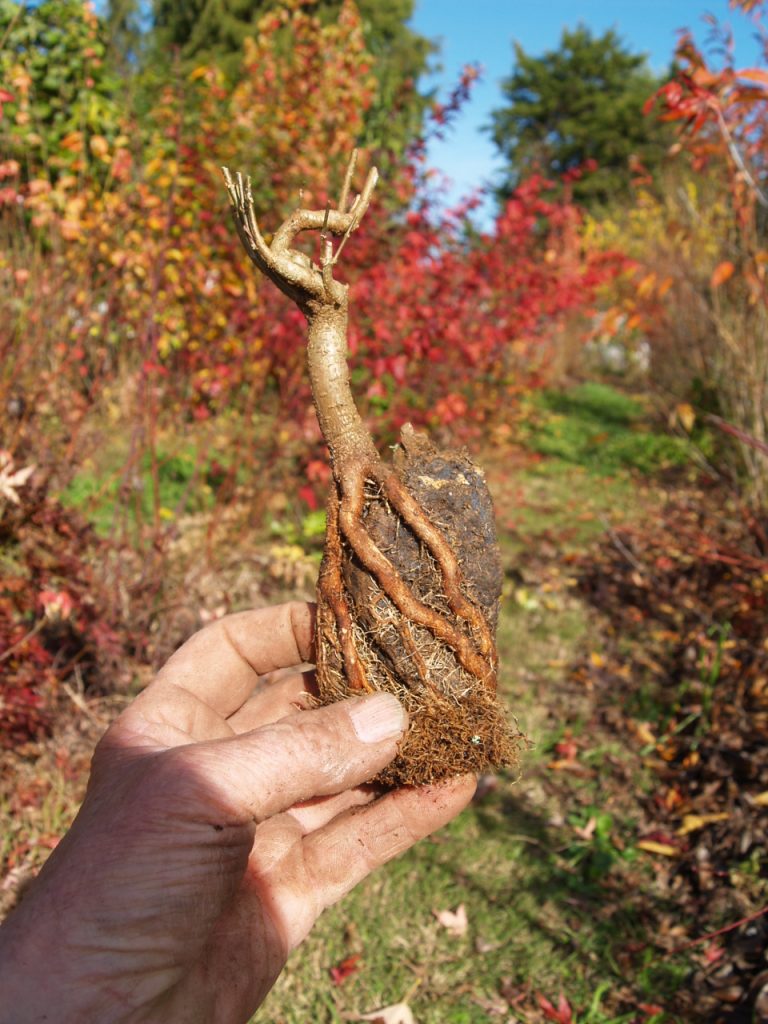
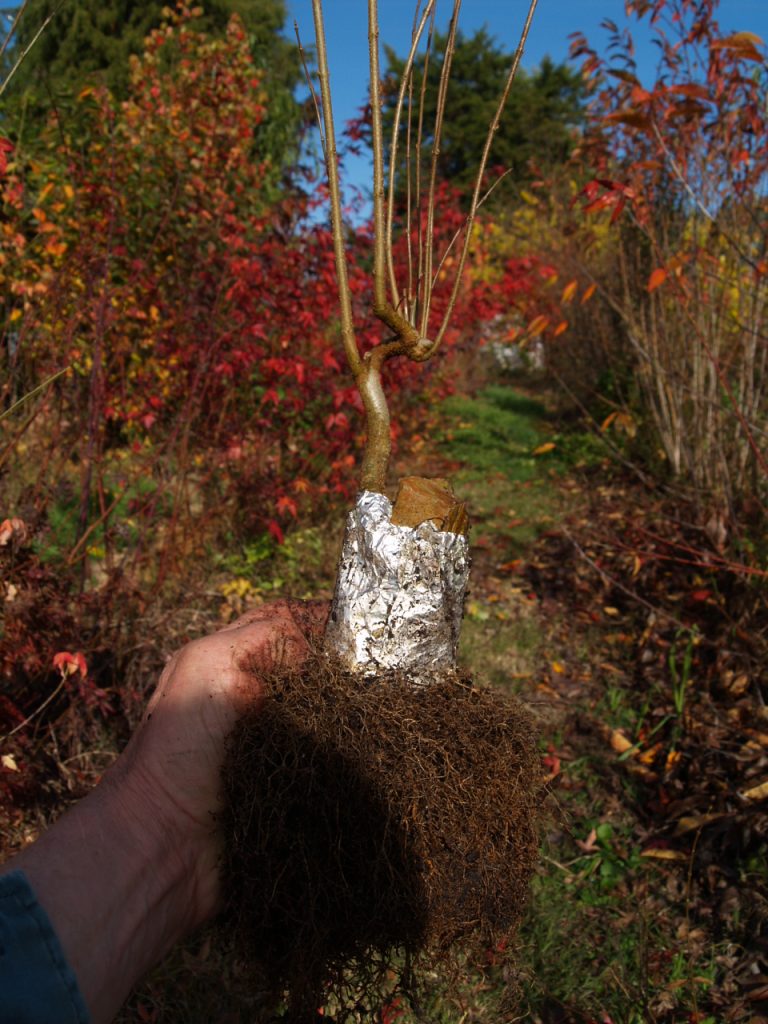
This one has also grown a few strong new shoots over summer which have done a great job of thickening both roots and lower trunk.
The new lower left branch is not a good candidate as new leader because it would make the new trunk line too straight and leading in the wrong direction to compliment the shape of rock and roots. It is also way too thick to be a branch on that trunk so I’ll cut it close to the trunk.
Thinner branch to the right is in a position to be a possible branch but the sweep upward won’t work and it also has long internodes so I’ll chop that one above the first node too and hope for better results next season.
After pruning the top. I’ve elected to leave 2 possible trunks to see which one looks better after another year.
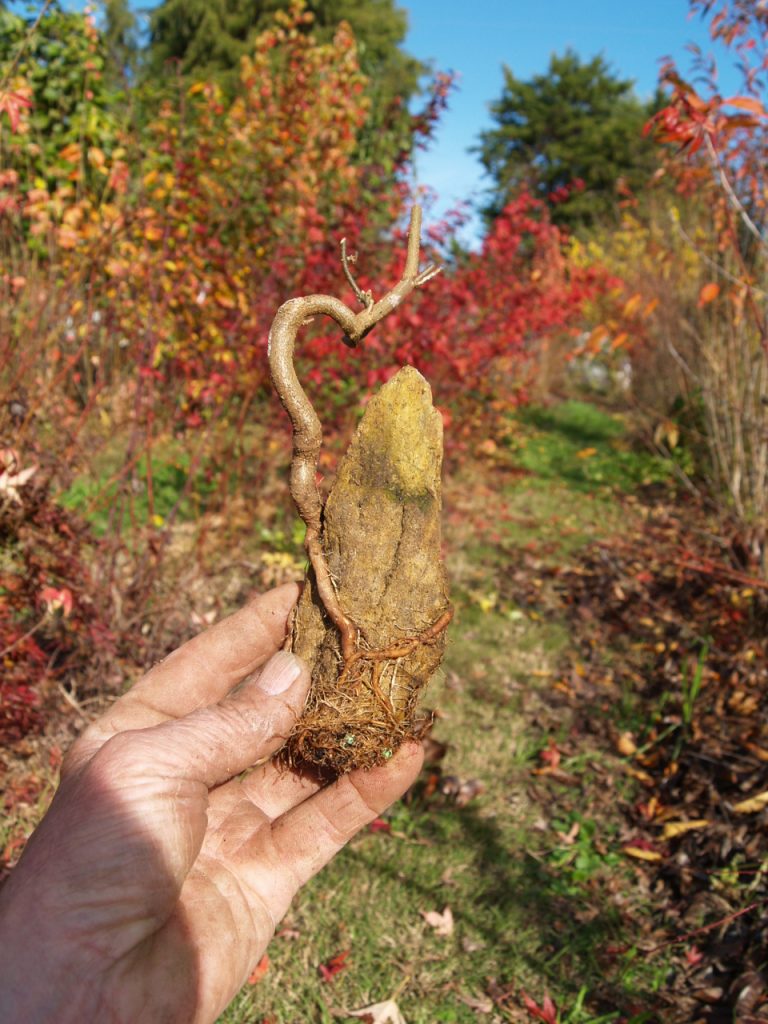
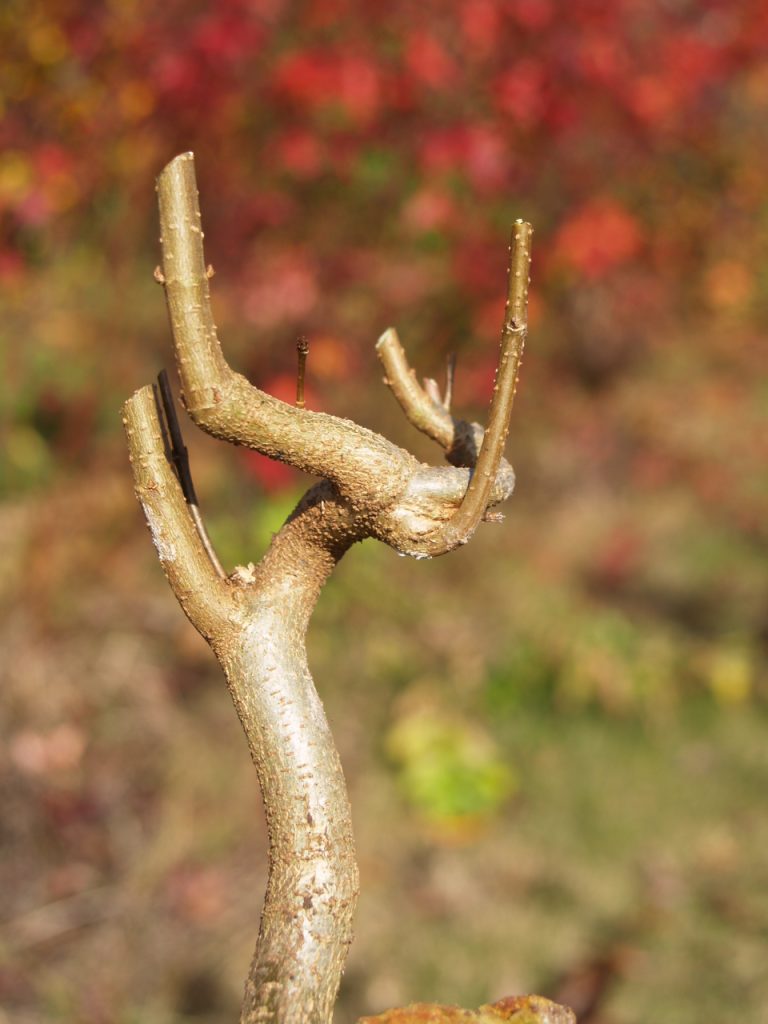
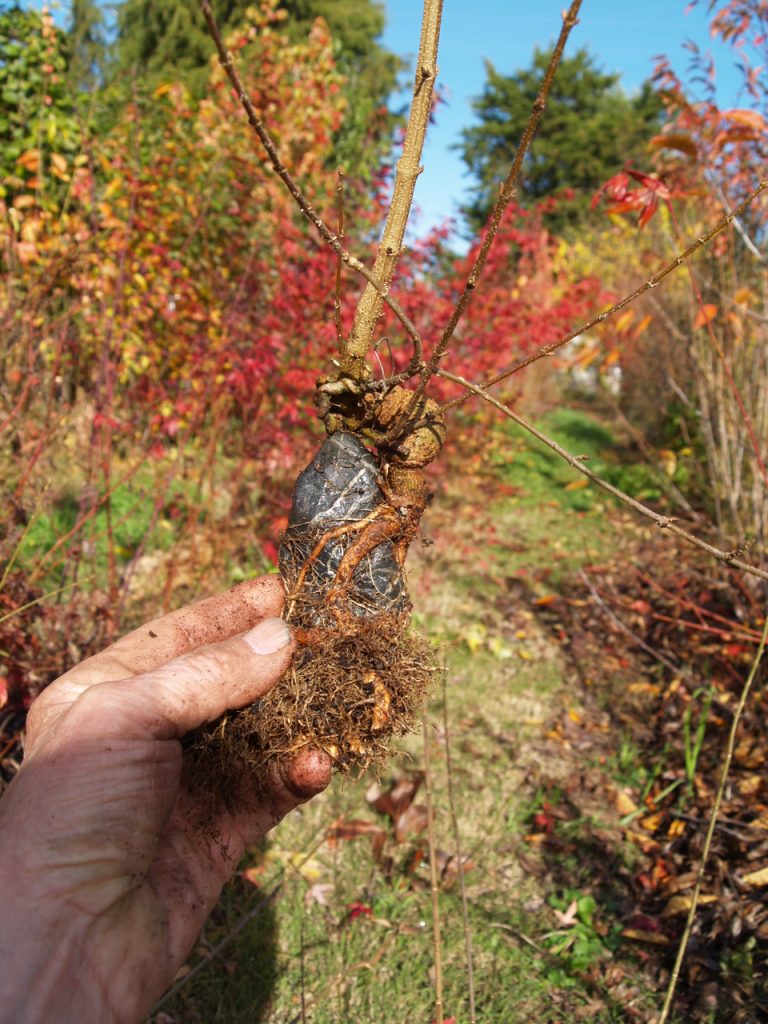
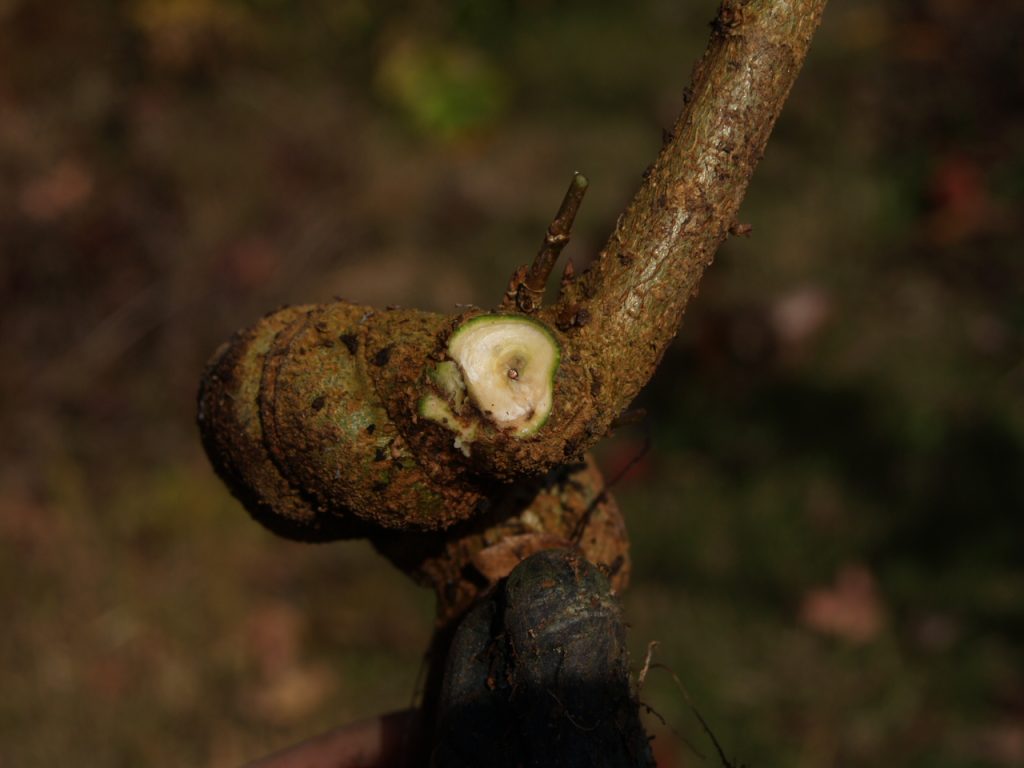
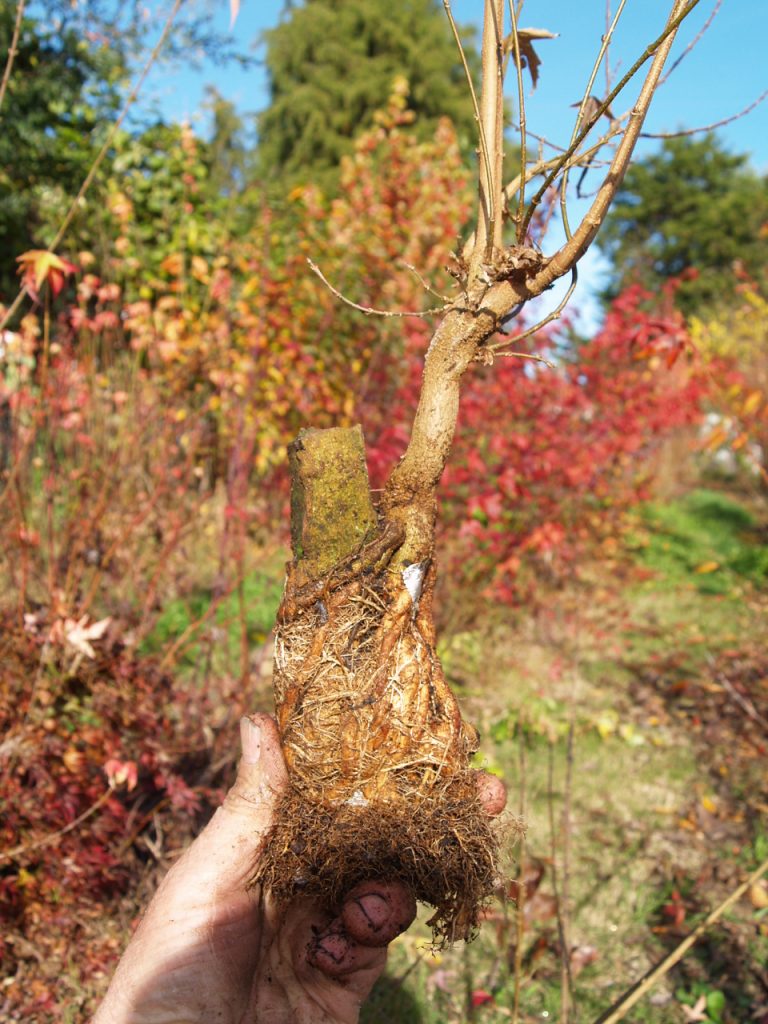
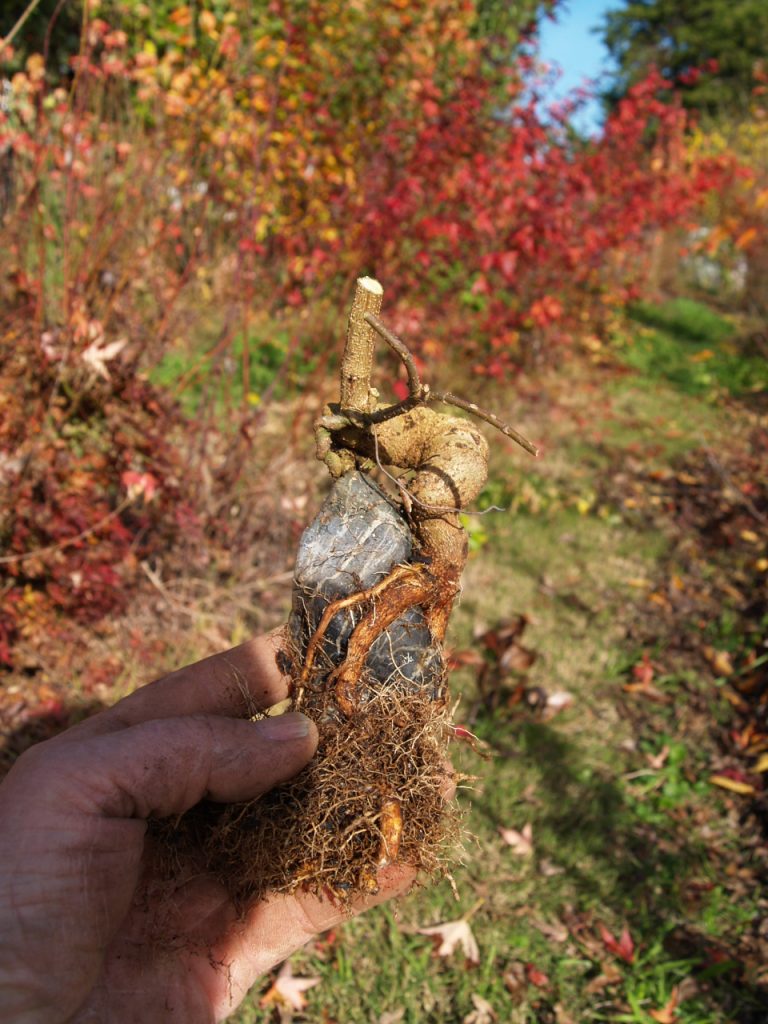
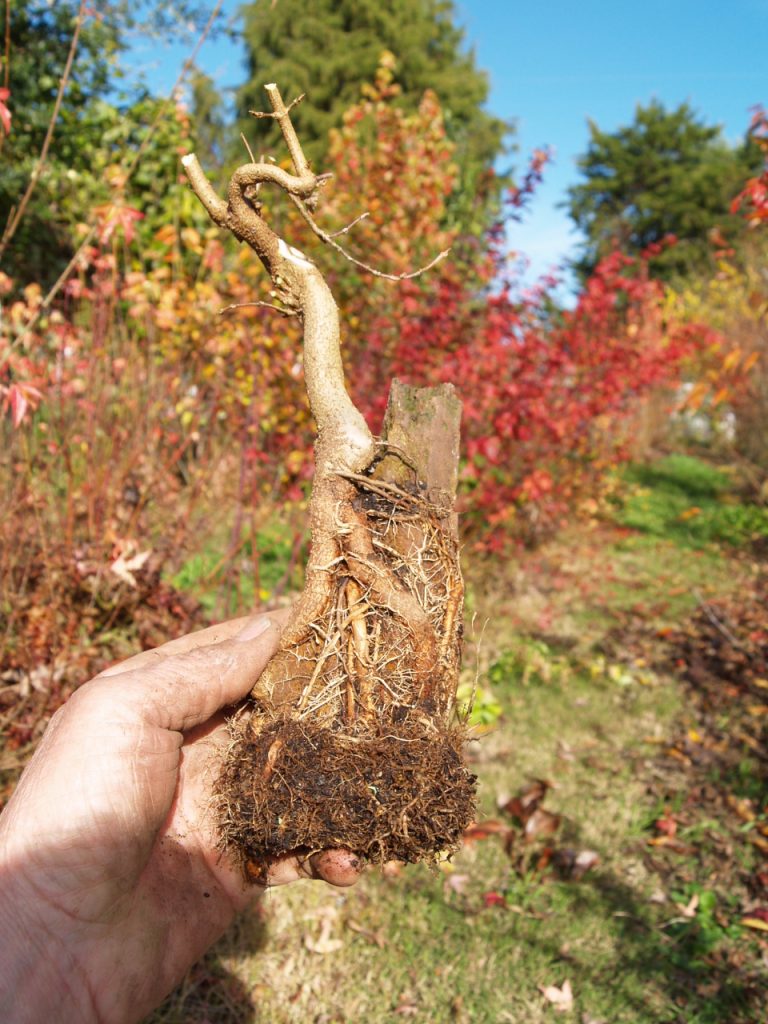
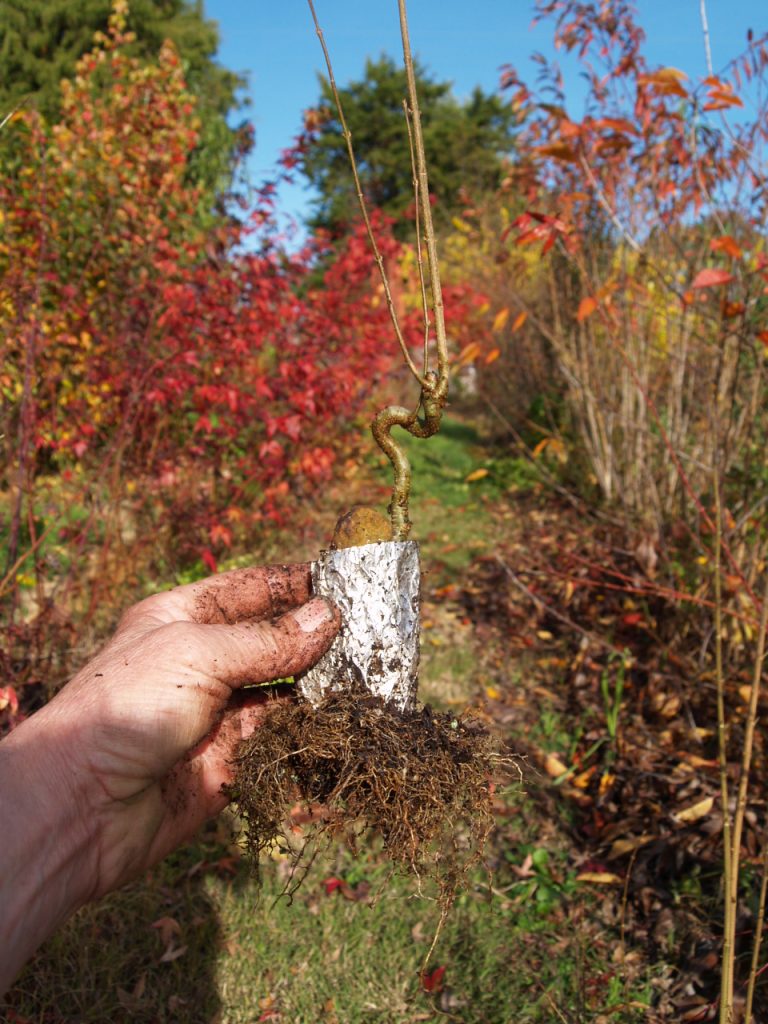
A final tree to look at for this post. Note the thick lower trunk.
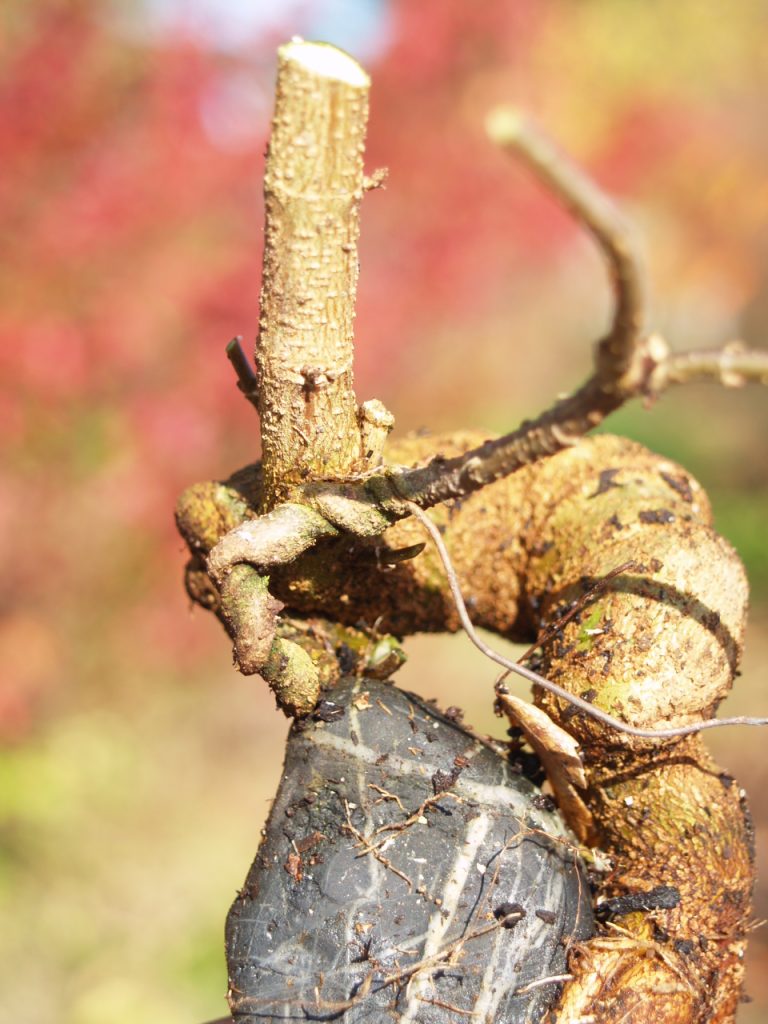
A closer look reveals something interesting.
The thicker trunk has spiral marks. The thinner part has more pronounced wire marks and near the end is a piece of copper wire protruding from the trunk.
This trunk is the result of some experiments with wiring very young seedlings the previous year to get really twisted trunks suitable for shohin sized trees. This is one that grew so quick I was not able to remove the wires in time and the trunk has grown right over the wire. That’s not something I would normally do or recommend but, in this case I think the results might possibly be good.
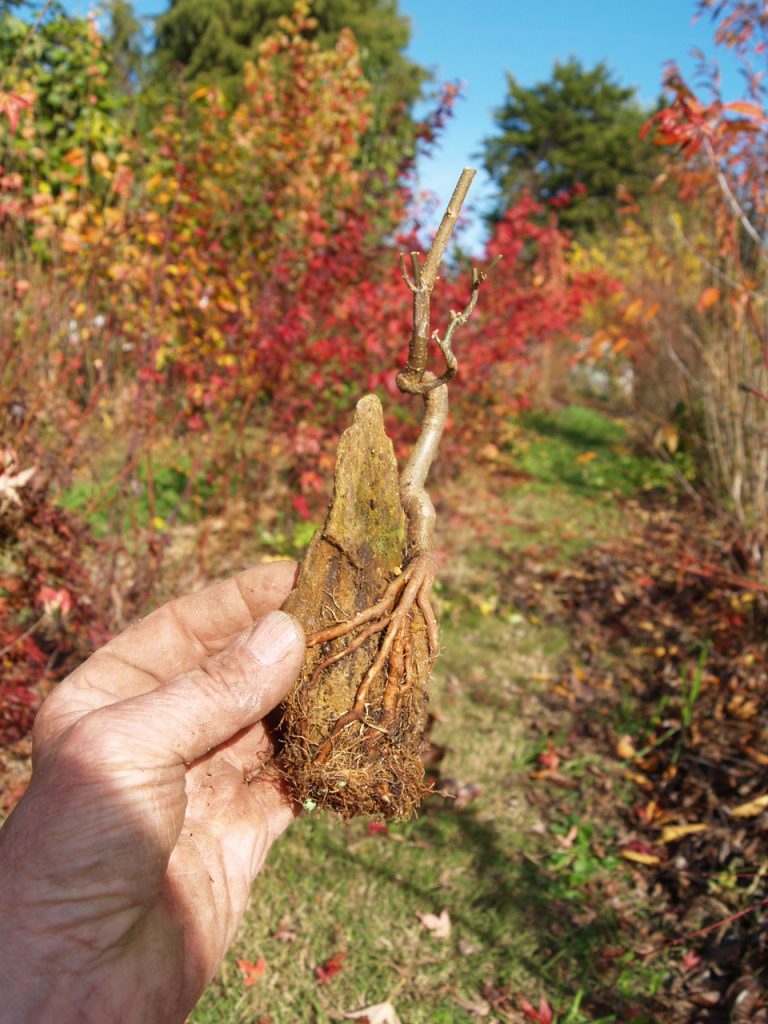
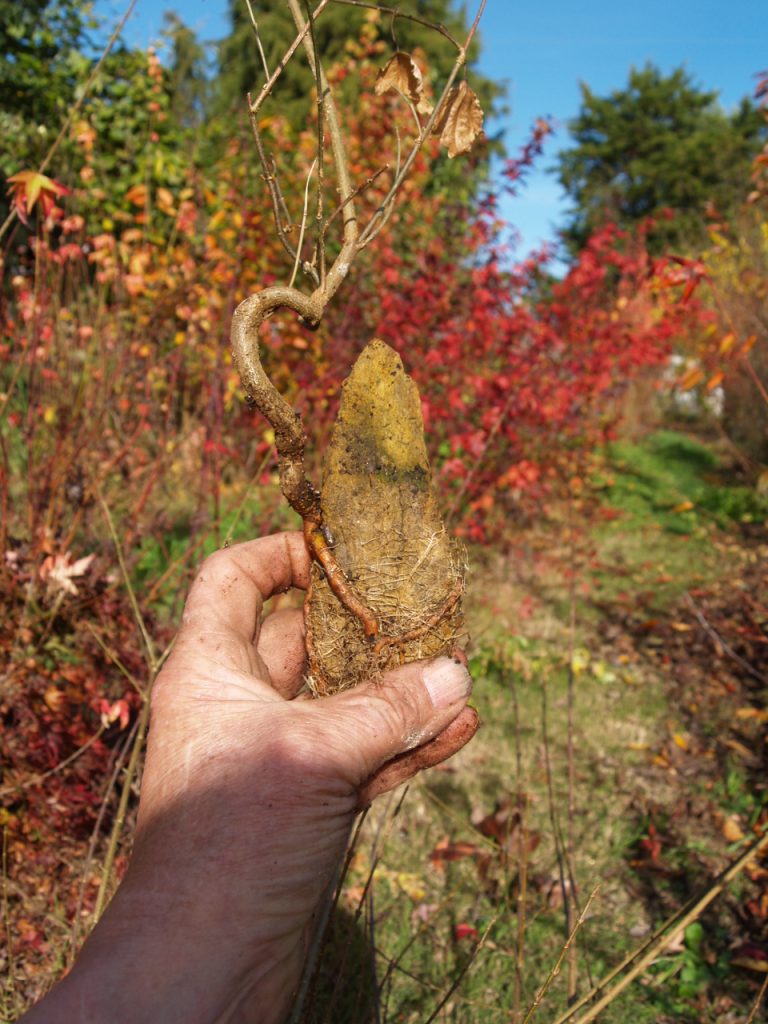
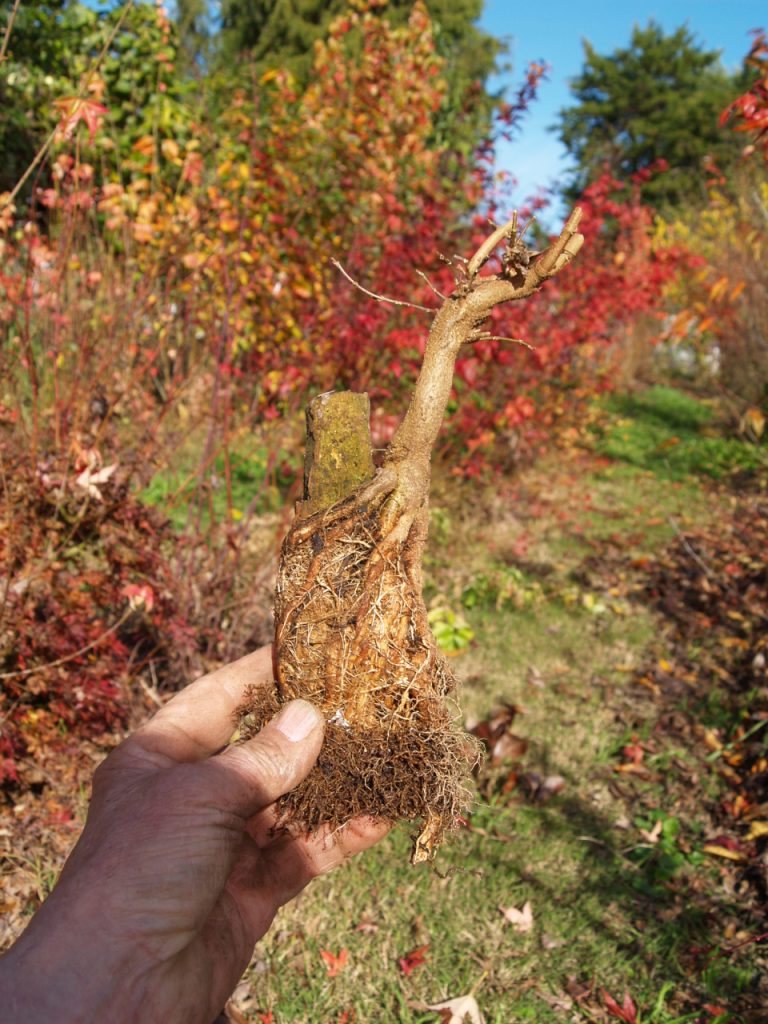
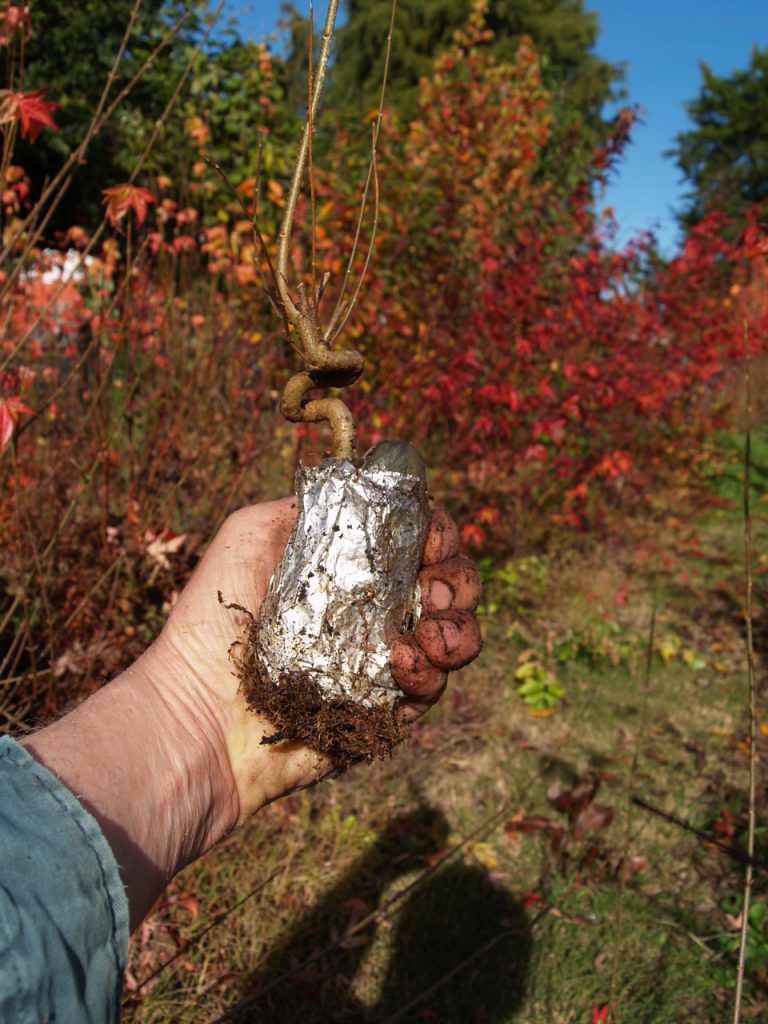
The twisted part of that trunk comes down too close to the top of the rock now. As it thickens it might obscure the view of the top of the rock. The new part is more upright so probably a better trunk line. I chop the thinner section.
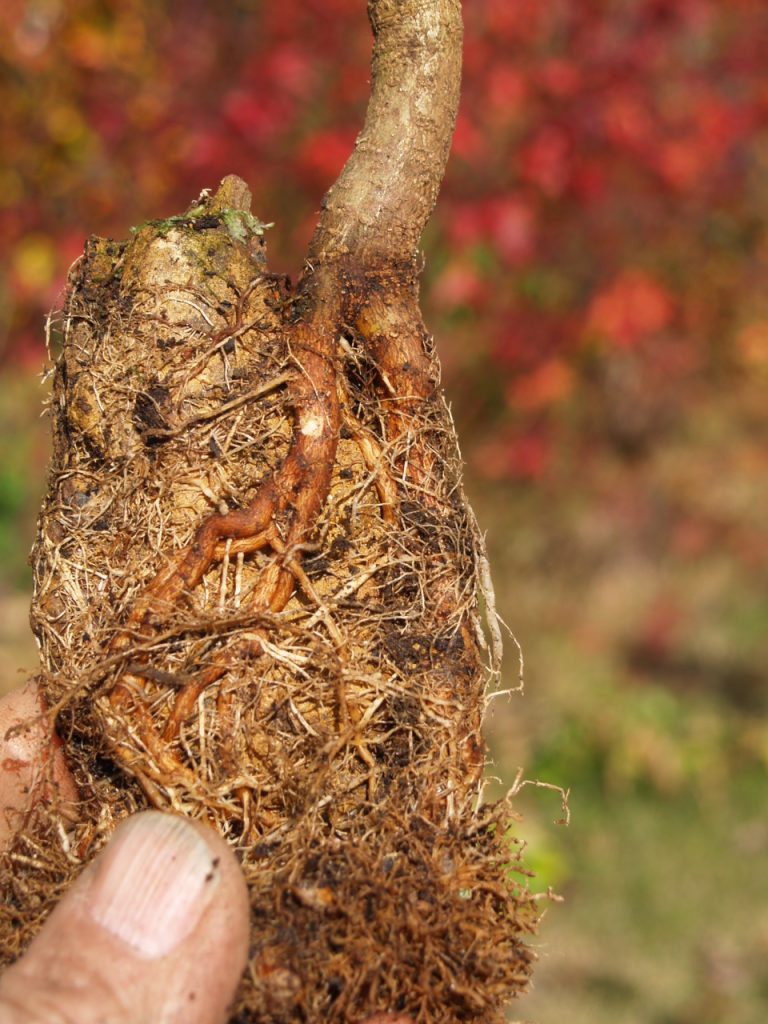
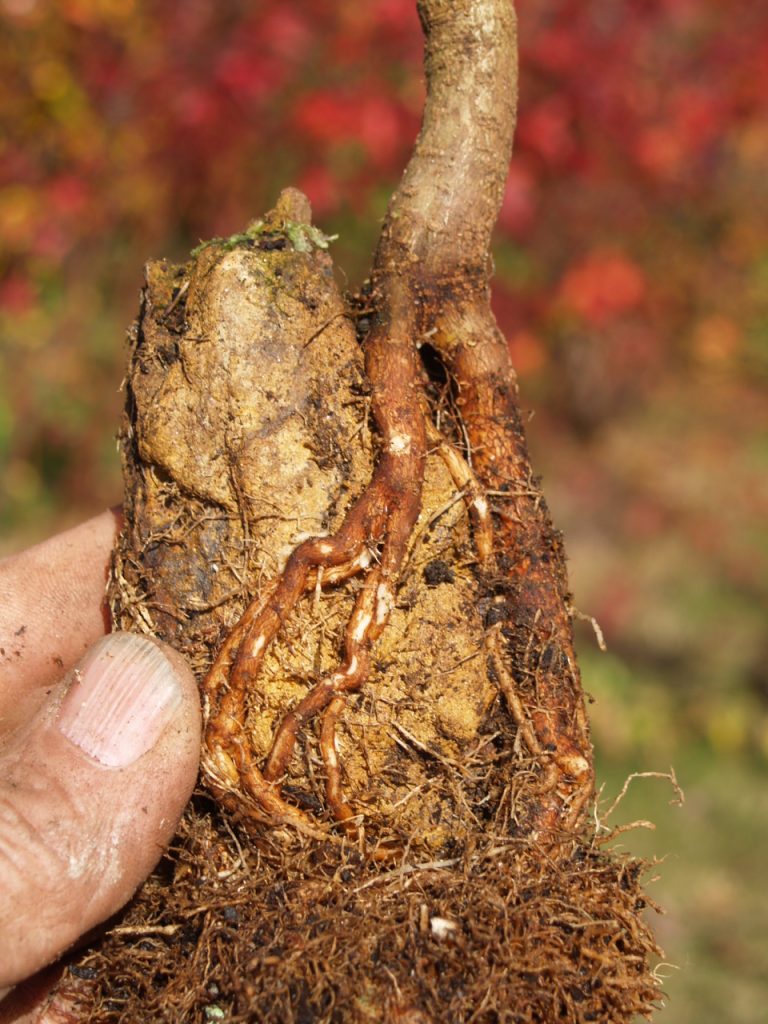
After chopping the thinner part a close look shows the copper wire is now right in the middle of the trunk.
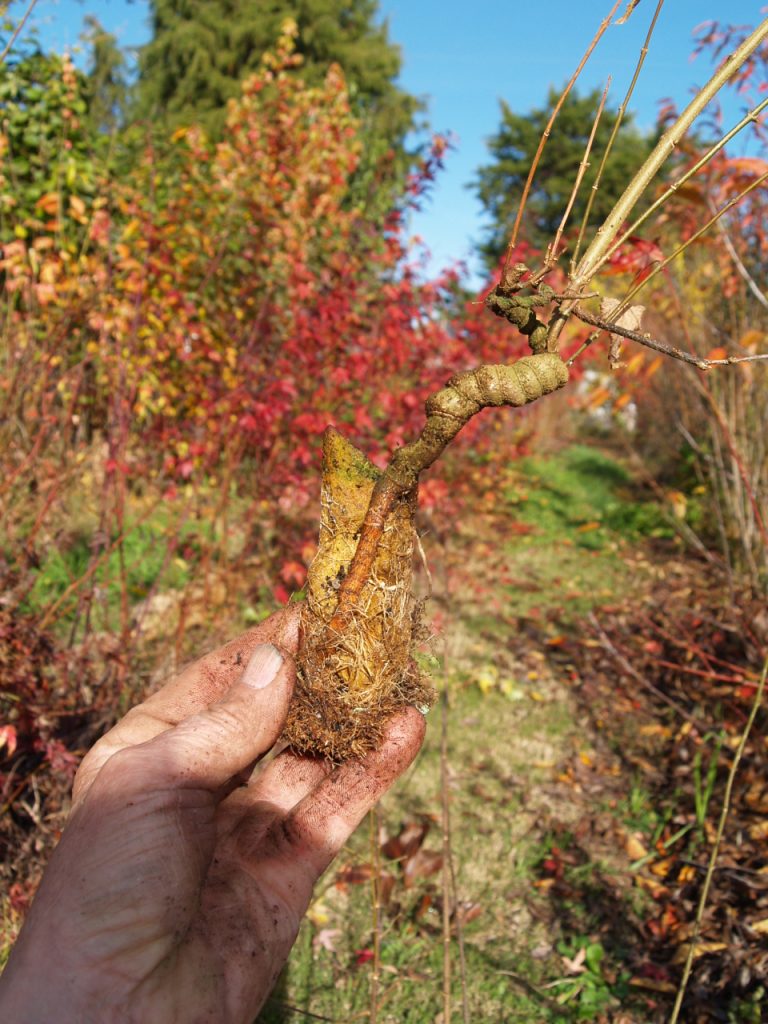
The remaining stronger, upright trunk has little taper or movement so I cut it back hard. Fortunately it does have some shorter internodes as the lower part so I’ve retained 2 nodes this time. Depending how many buds break in spring and which directions they grow I may cut further.
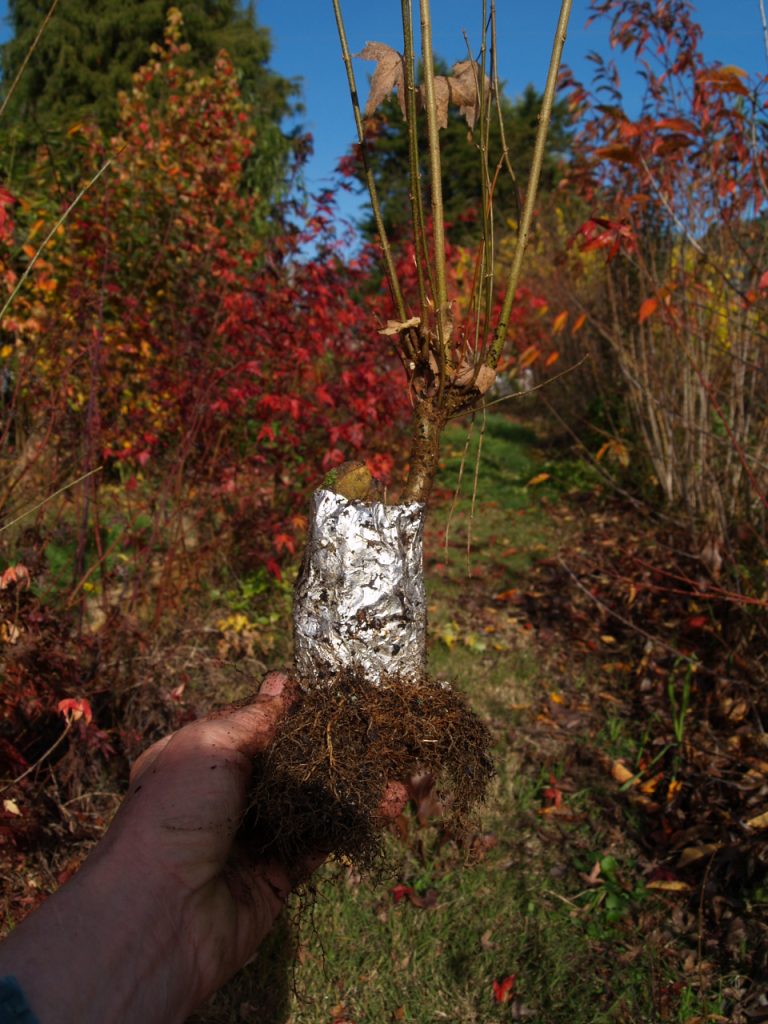
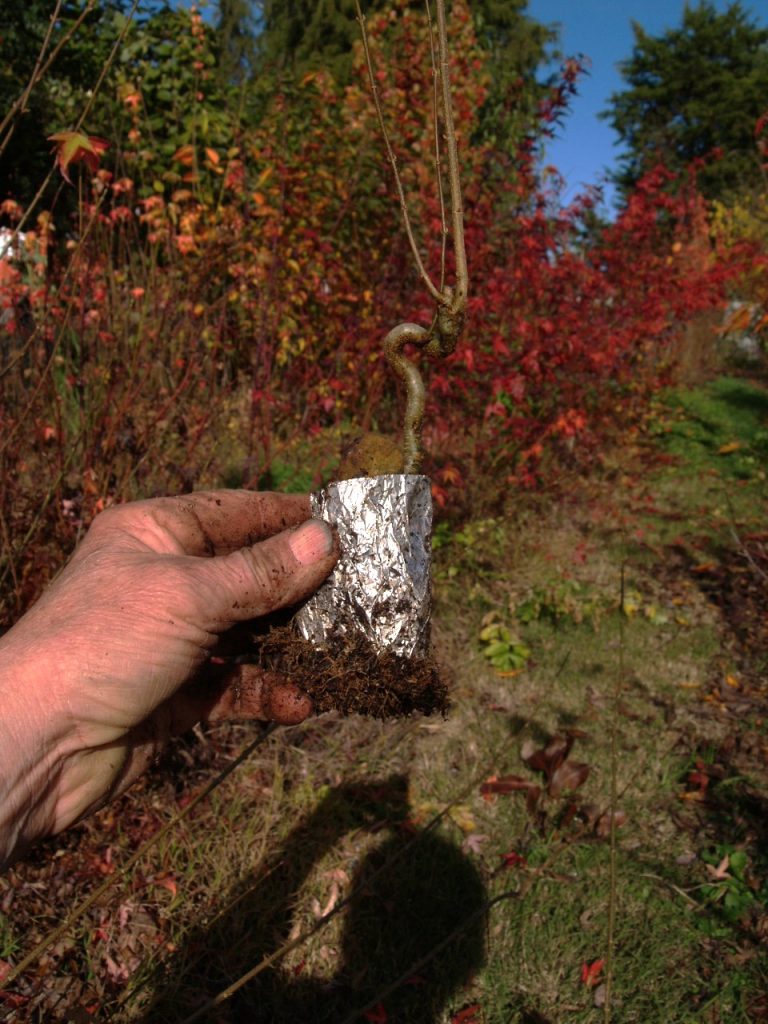
Removing the foil wrap is easy. Unlike some other methods the roots do not get tangled up or grow over and through the bindings.
Here’s the first after unwrapping.
And some more.
Now I can assess the shape better. Look at shape of the rock, flow of the trunk, flow of roots, etc to determine which side looks better. That can determine where the longer shoots will be chopped. These still have some growing to do so they may still change appearance. At this stage I’m just making some guesses and anticipating what may happen in the next few years and trying to direct future growth along the lines that I think will look best.
After preliminary pruning the tops.
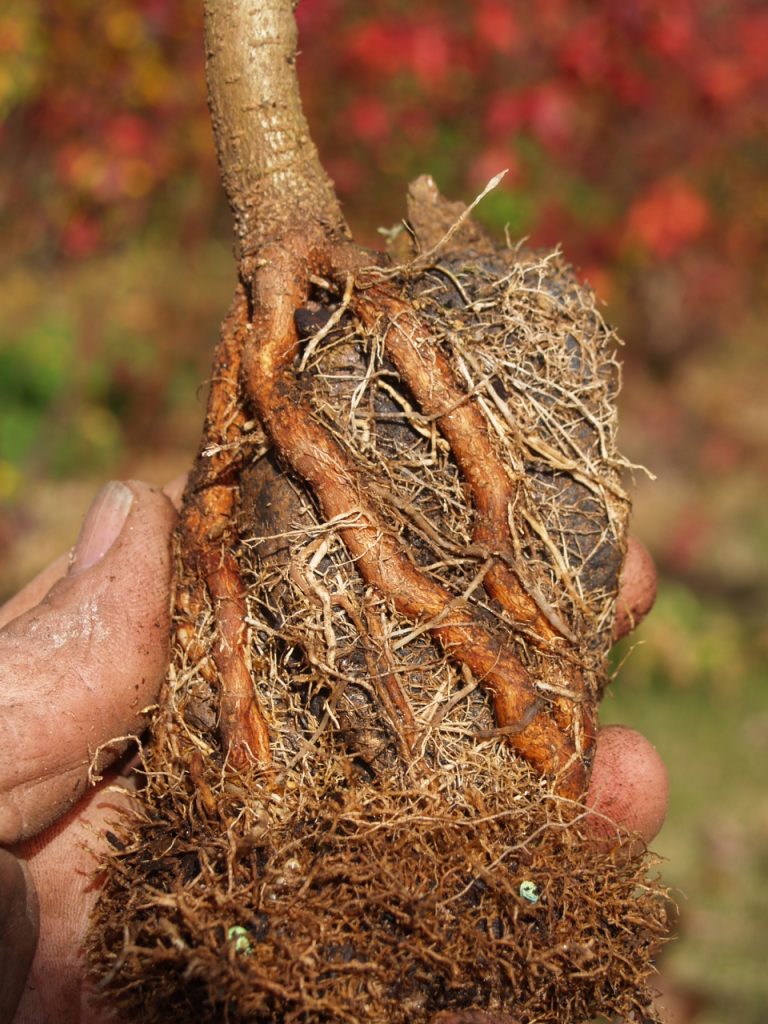
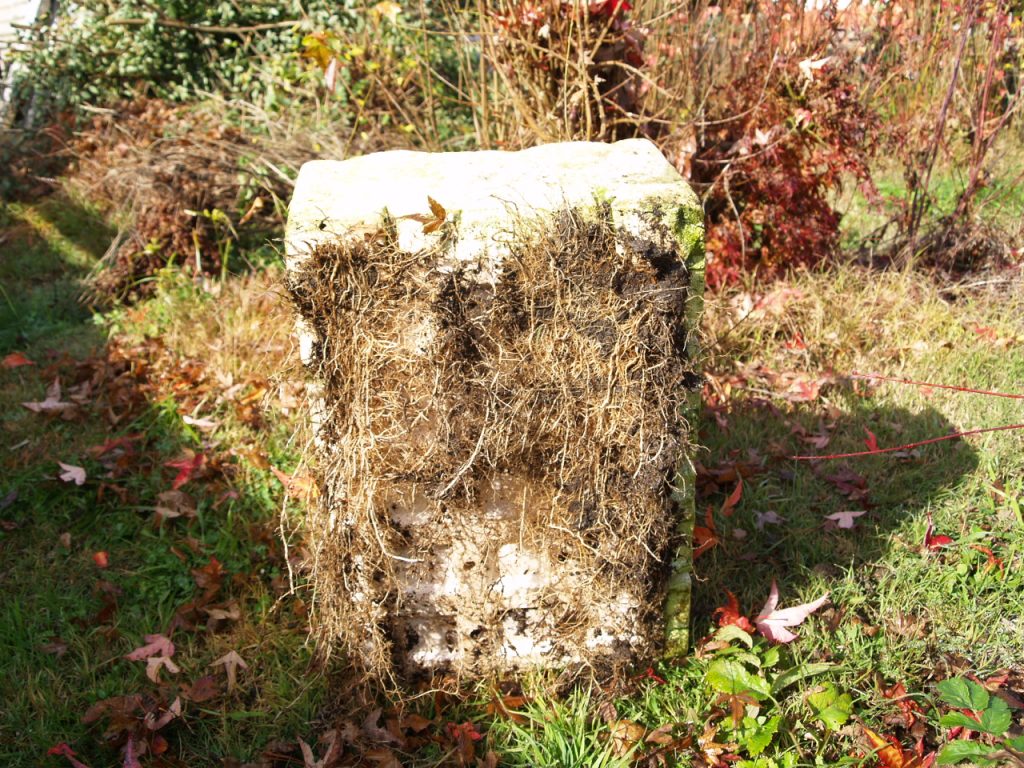
Look at the mass of roots. Many of those finer white roots have grown since I wrapped it last winter. Provided moisture levels are adequate conditions between the rock and foil are ideal for root growth.
Roots do not actually need soil to grow. Humid conditions is all they need and that’s what foil wrapped rocks provide in abundance. Some of these did not even have roots sticking out the bottom of the foil last year but have since grown down and out into the soil.
From experience I know it is important to assess and manage the roots now. Too many roots may seem a good problem to have but over time they will all thicken and spread to completely hide the rock. No point having a root over Rock planting if nobody can see there’s a rock!
Also need to deal with crossing roots. As well as being confusing to the viewer, a root growing under another will push the overlying root out away from the rock as it thickens and spoil the arrangement.
After cleaning many of the new, smaller roots and removing some that cross over or under. This should allow the rock to show through the spaces even as the remaining roots thicken and spread.
The reverse side of the same tree before cleaning excess roots
and after cleaning the roots on that side.
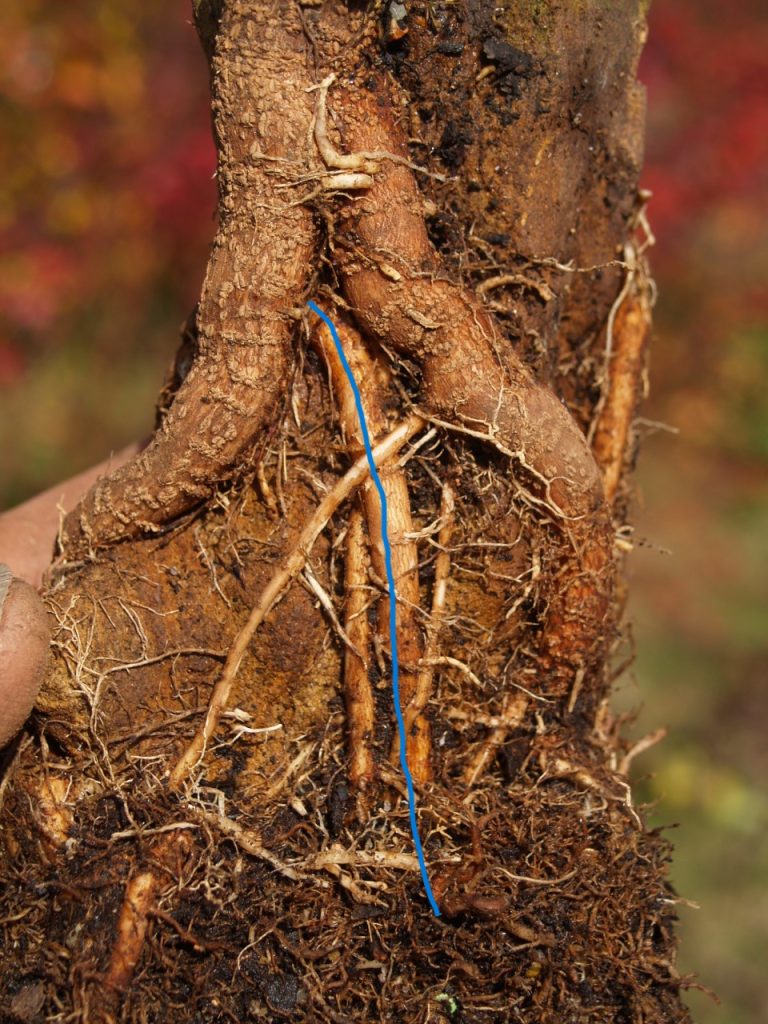
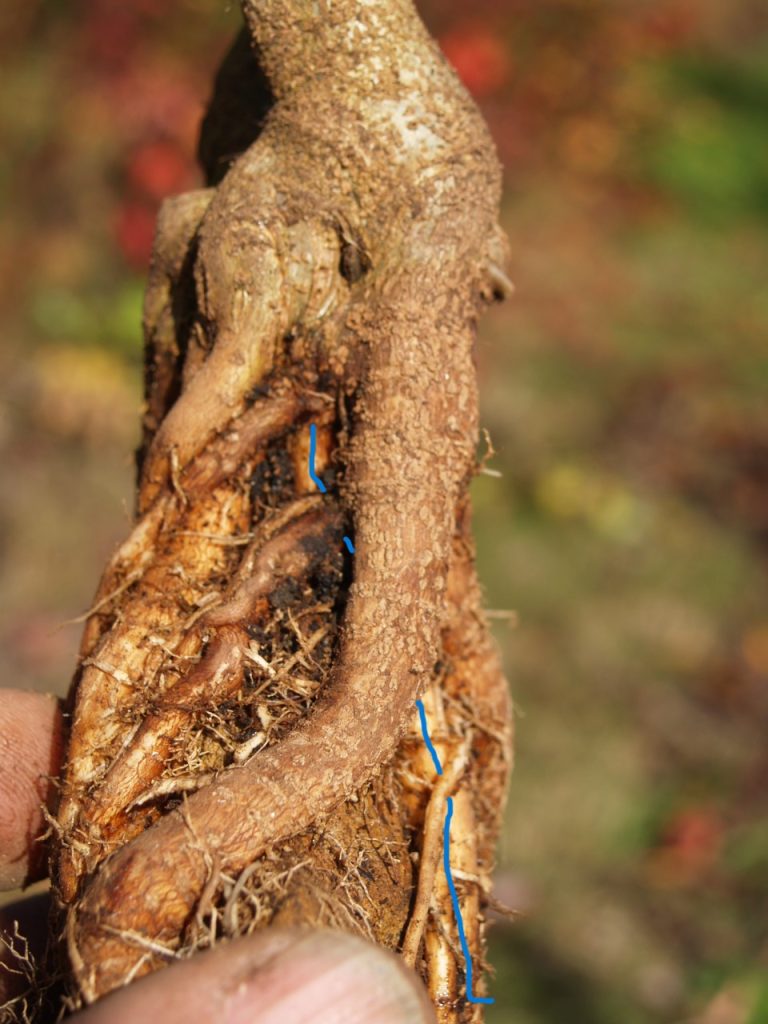
Here’s another case of crossing roots.
A closer look at the root marked with blue….
Shows that it comes from the other side of the tree, ender the base of the trunk, under another important root then down the front of the rock.
That’s one root I will definitely remove now, before it gets the chance to start lifting the entire tree away from the rock.
A few of these little ROR starters are already good enough to pot up and begin training trunk and branches. Others still need some more grow time so those are rewrapped with fresh foil and will go back into pots or boxes so the roots and trunks thicken a little more next summer.
Wrapped ready for another year’s growth and development.
June marks early winter here at Shibui Bonsai. The leaves have fallen off most of the trident maples and that means it’s time to start work on the developing trees. Most years I start with the Root over Rock plantings because it is always great to finally see what has happened over summer.
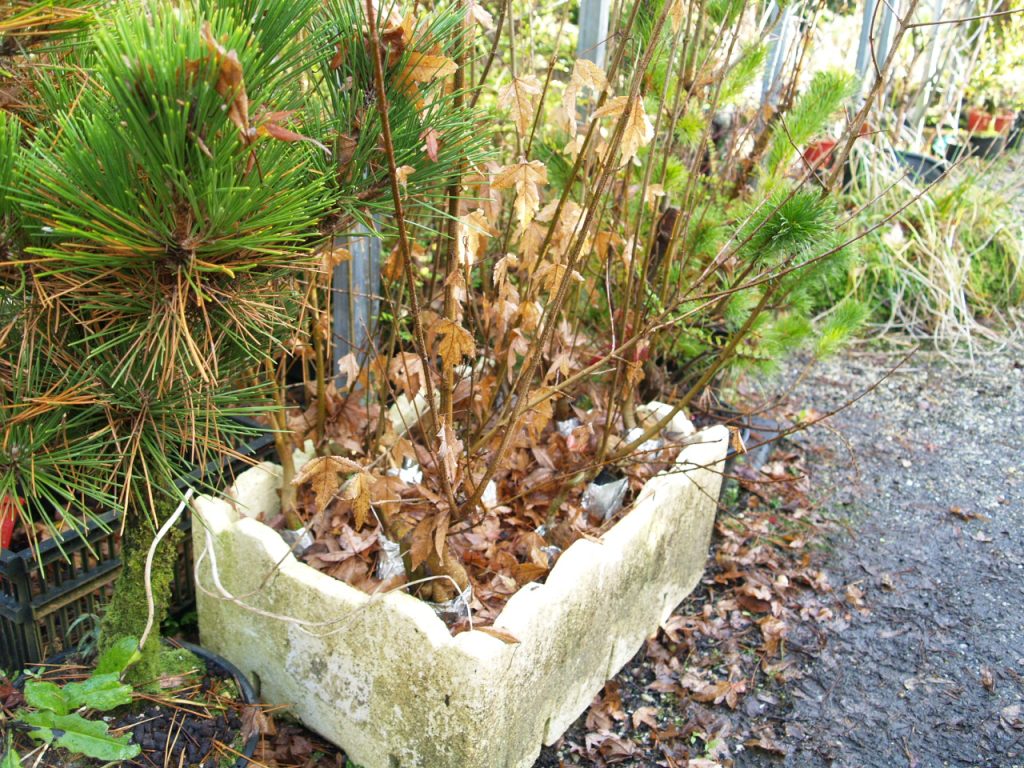
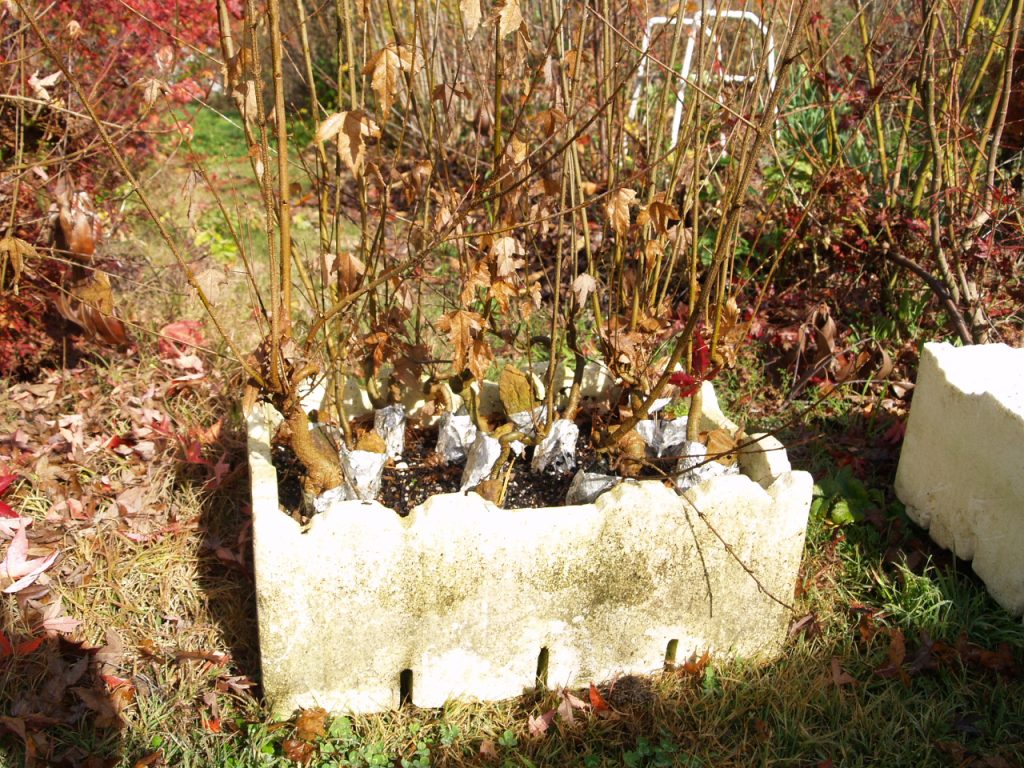
The box of potential shohin trident root over rock
After clearing fallen leaves you can now see the trees and rocks wrapped in alfoil.
I use aluminium foil because it conforms very closely to the shape of the rocks. even into crevices and hollows and holds the growing roots very close to the rocks.
Roots have grown through the bottom of the polystyrene box over the summer indicating good growth of at least some of these trees.
After cutting the roots under the box I gently ease each tree out of the soil. Breaking a few of the roots at this stage doesn’t matter as I intend to cut them back much further in the next step
Just a quick, rough trim of roots hanging out from the foil to make the trees easier to handle.
I won’t trim the tops at this stage. I really want to see the shape of both rocks and new roots before deciding where to prune the long trunks and branches.
Next time I open them up to see how the roots have developed.