Shohin Root over Rock – establishing trunk lines

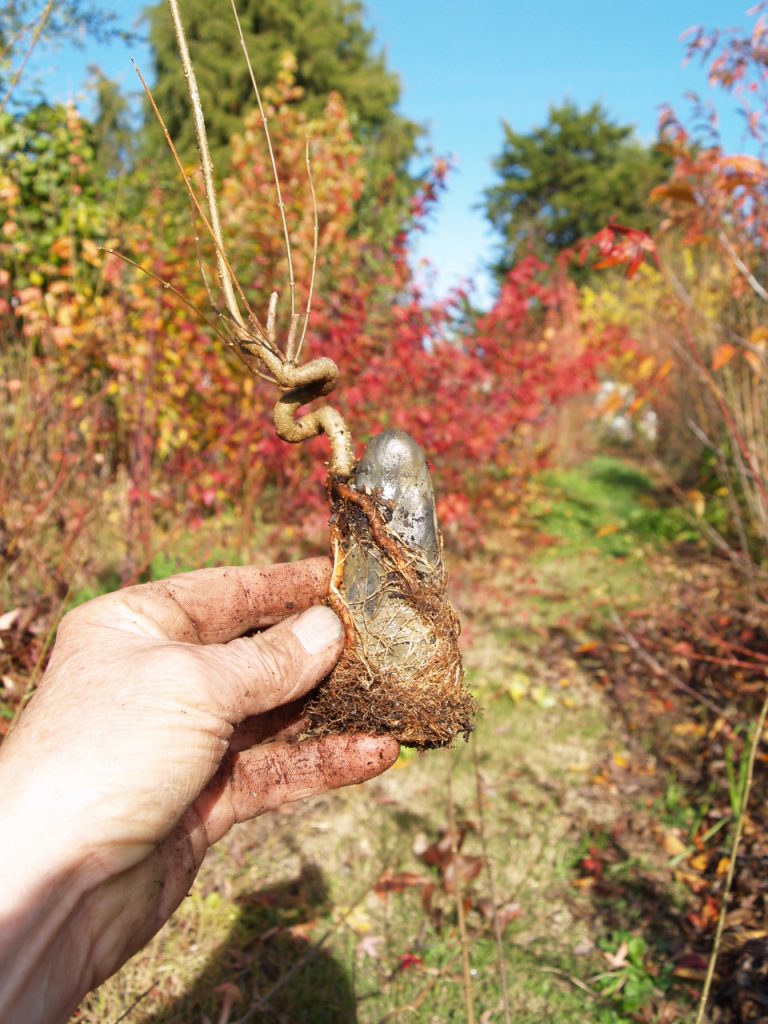
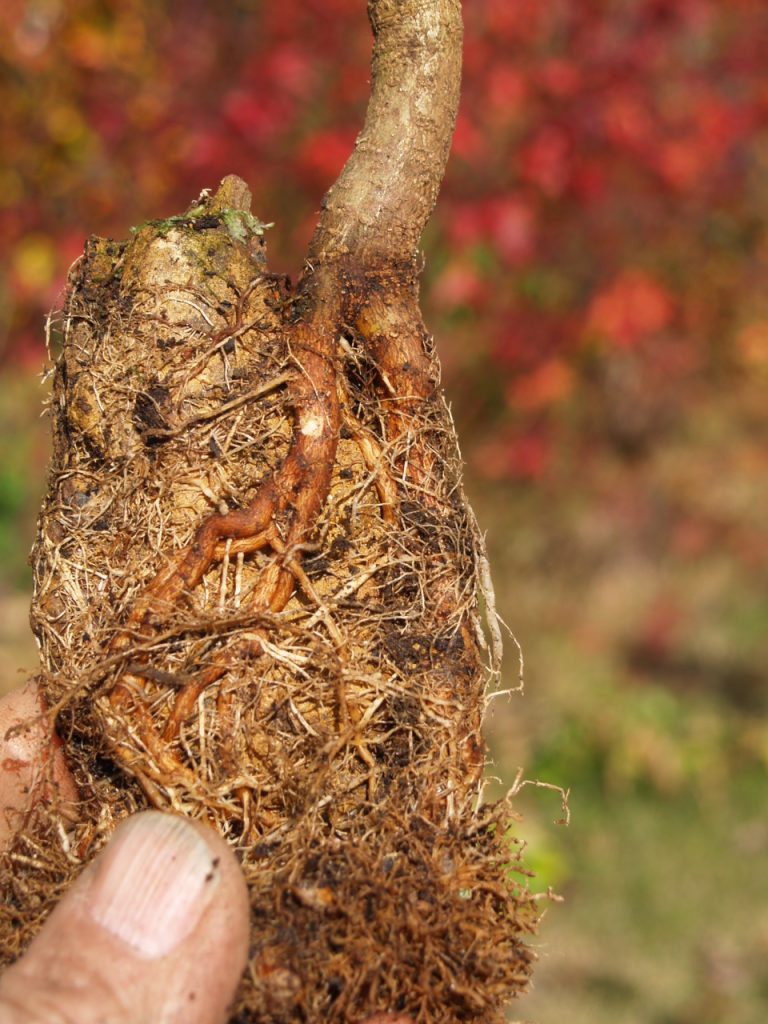
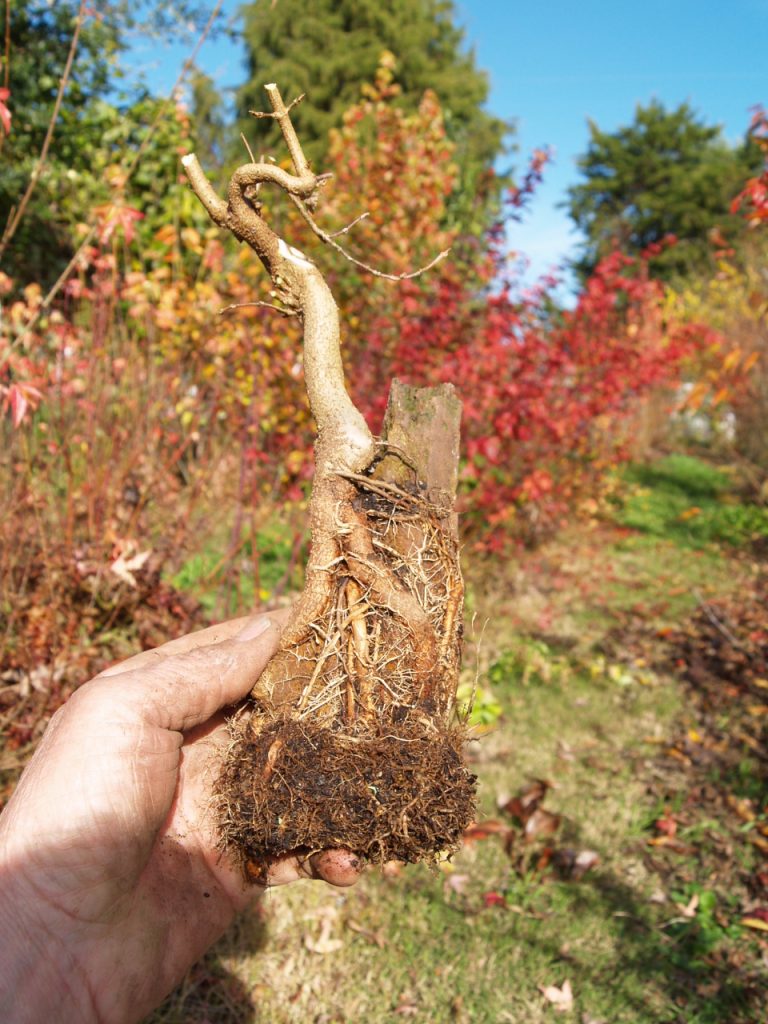
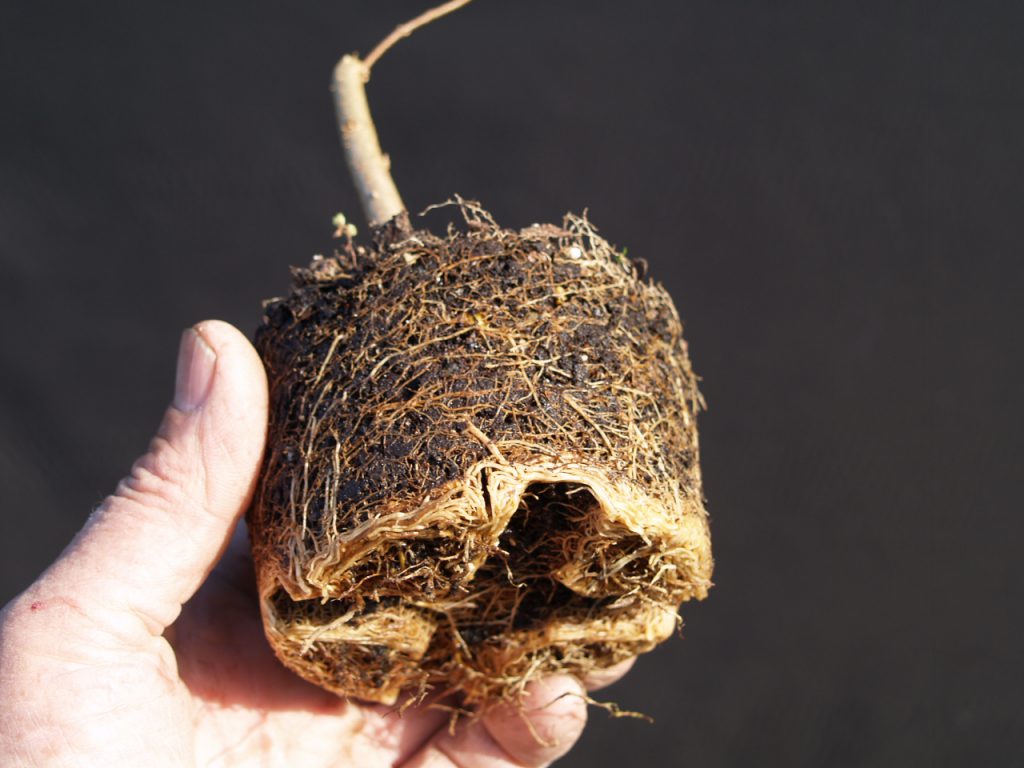
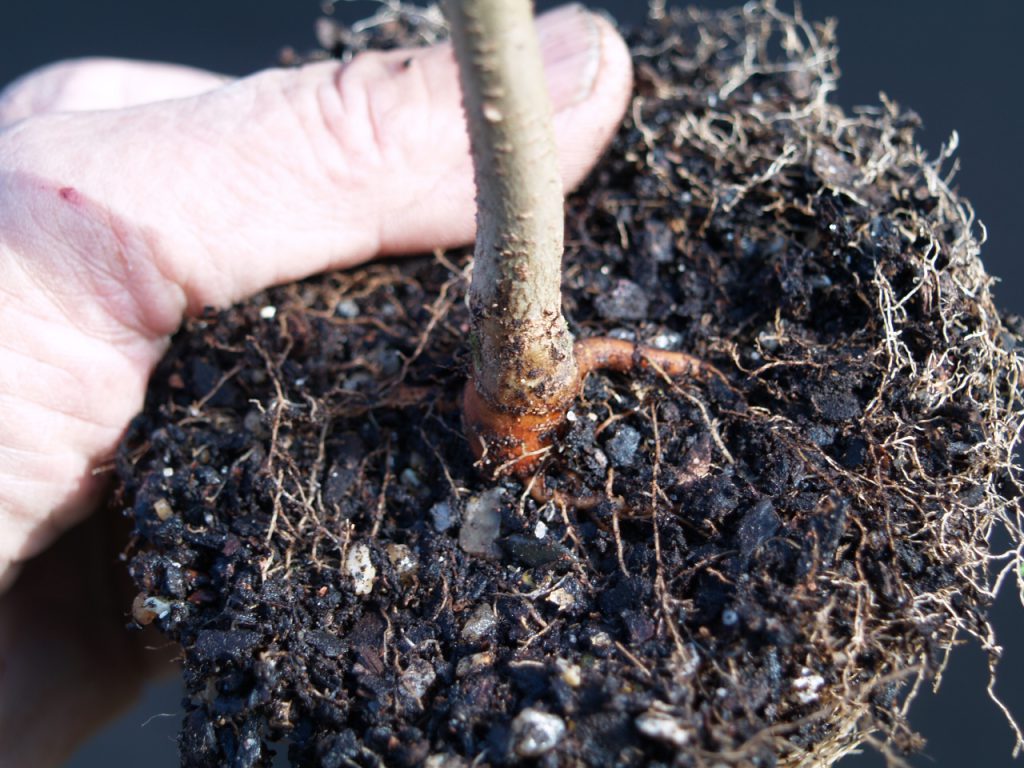
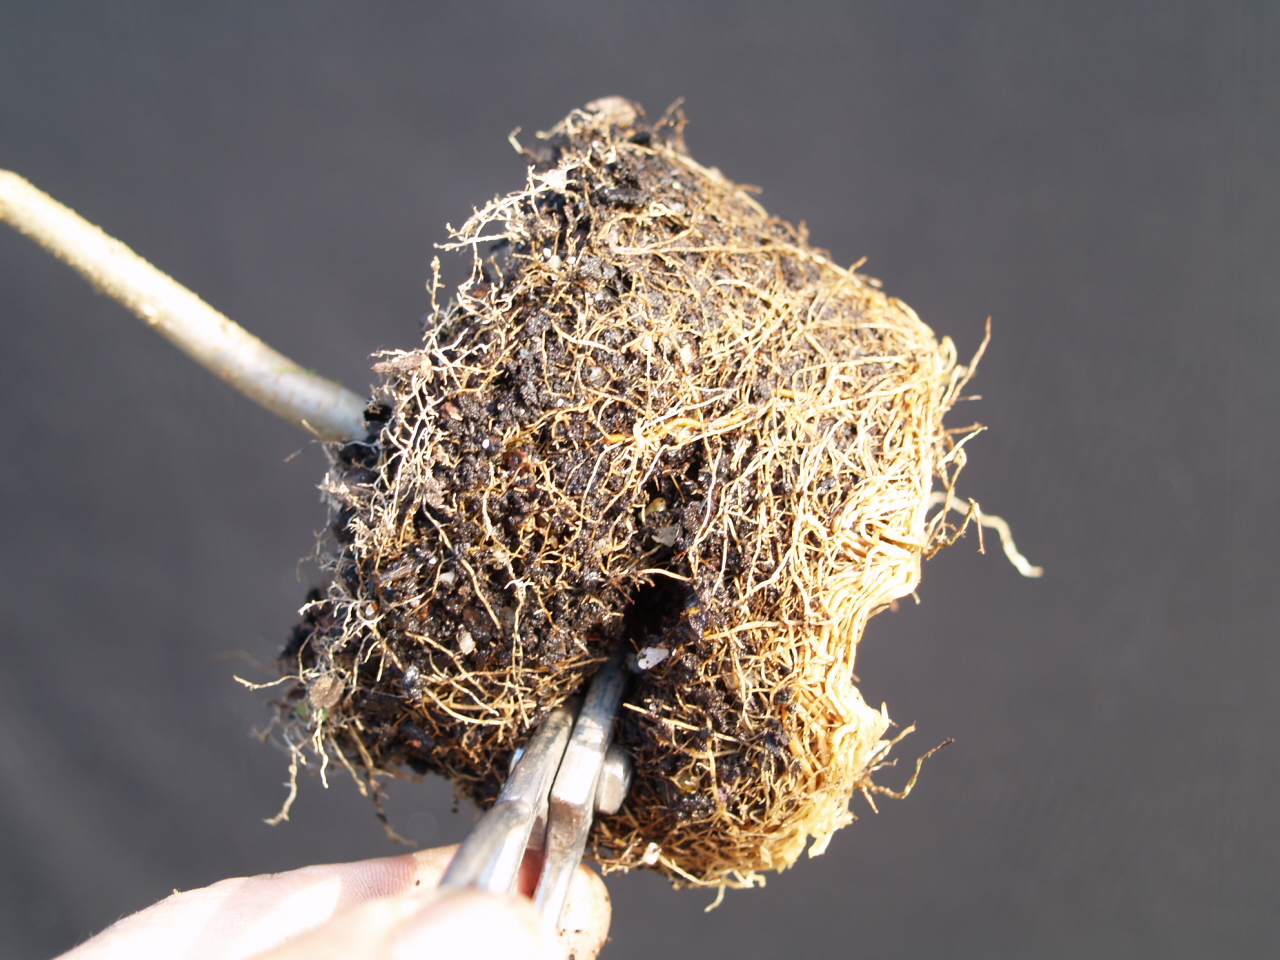
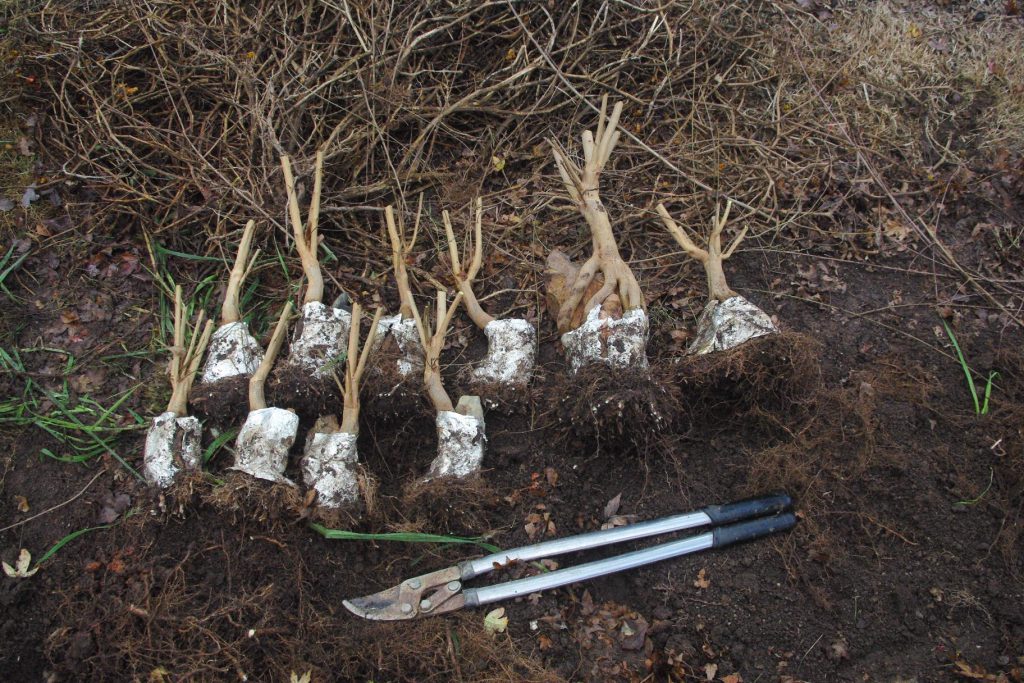
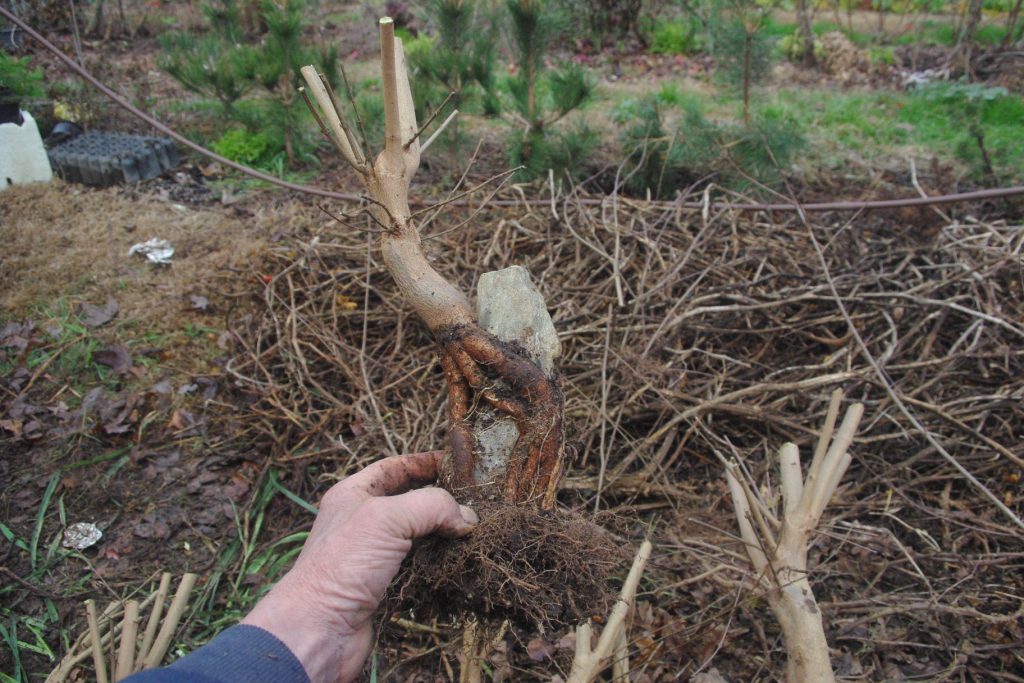
Now that the roots have been thinned and adjusted it’s time to take a more thorough look at the overall shape in case trunk lines need any work.

When I initially planted these I tried to match trunk shape to the shapes of the rocks while also trying to get good root lines. Since then strong growth of new shoots and trunk thickening have often changed the appearance so they need to be reassessed. Some will obviously need to have slight adjustments, others may need more radical pruning and a few will just be so bad I’ll scrap them.

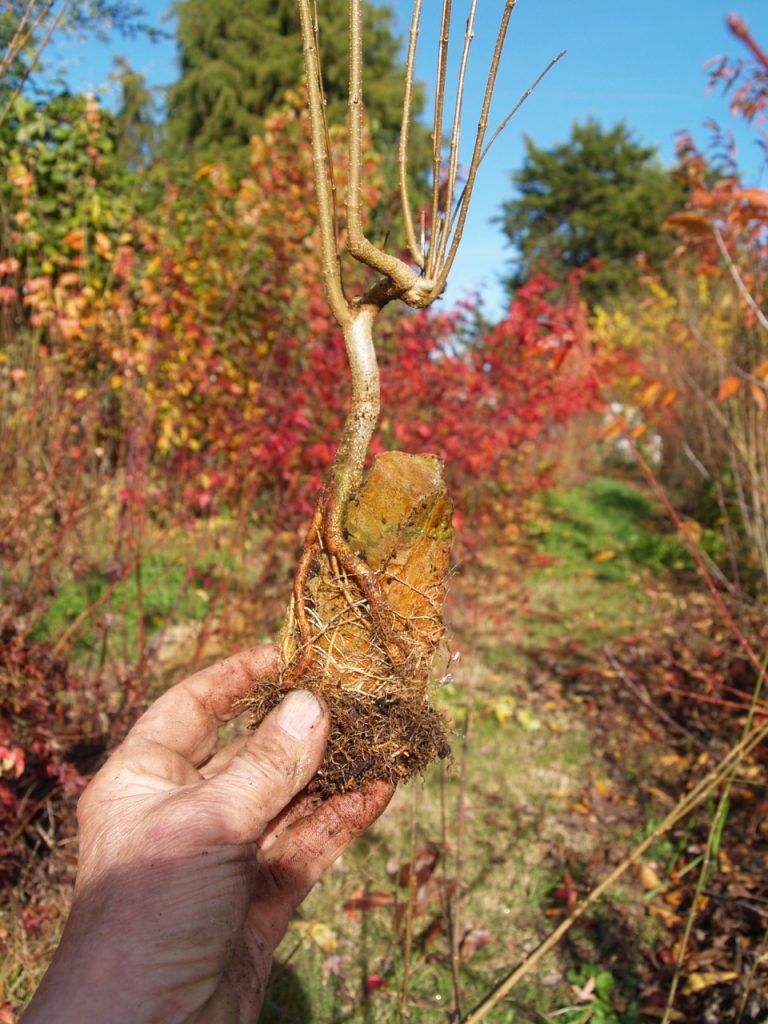
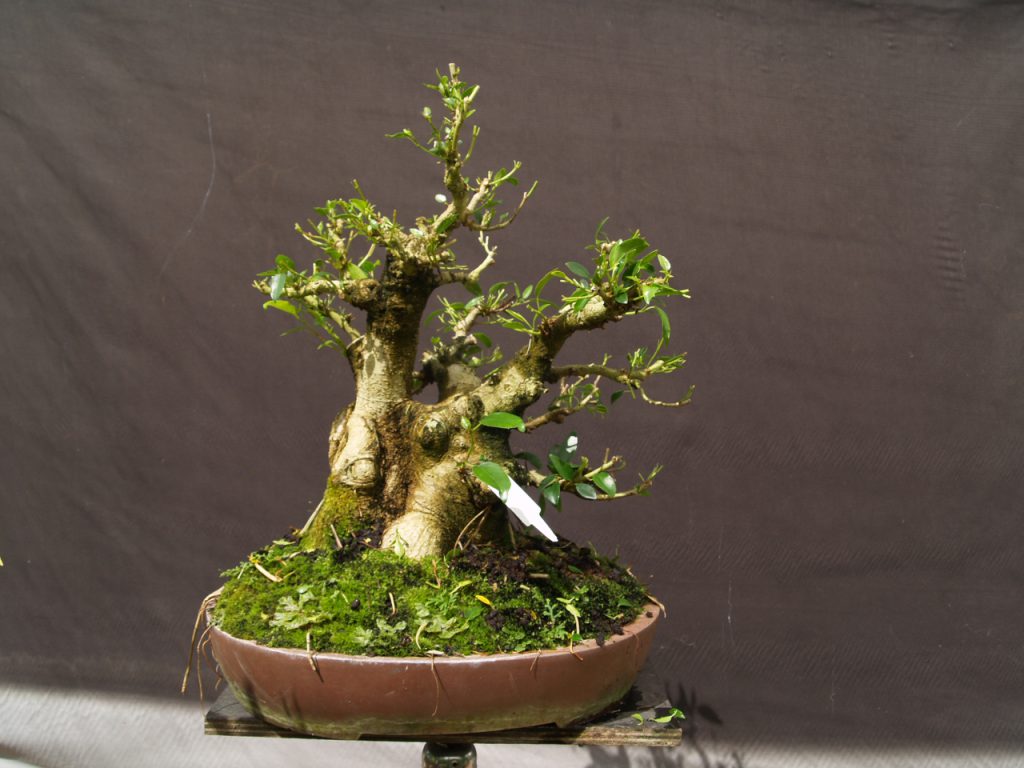
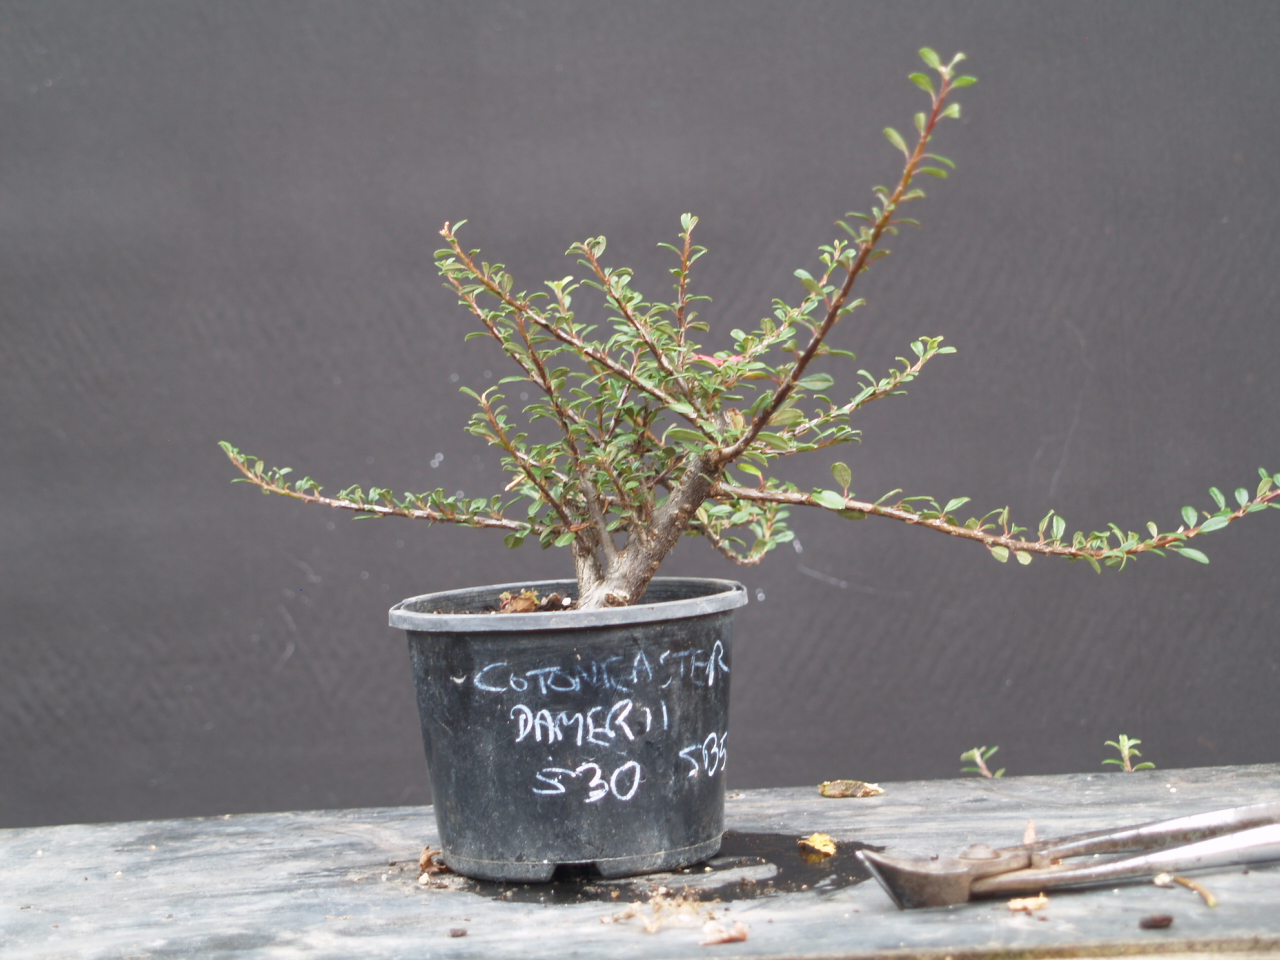
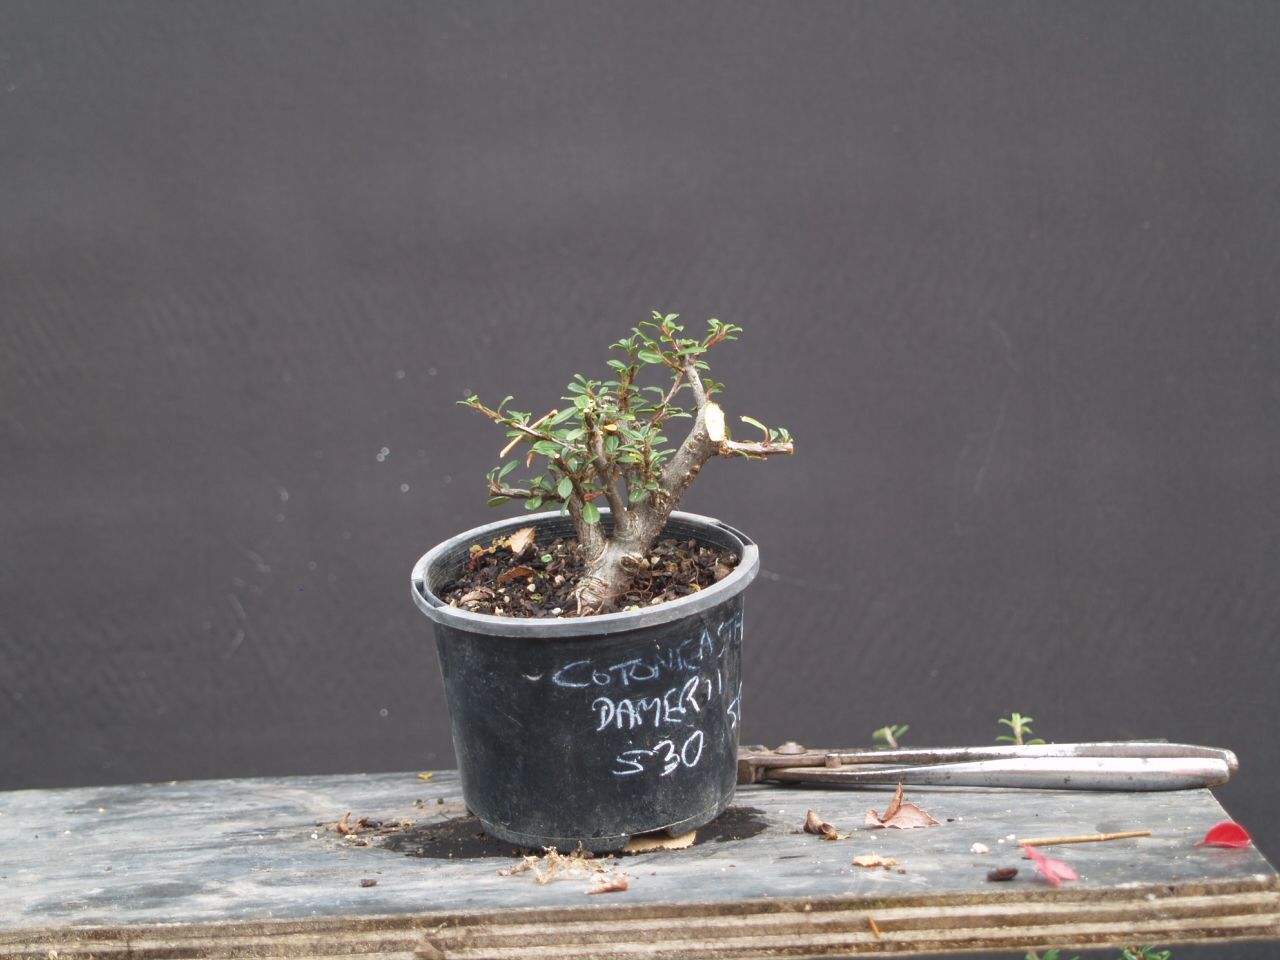
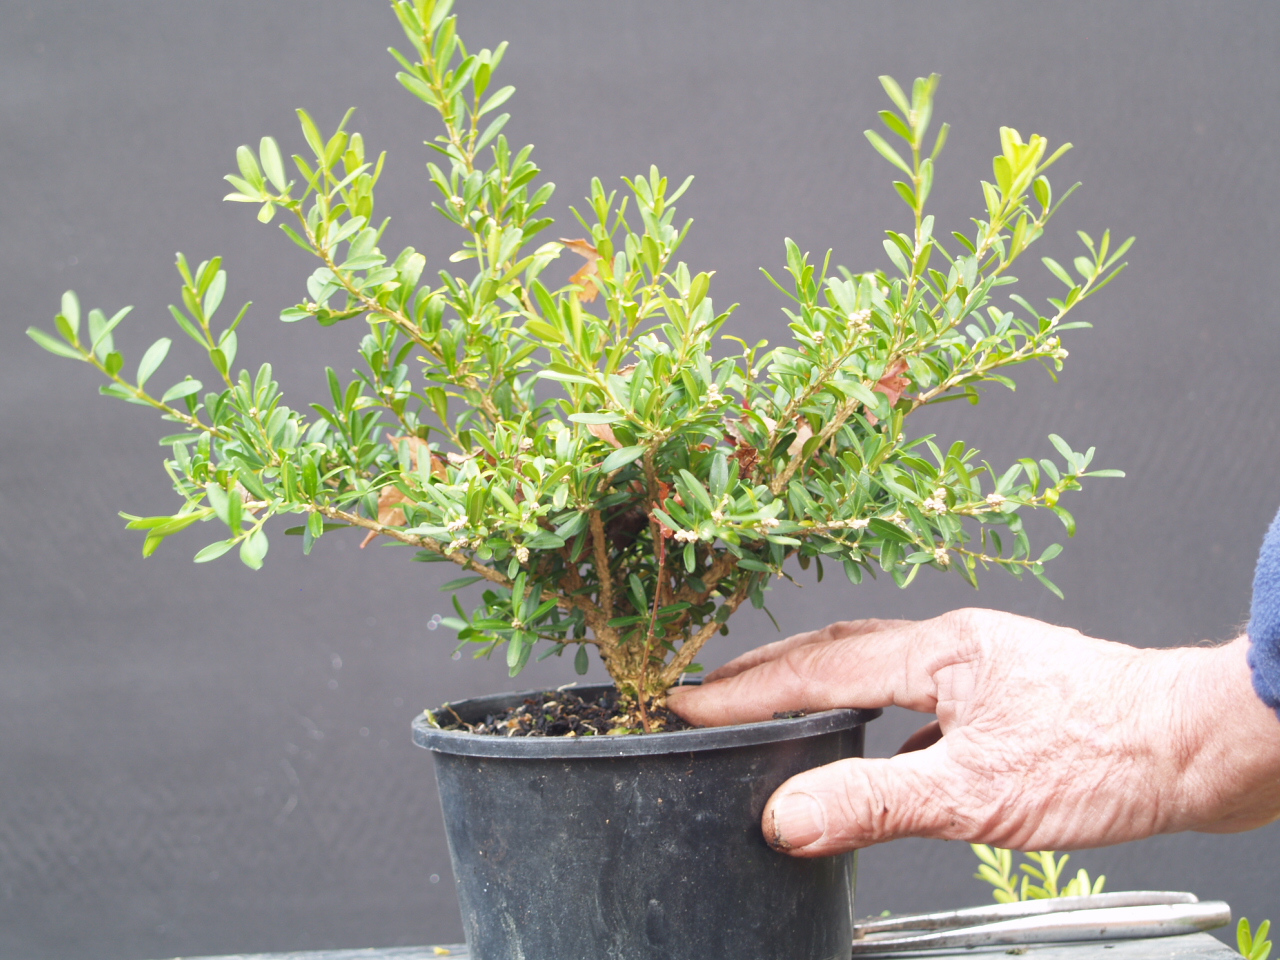
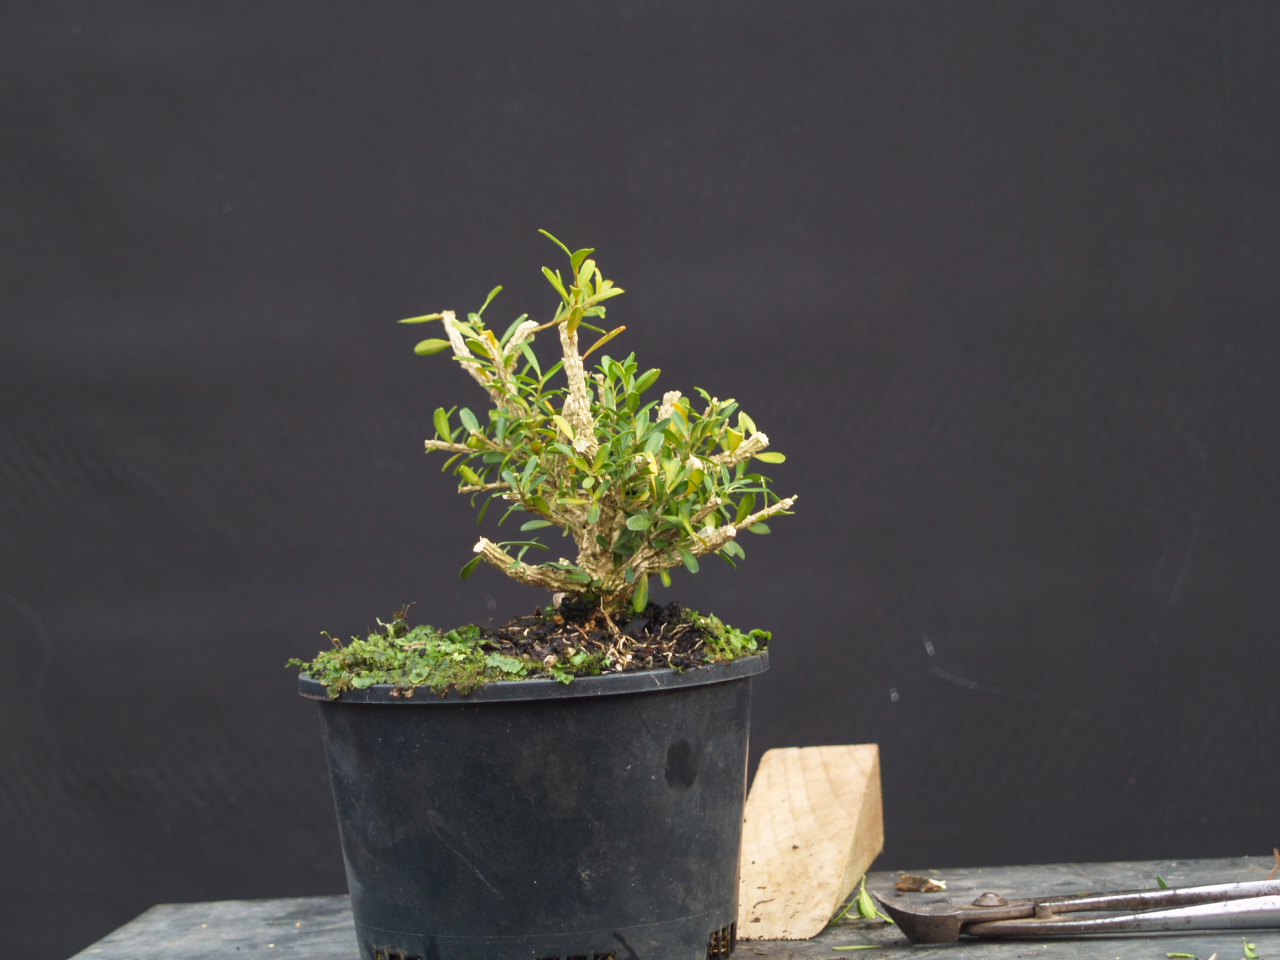
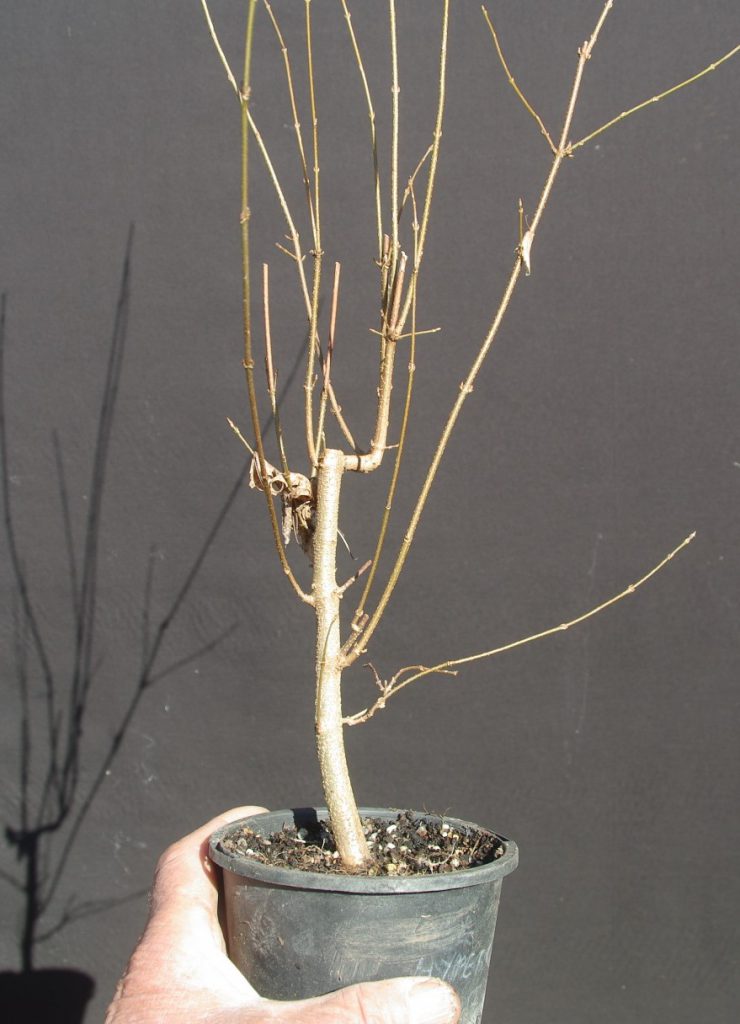
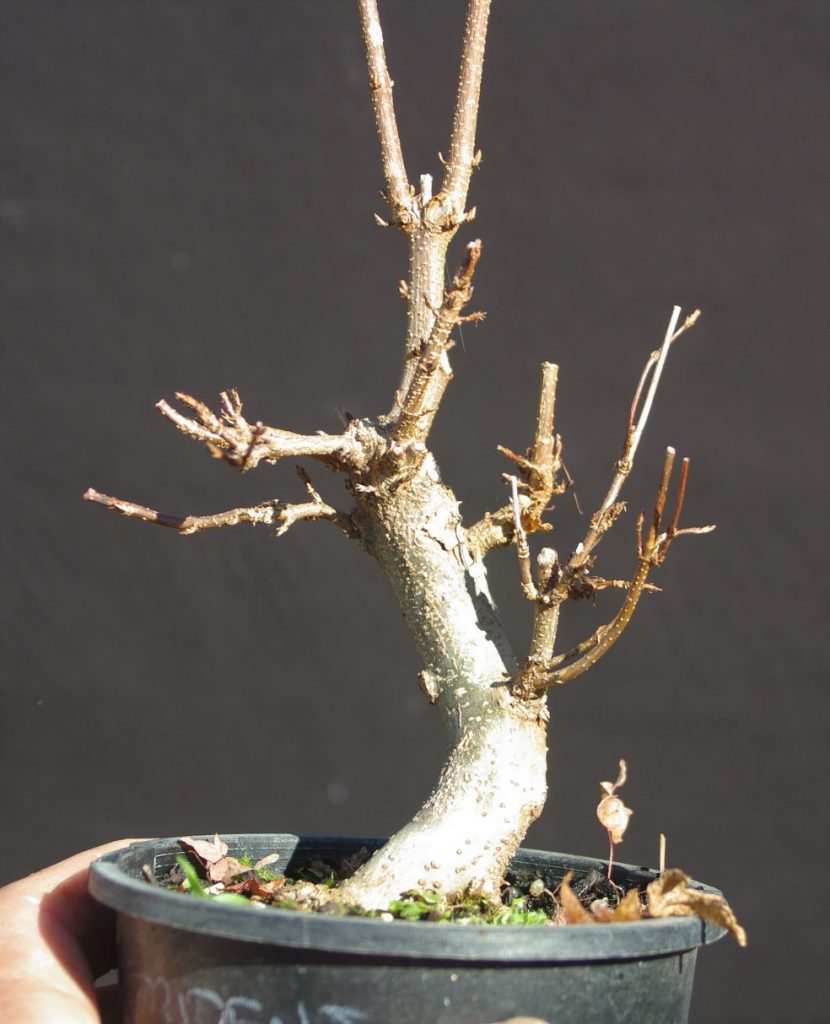
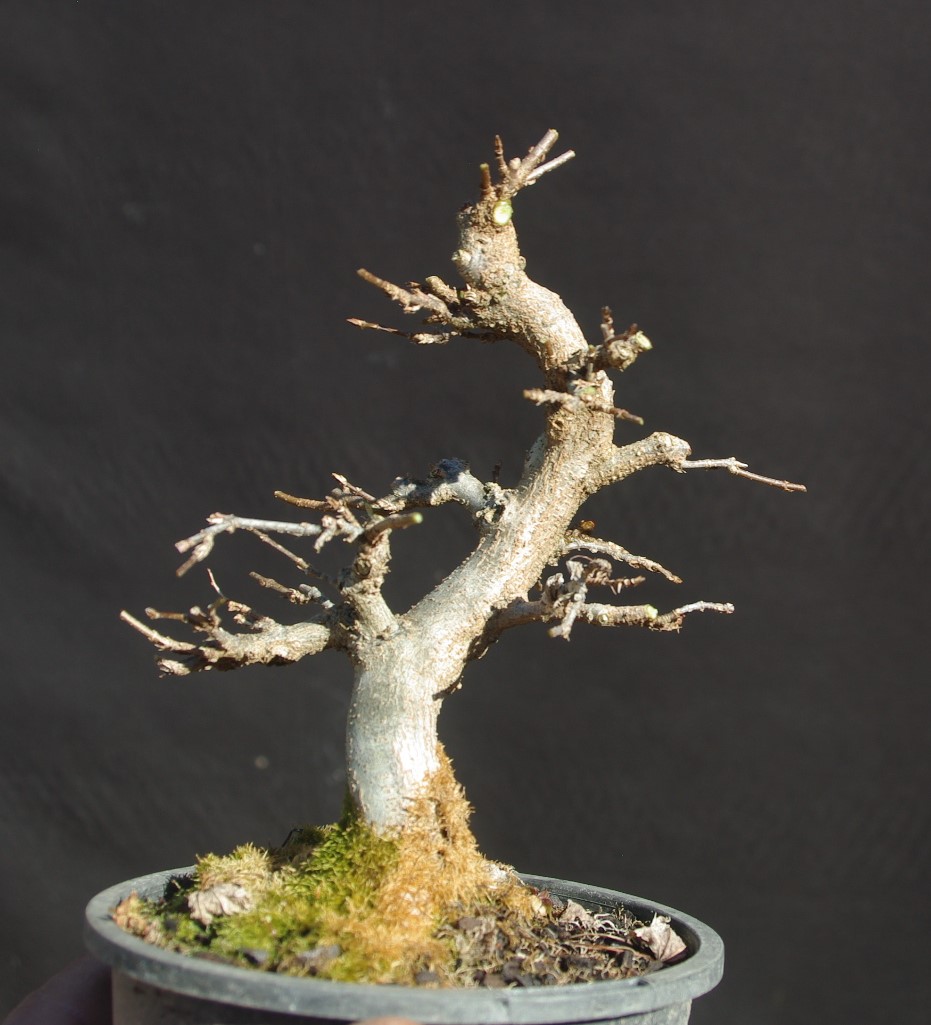
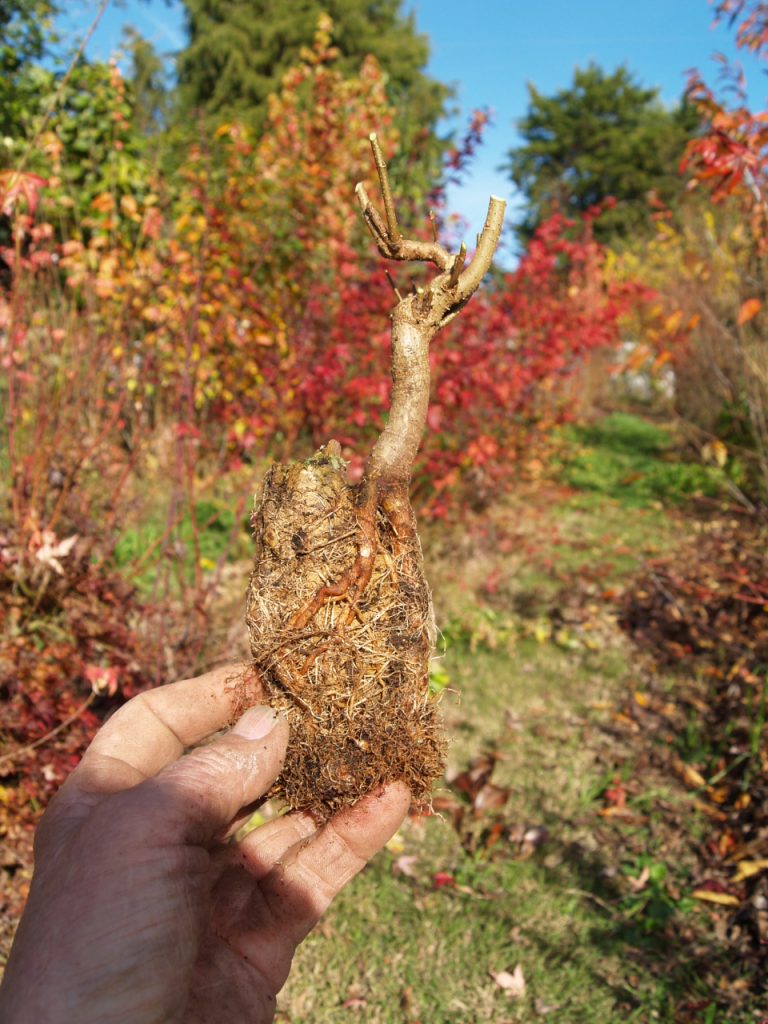
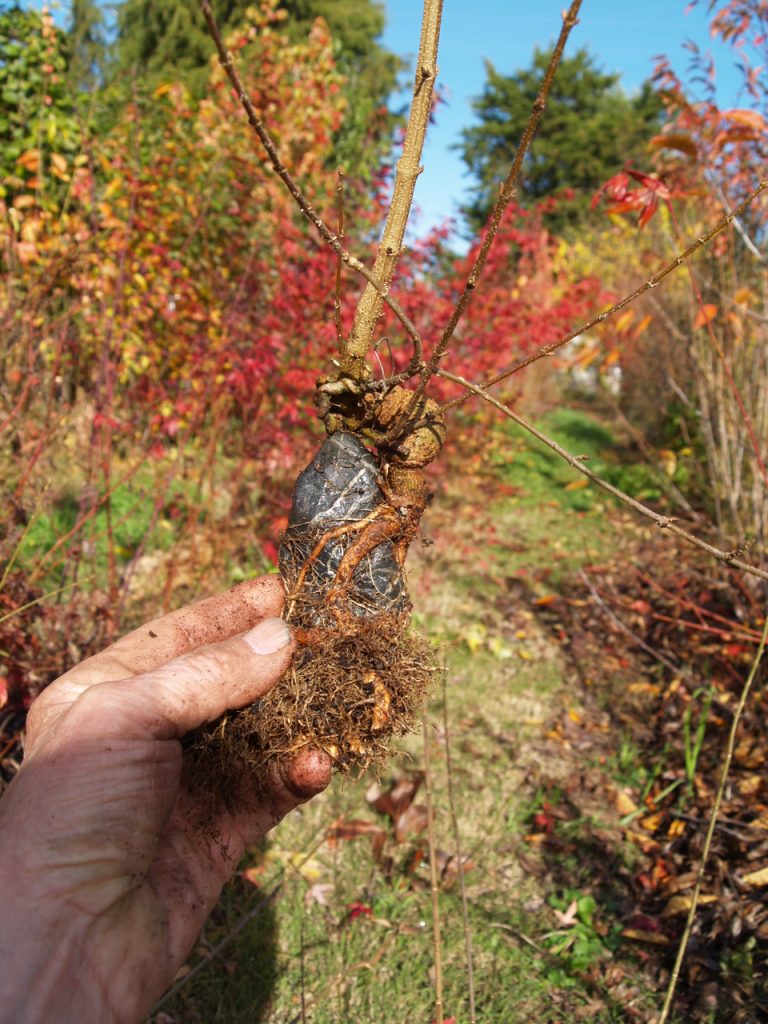
Many readers will already be able to assess and prune for developing trunk lines but for newer growers I’ll try to work through some of my decisions with the following tree.

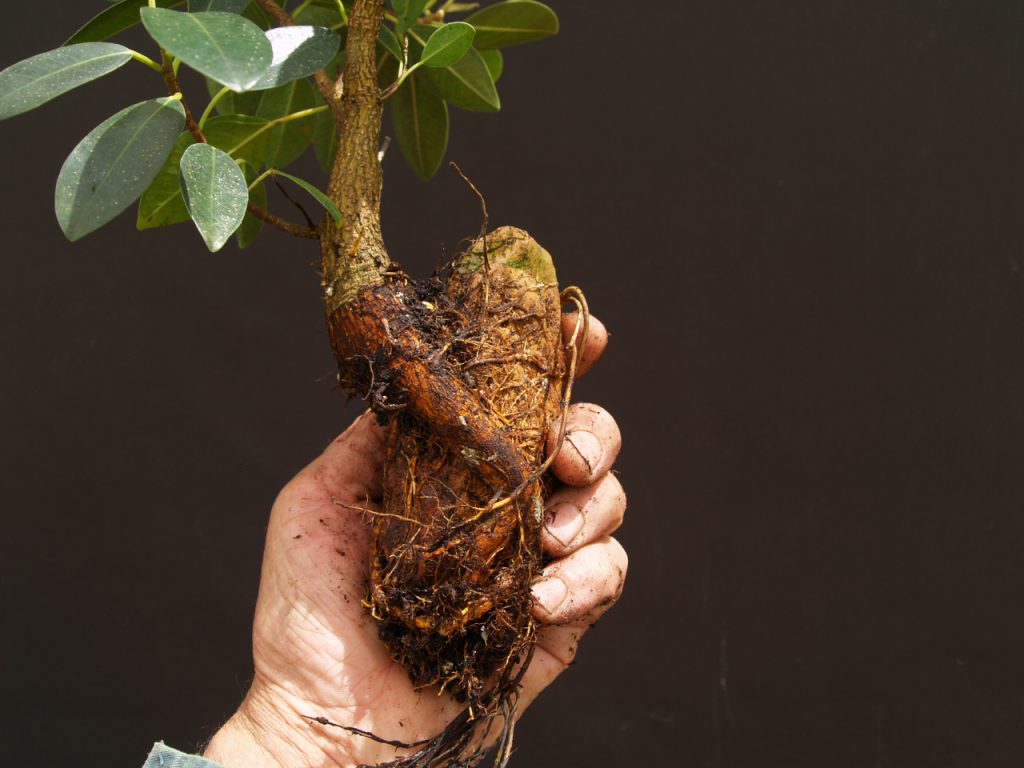
Check the appearance, roots, rock, trunk line and any branching from all sides and angles.

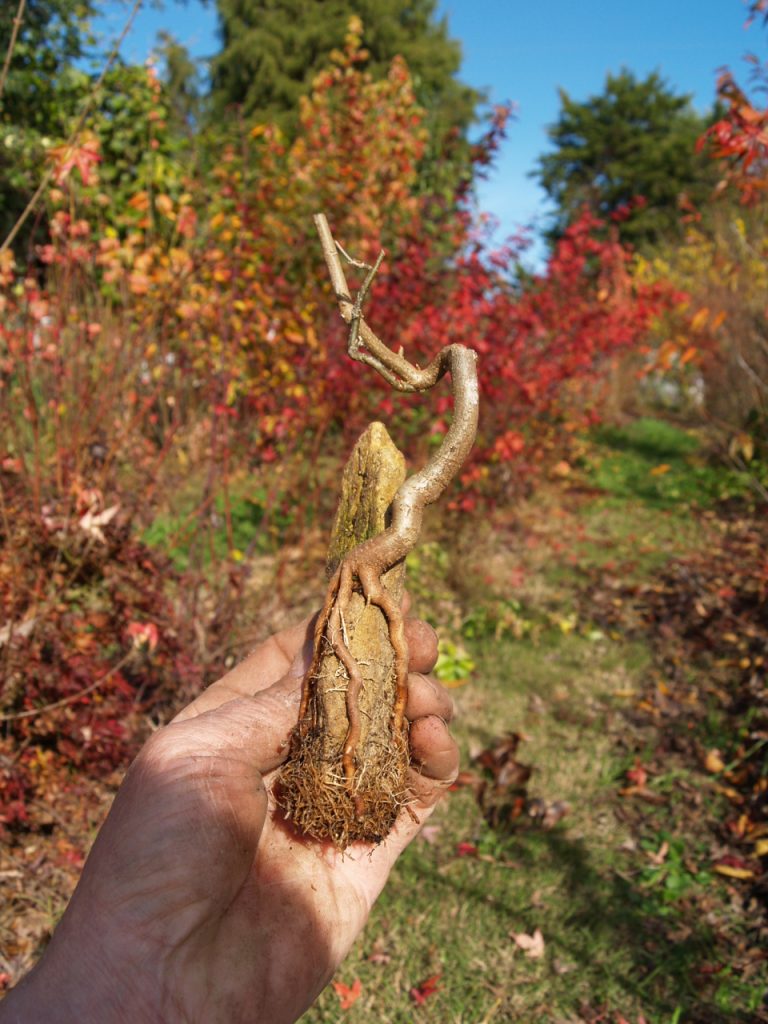
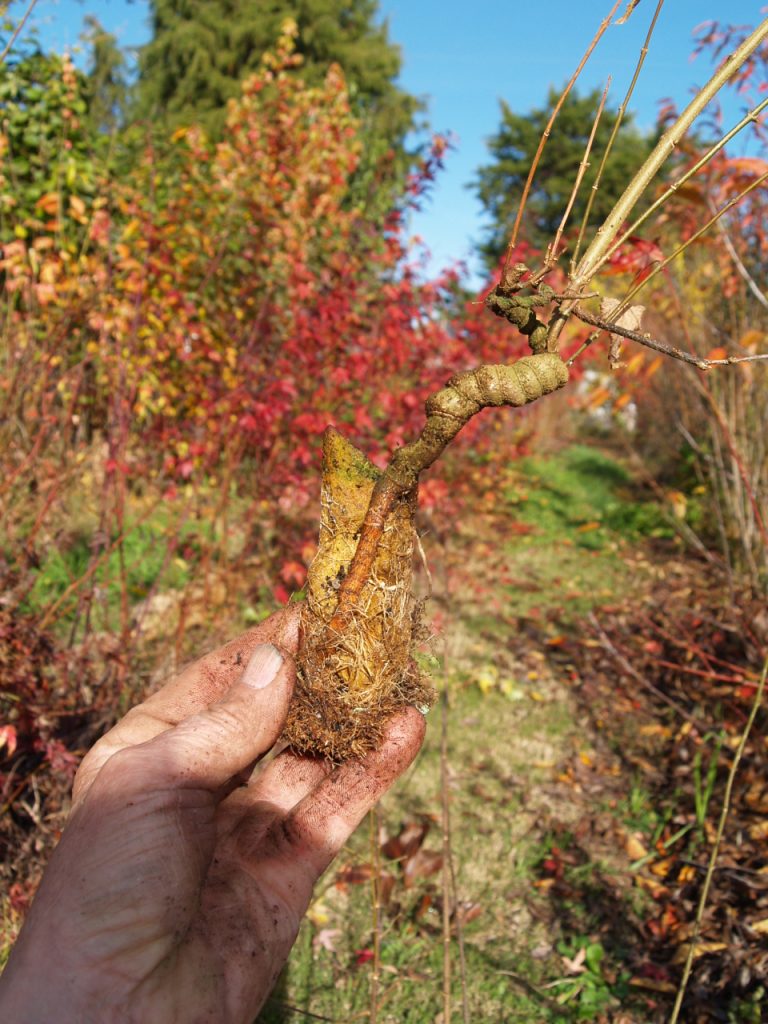
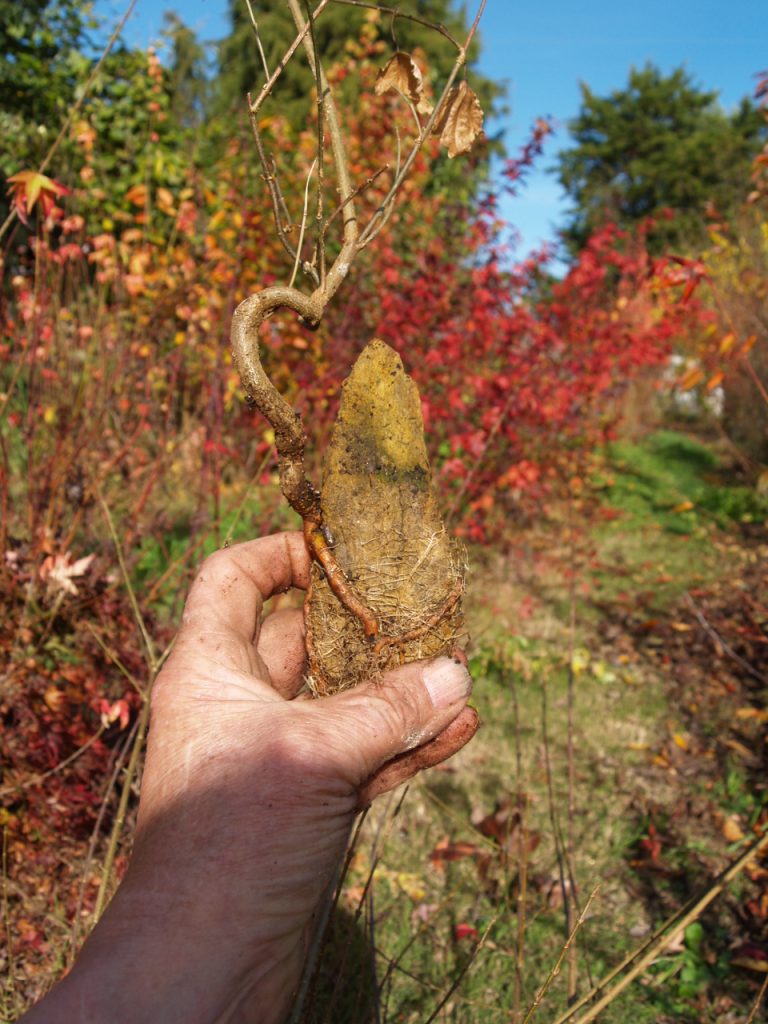
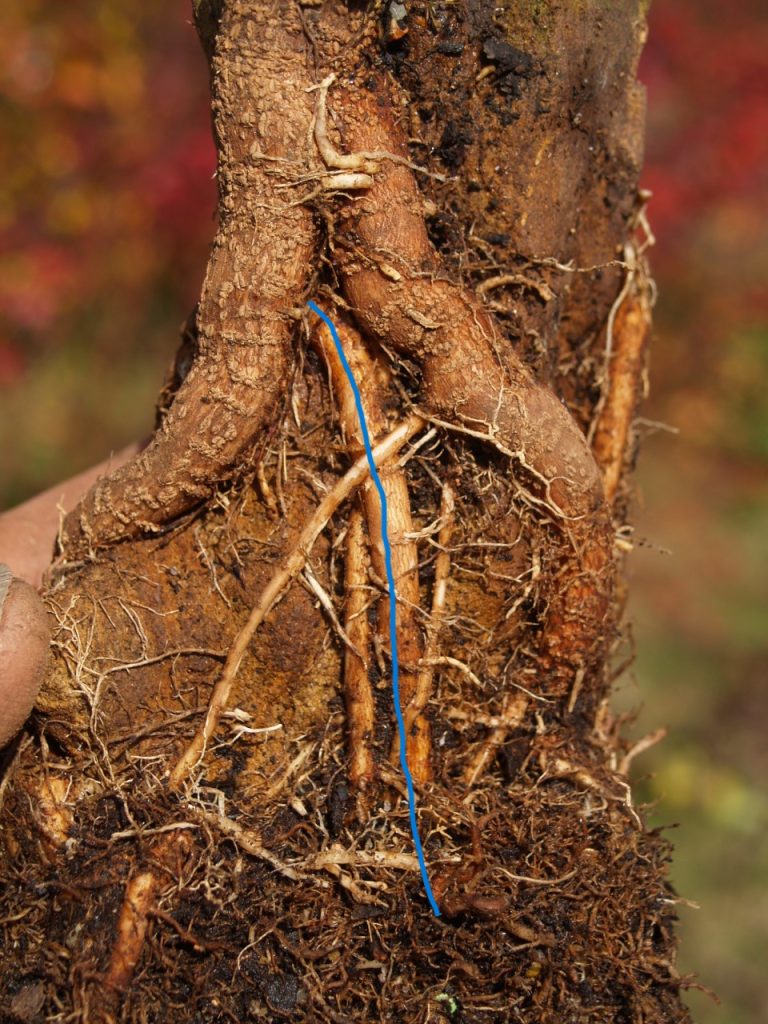
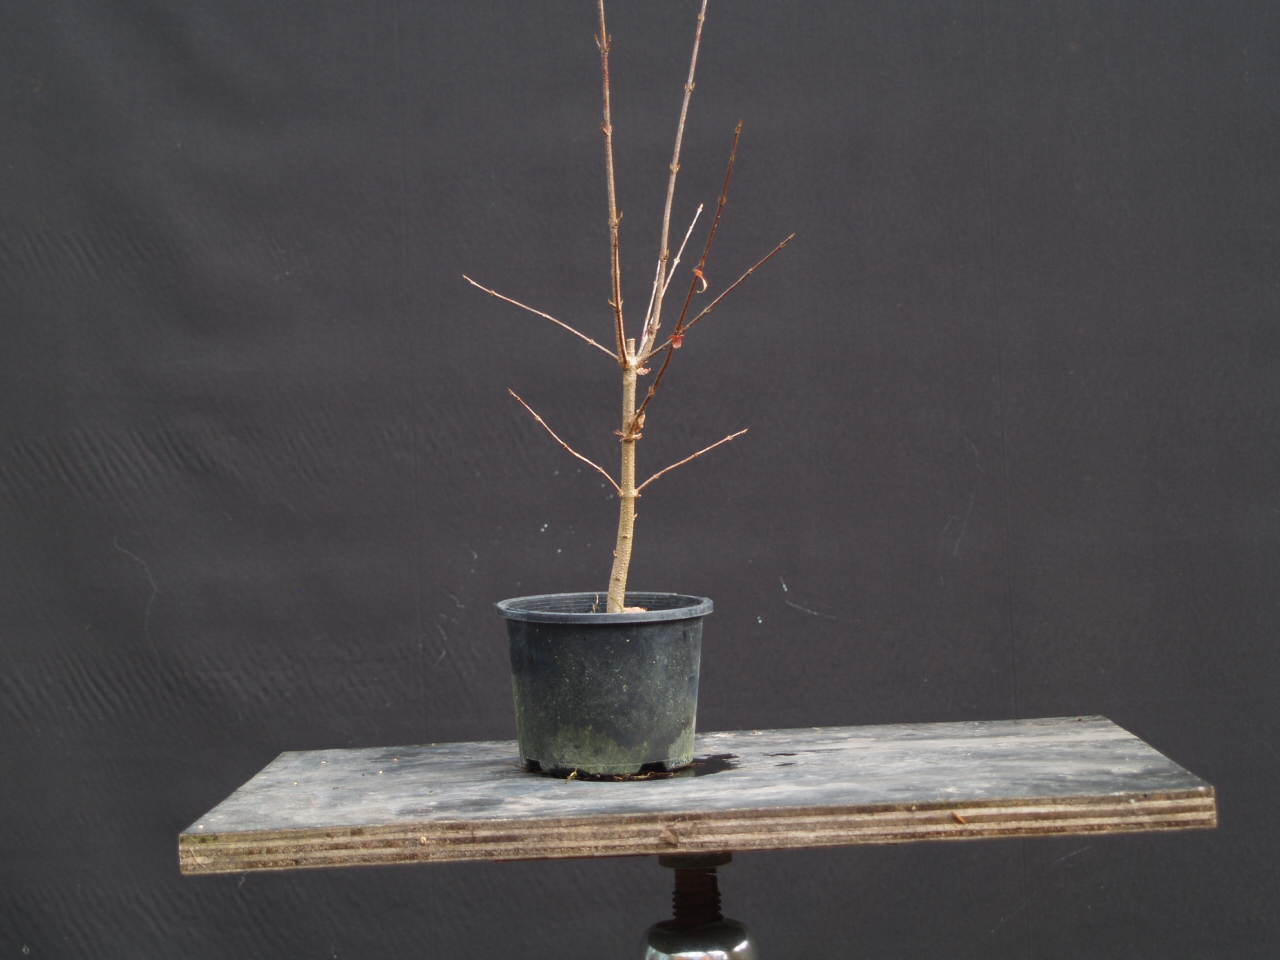
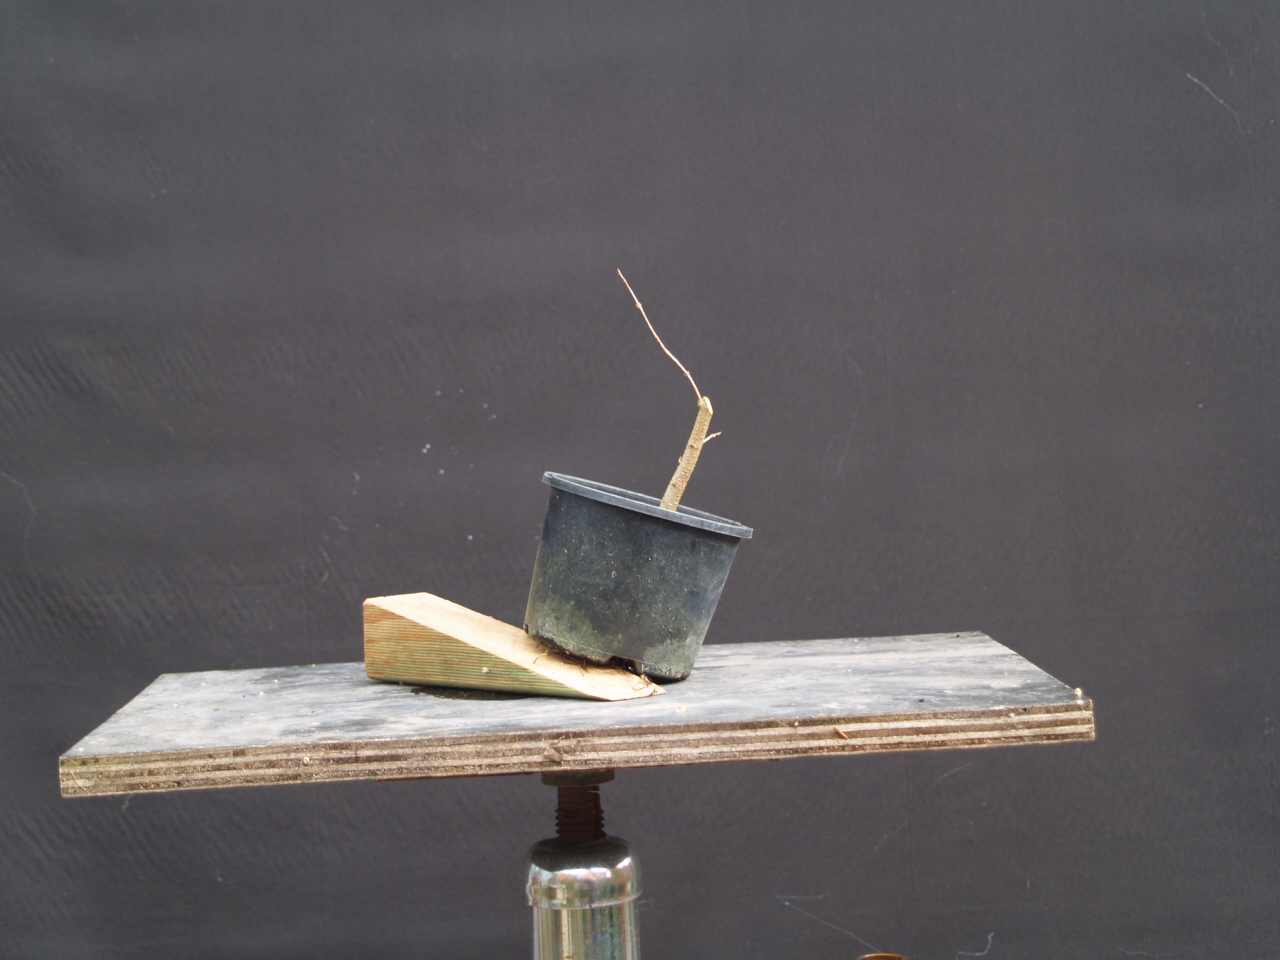
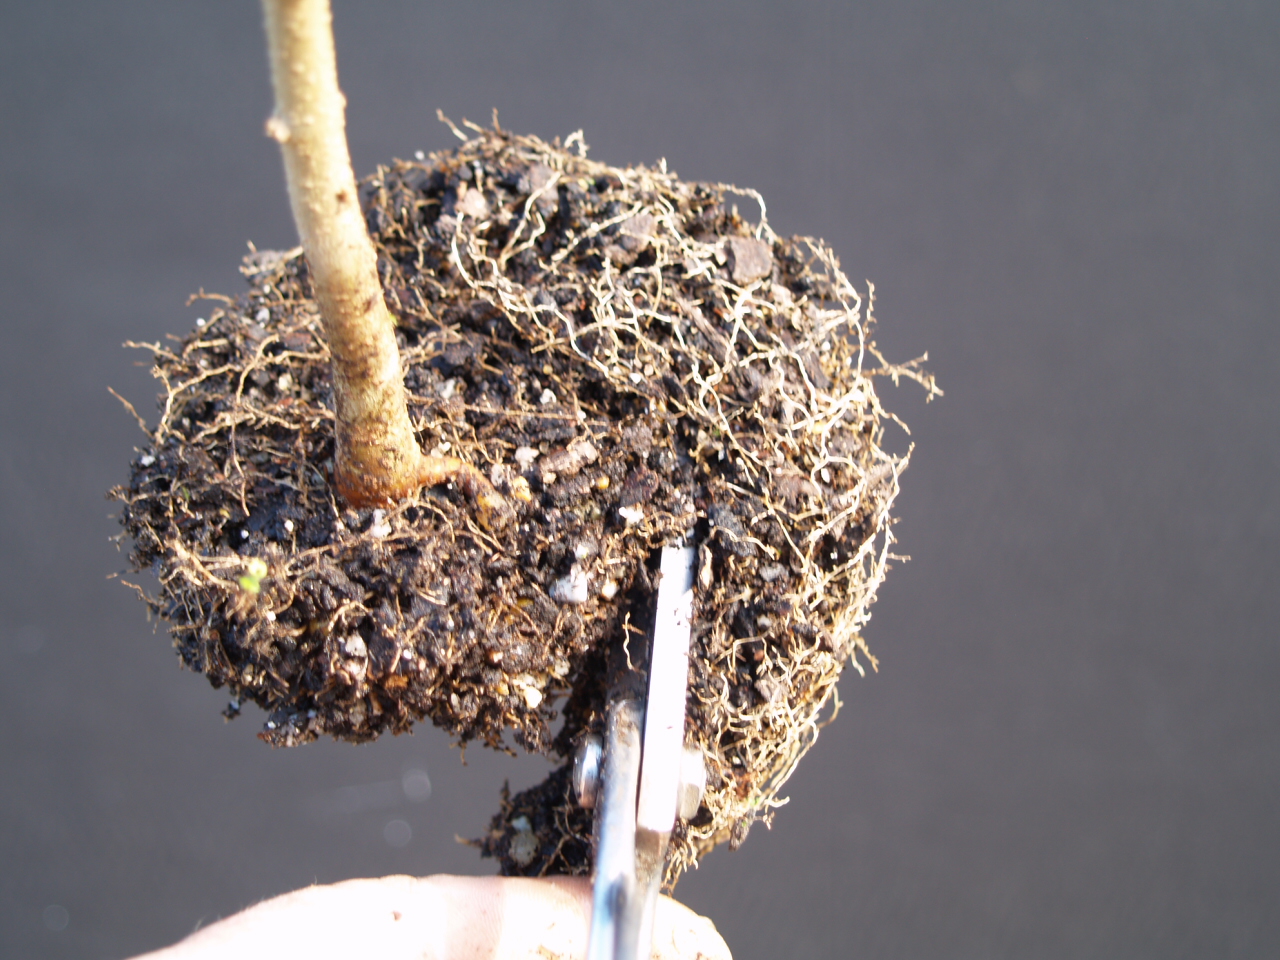
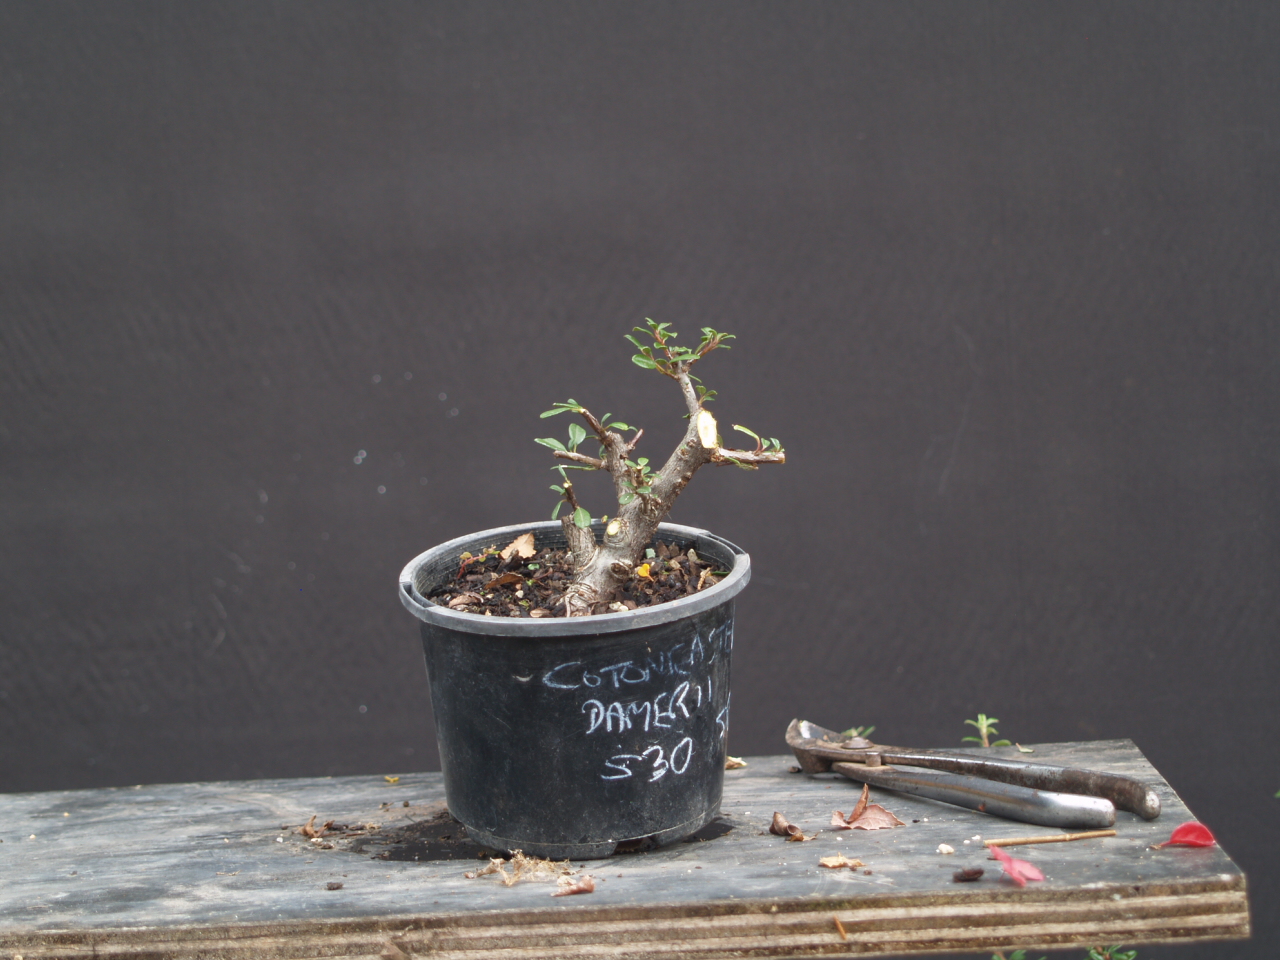
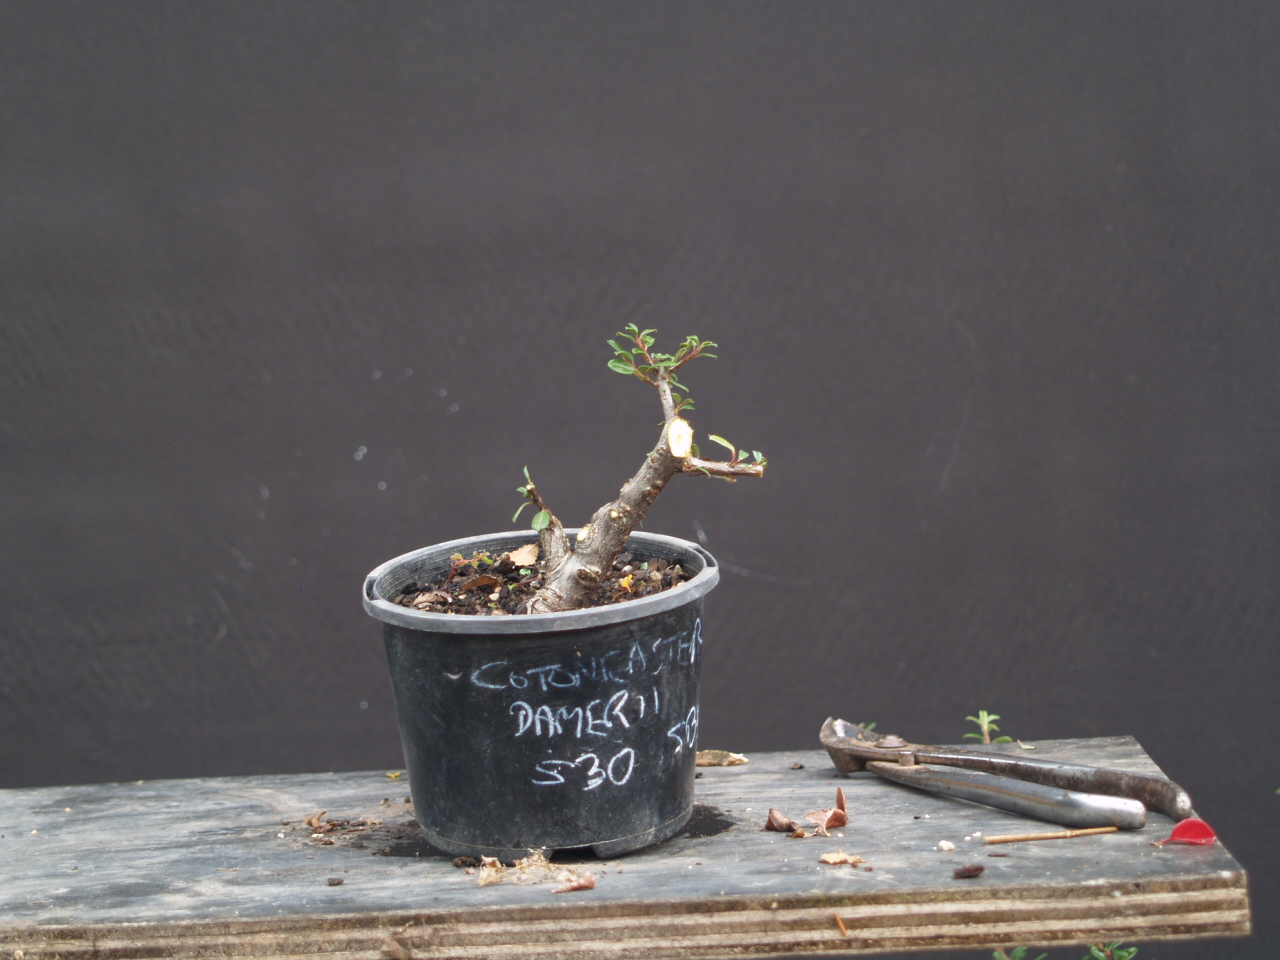
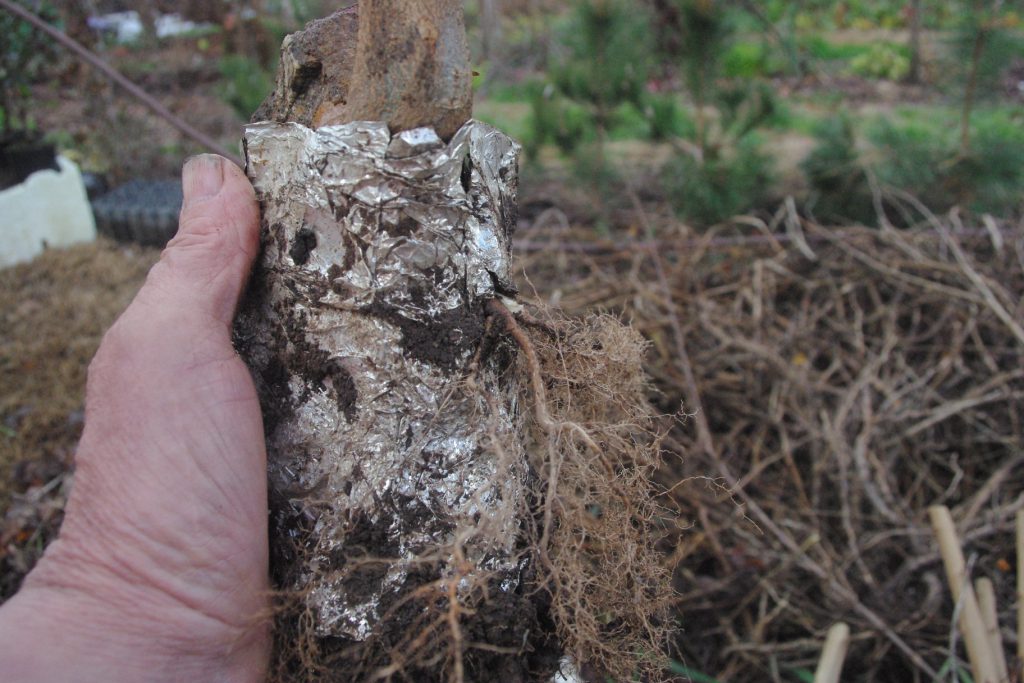
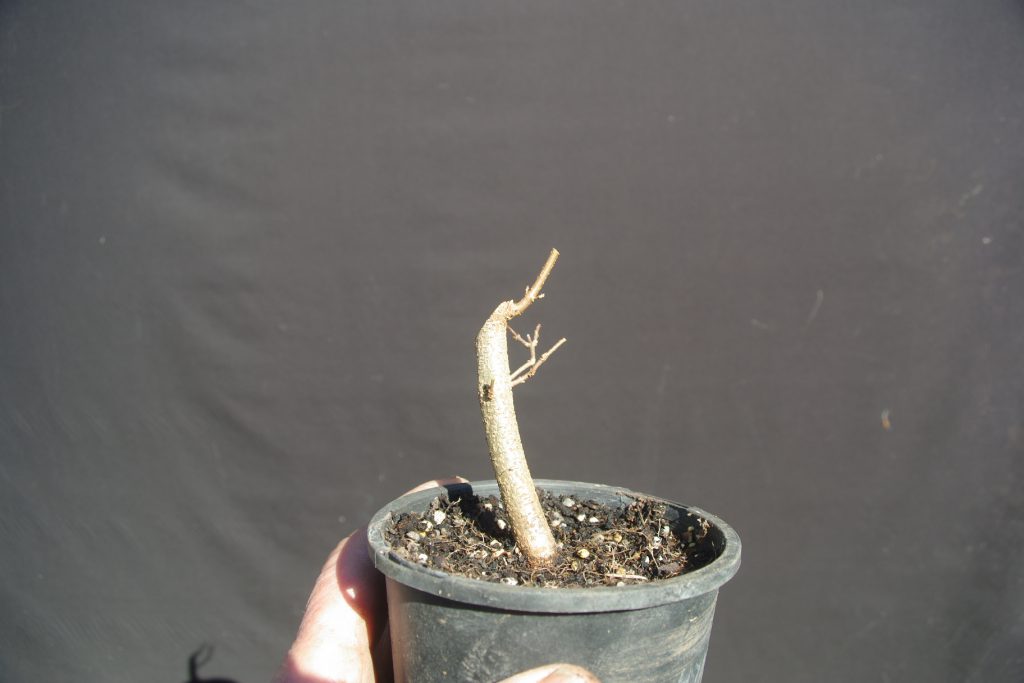
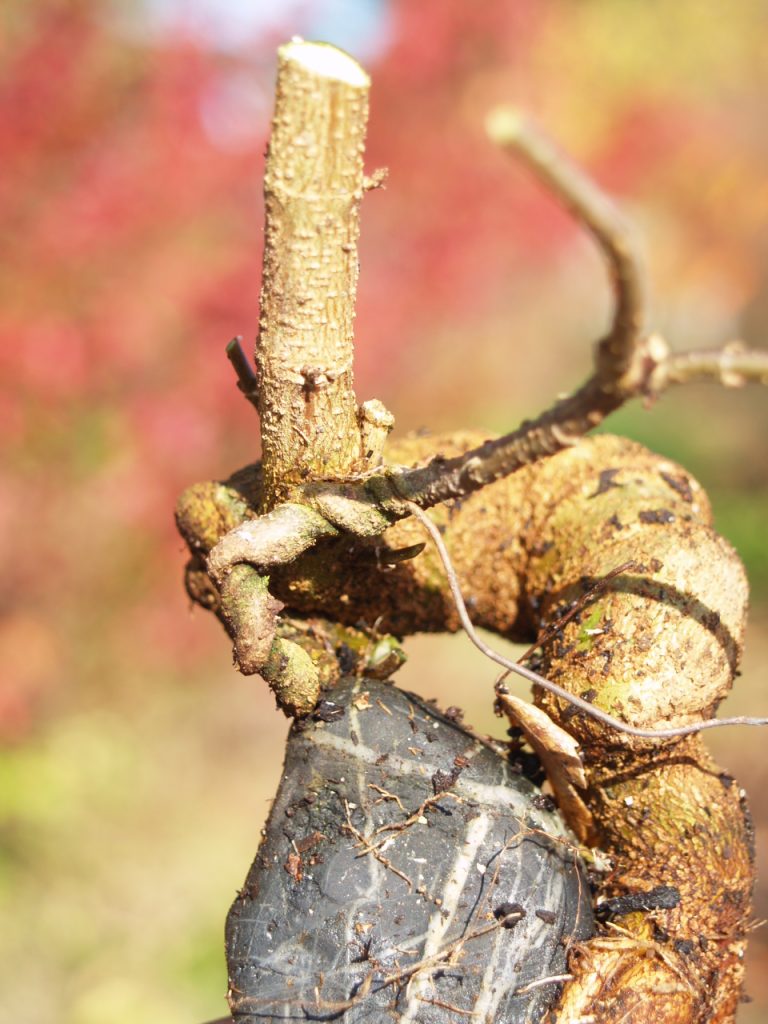
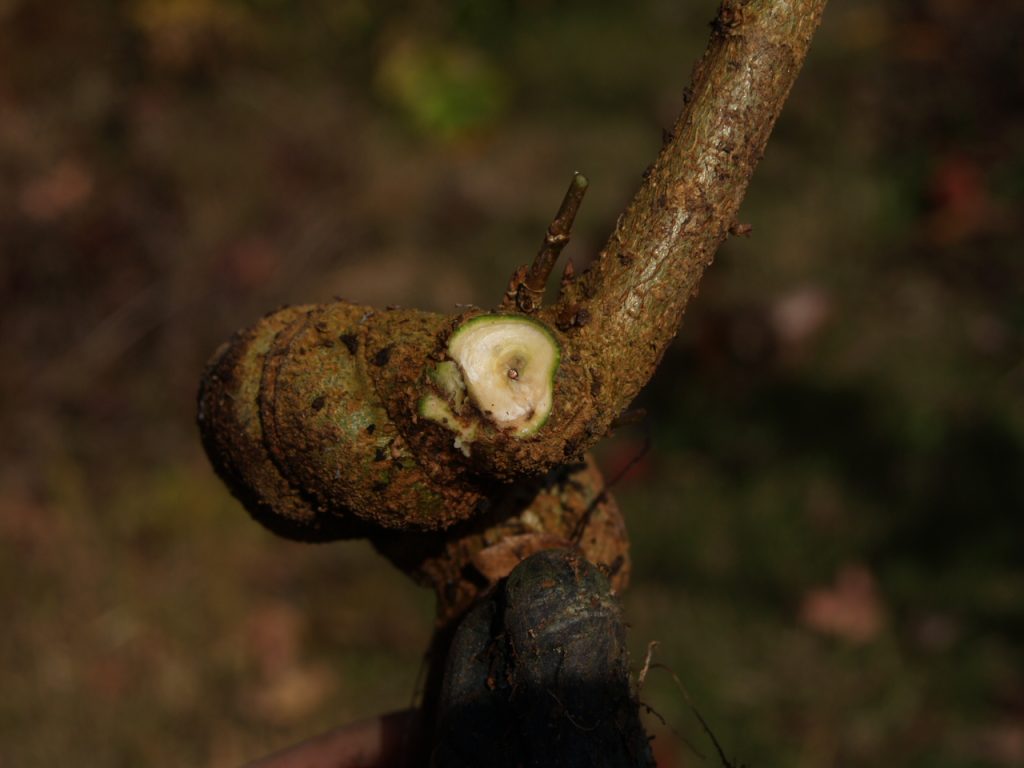
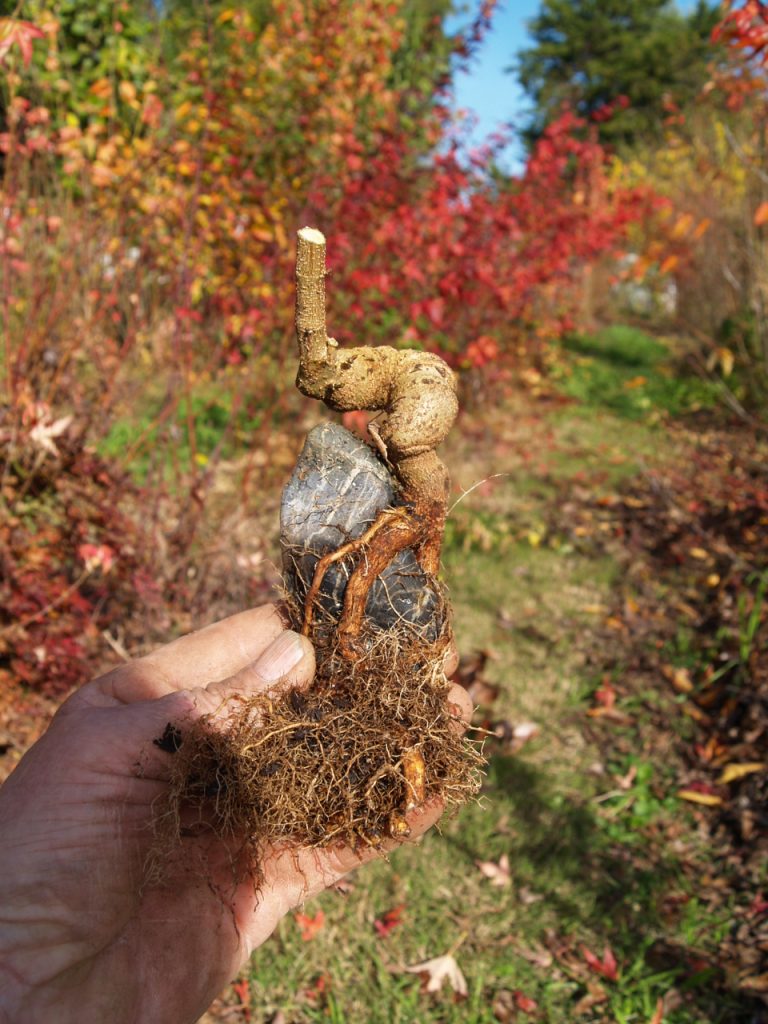
The main trunk line seems to compliment the shape of the rock from a couple of viewing points so that’s a good start. I can see that the original trunk was wired and bent (thinner upper section) but a new shoot has grown strongly vertical. Both those lines would be Ok as a trunk but the new, thicker shoot is almost the same thickness of the lower trunk meaning almost no taper in the trunk. Also that new shoot has long, relatively straight internodes so I would not be able too develop branches where I want them if that’s chosen as the main trunk. I decide to chop that new part just above the first node. New buds will sprout and grow in the coming growing season and I’ll reassess again next year.

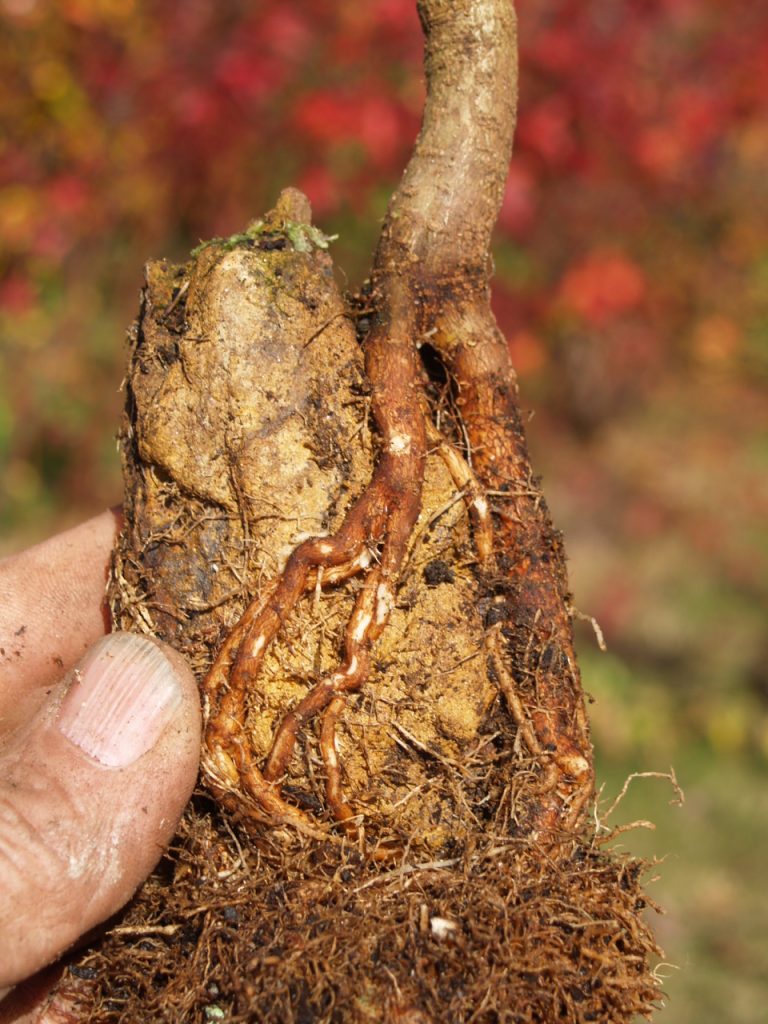
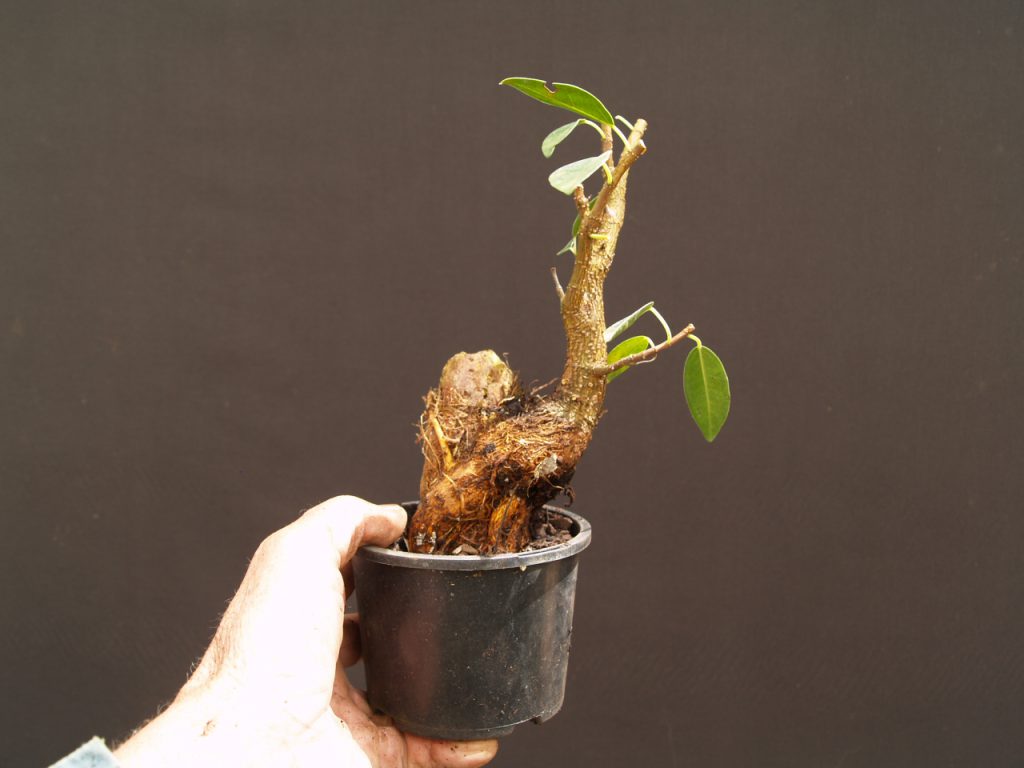
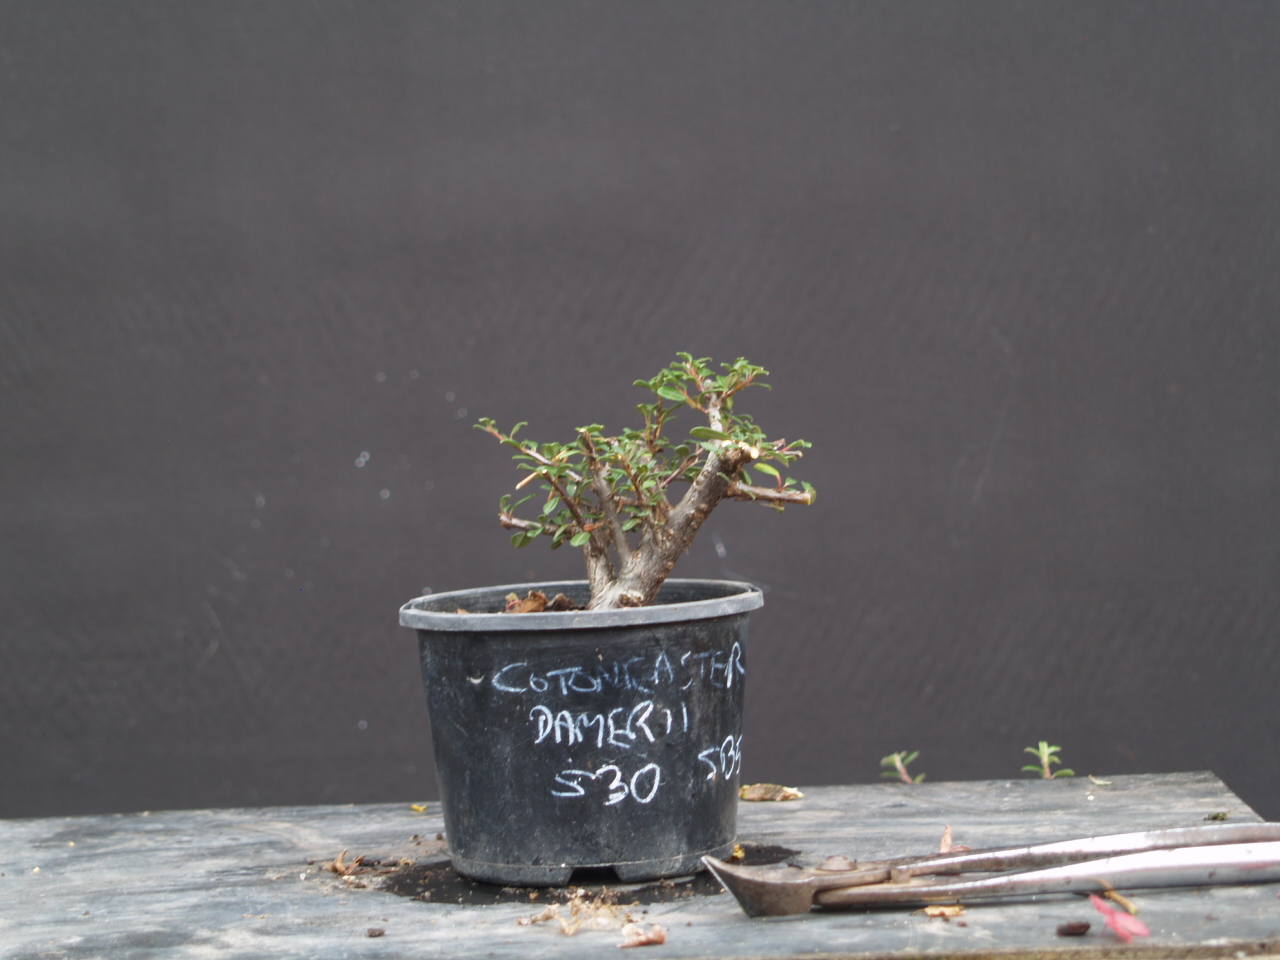
Both trunk and roots would be better with some more thickening so I decide to rewrap and plant it in a grow box for another season.
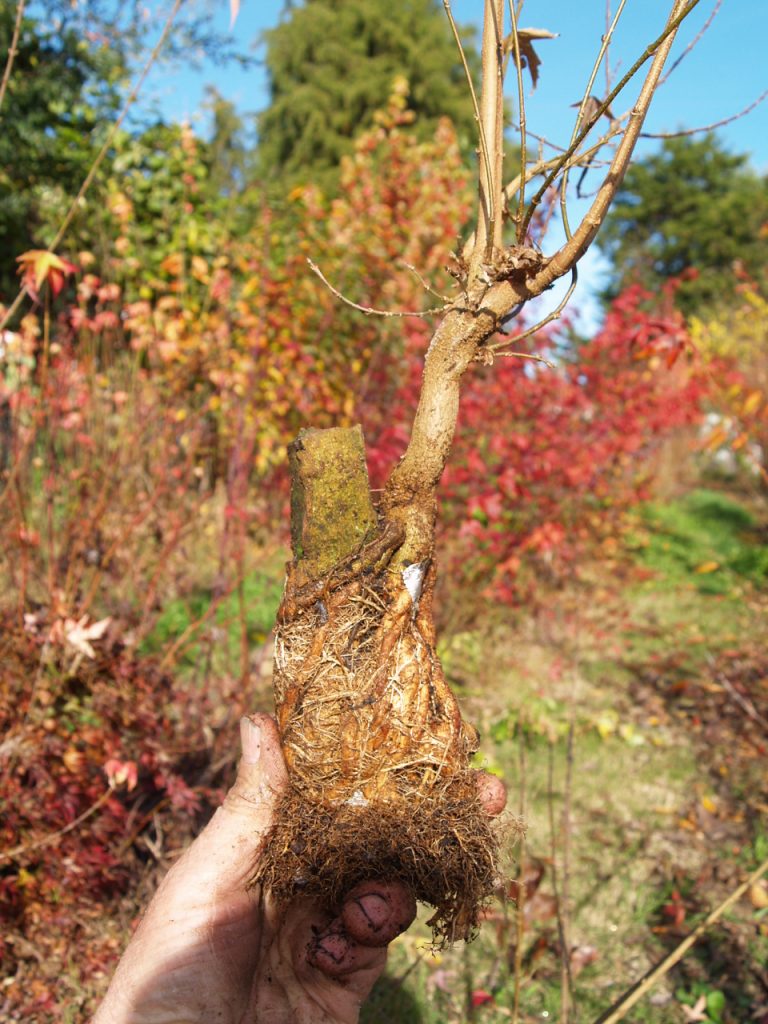
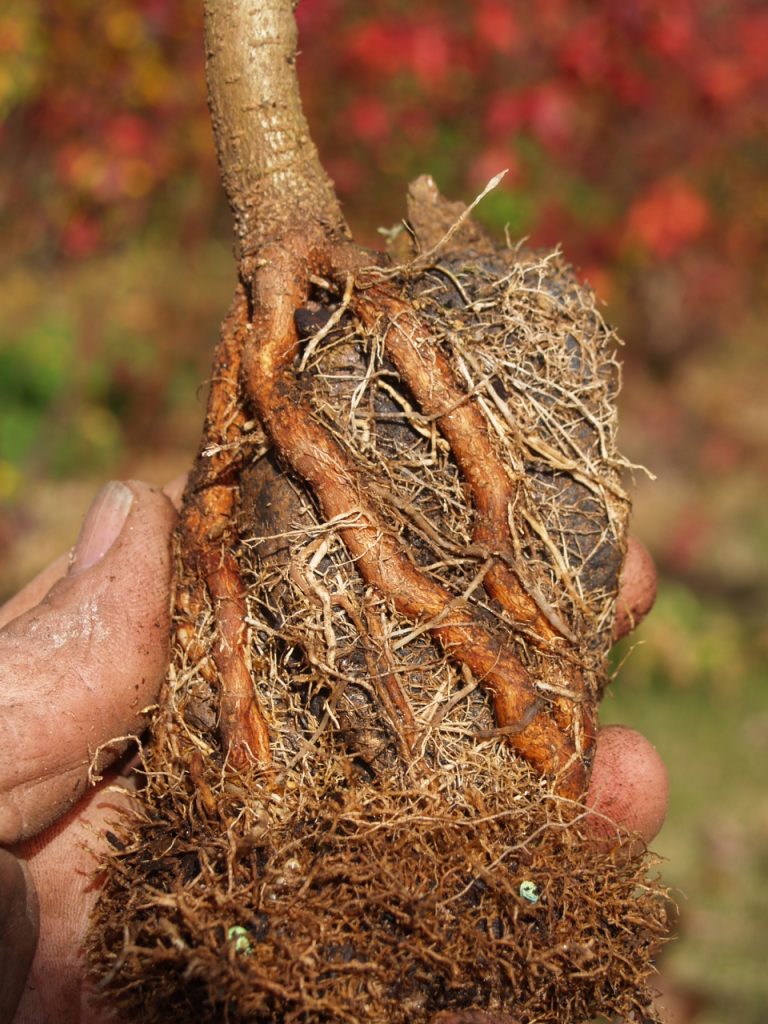
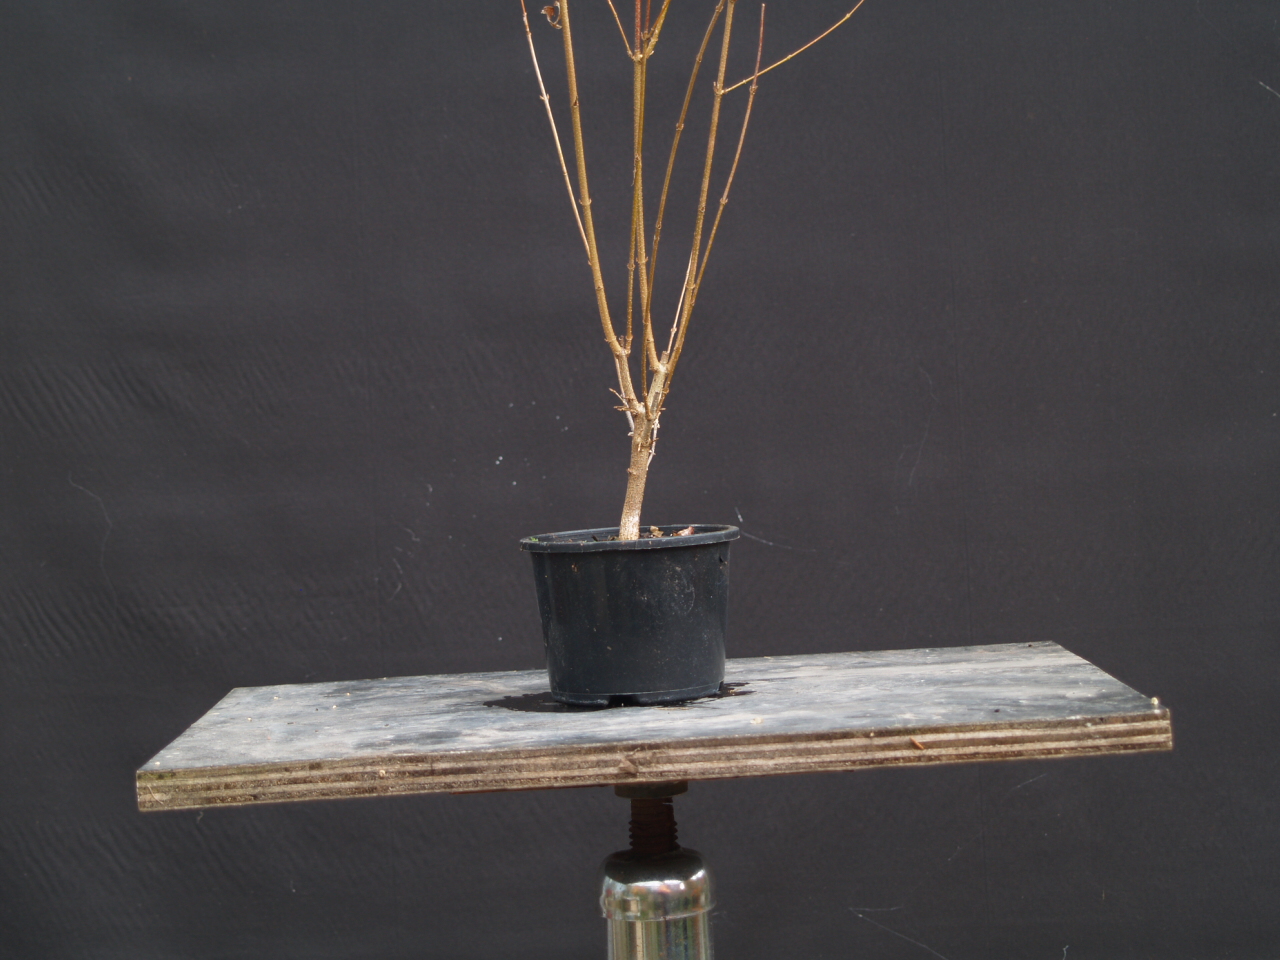
Next subject

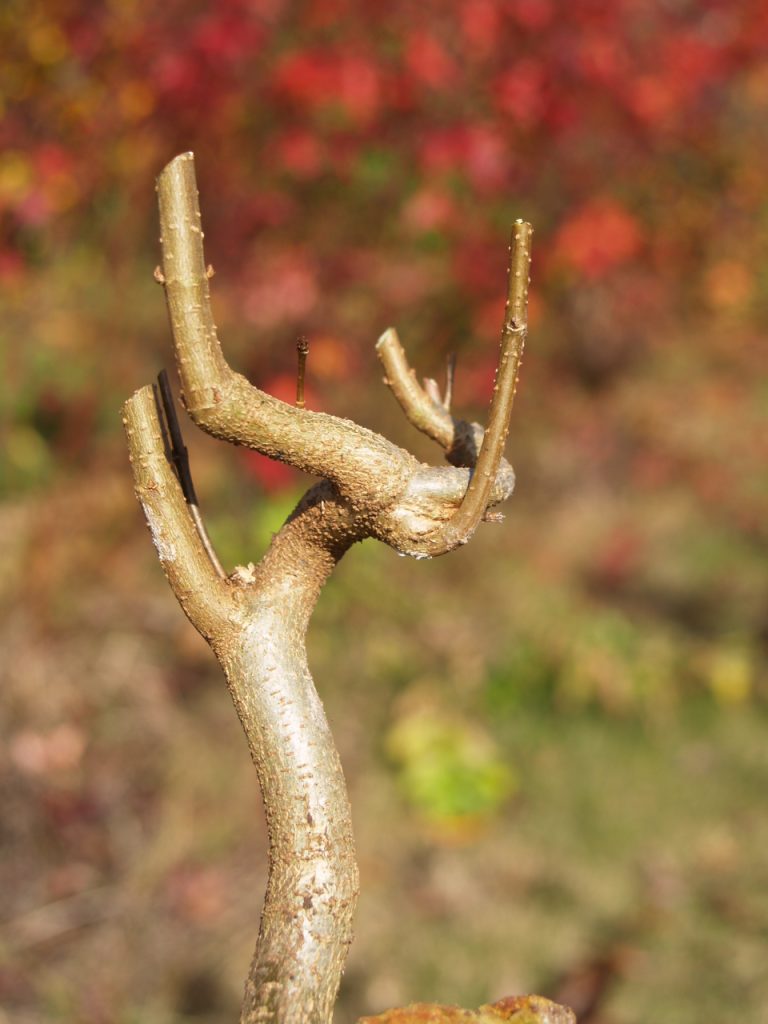
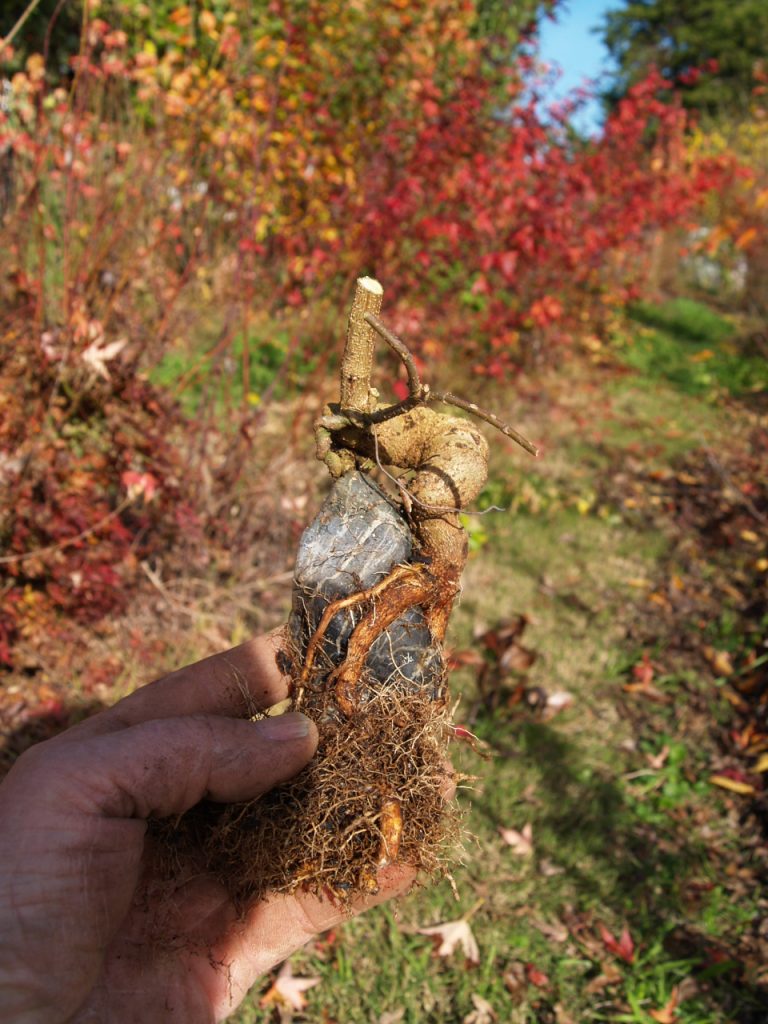
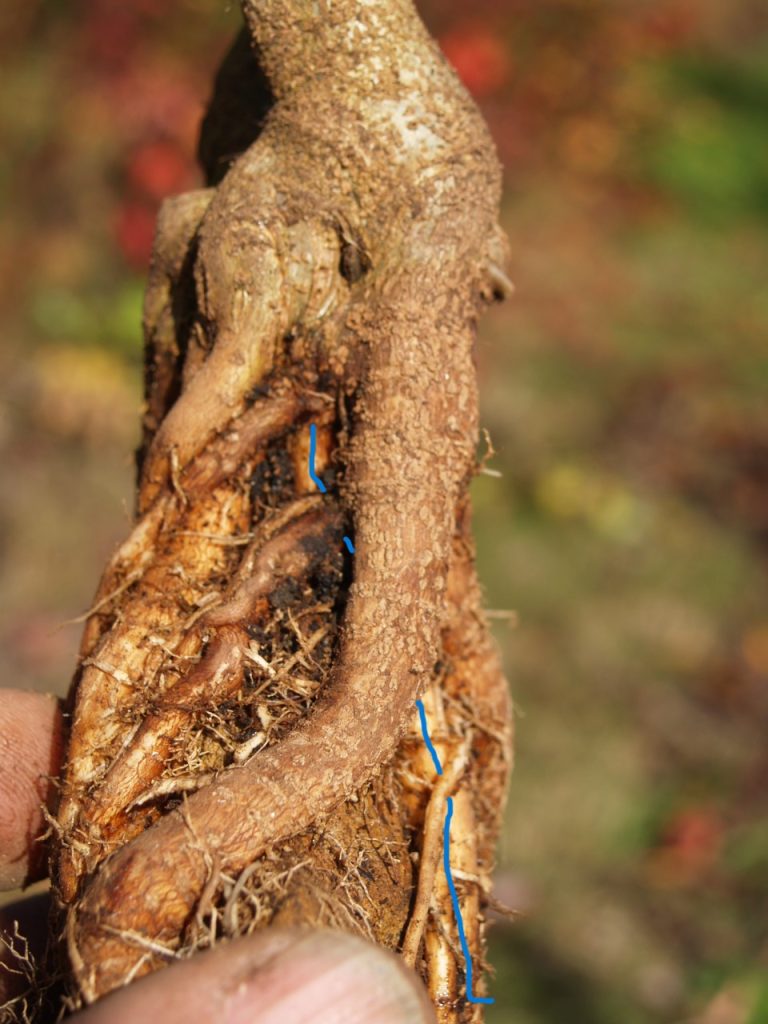
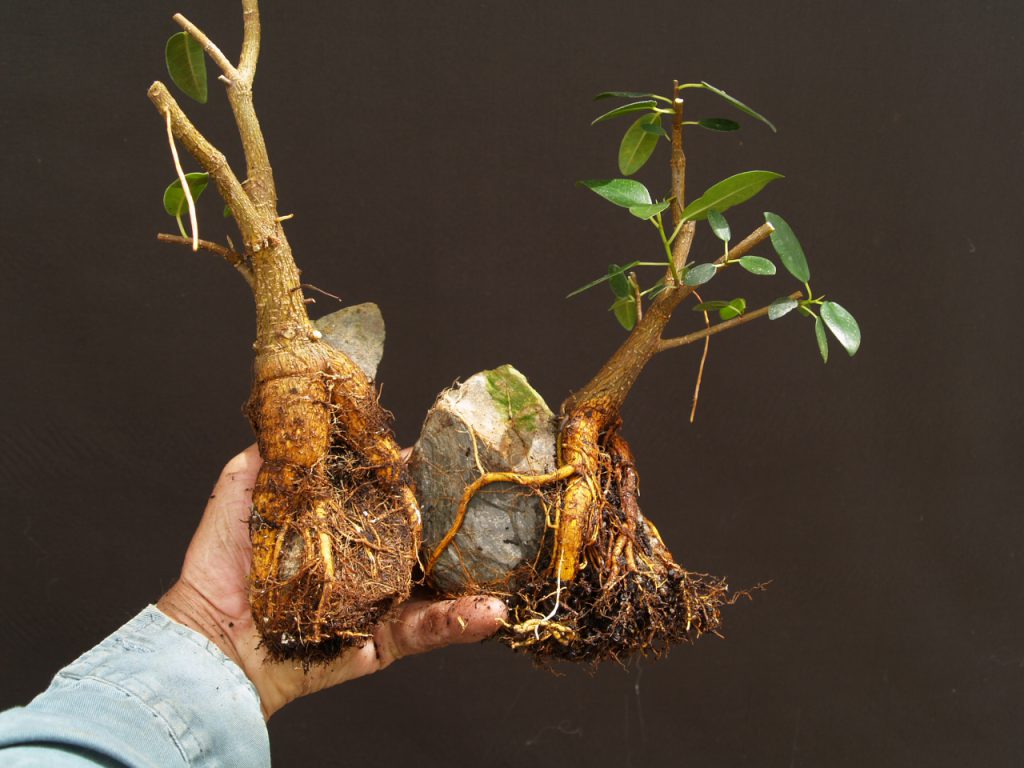
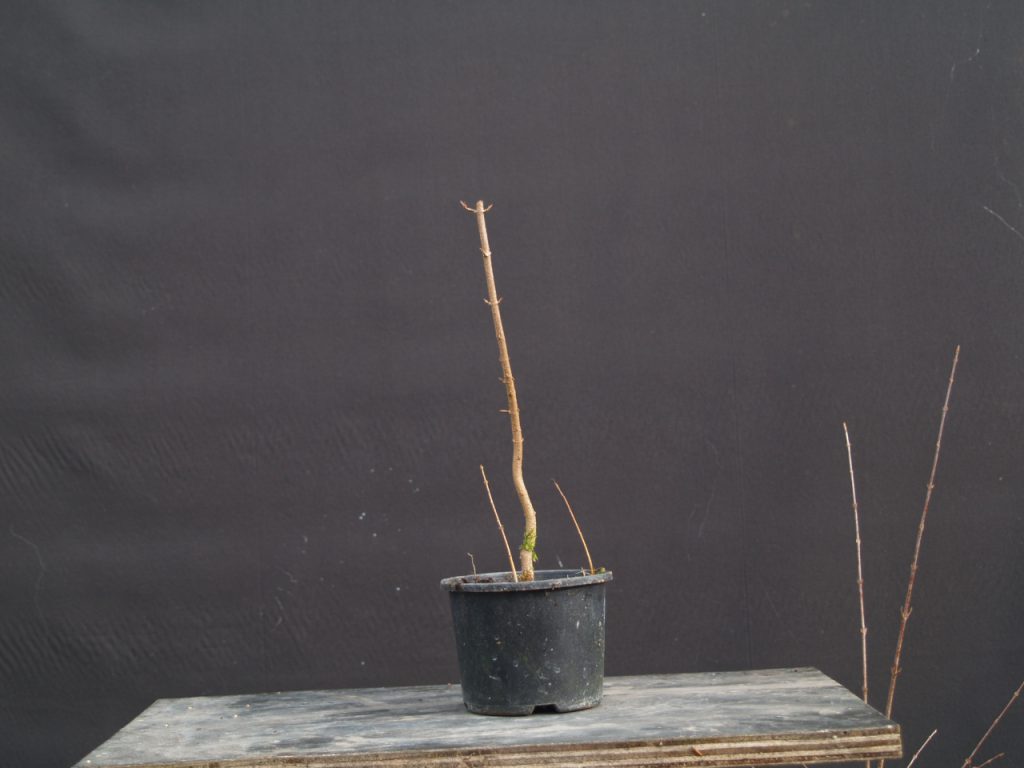
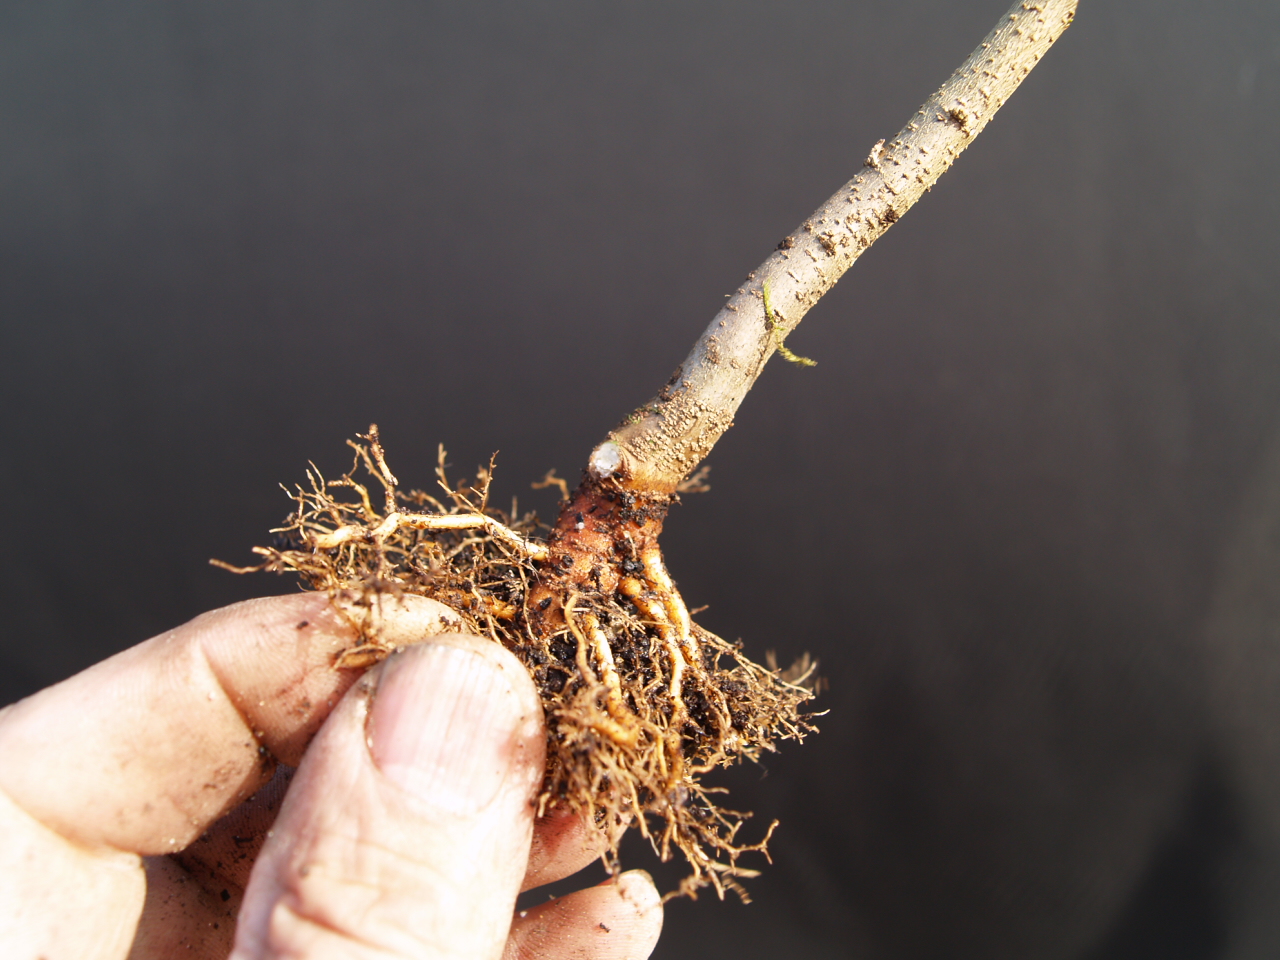
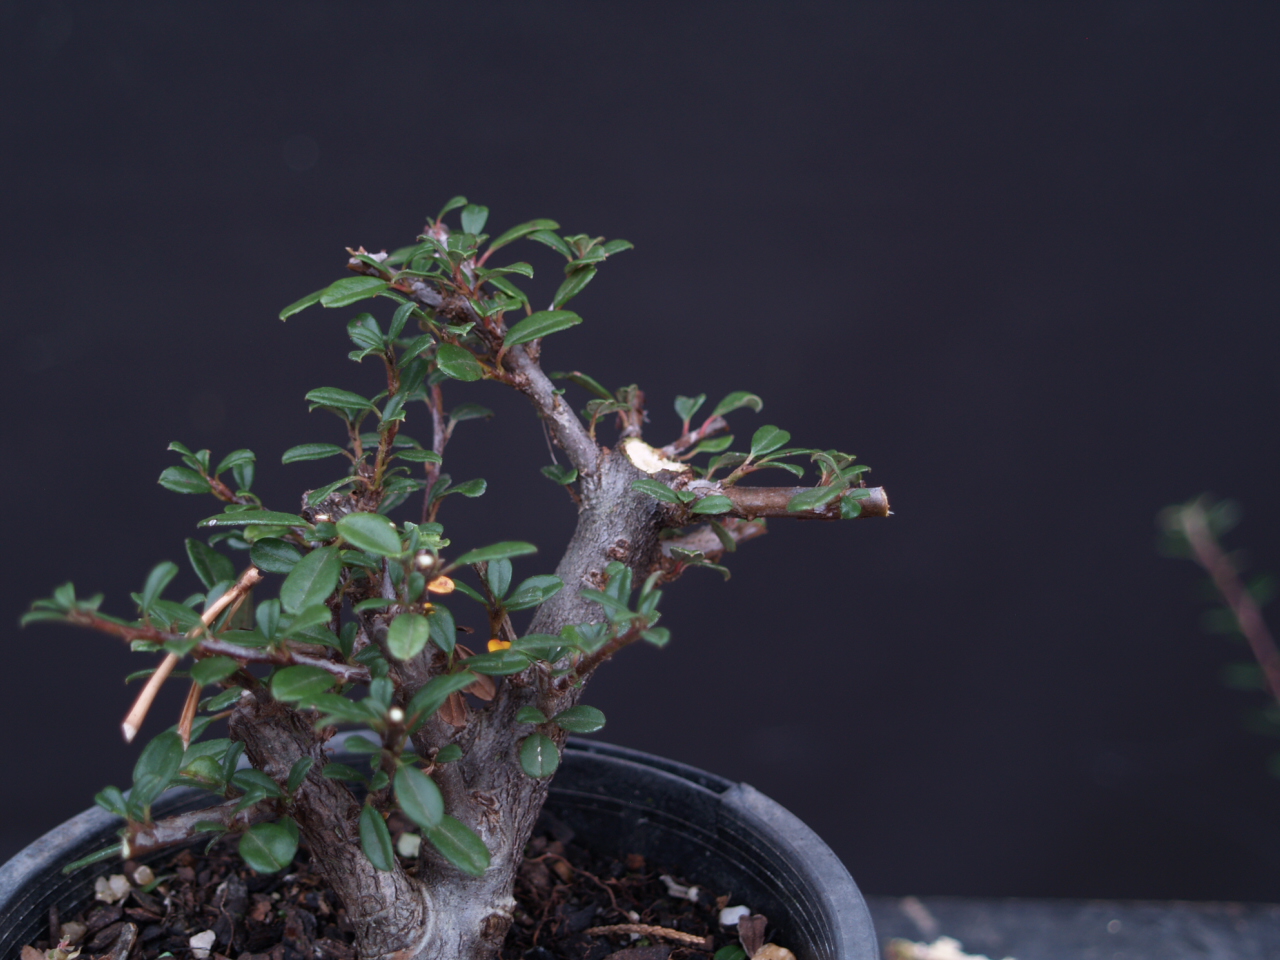
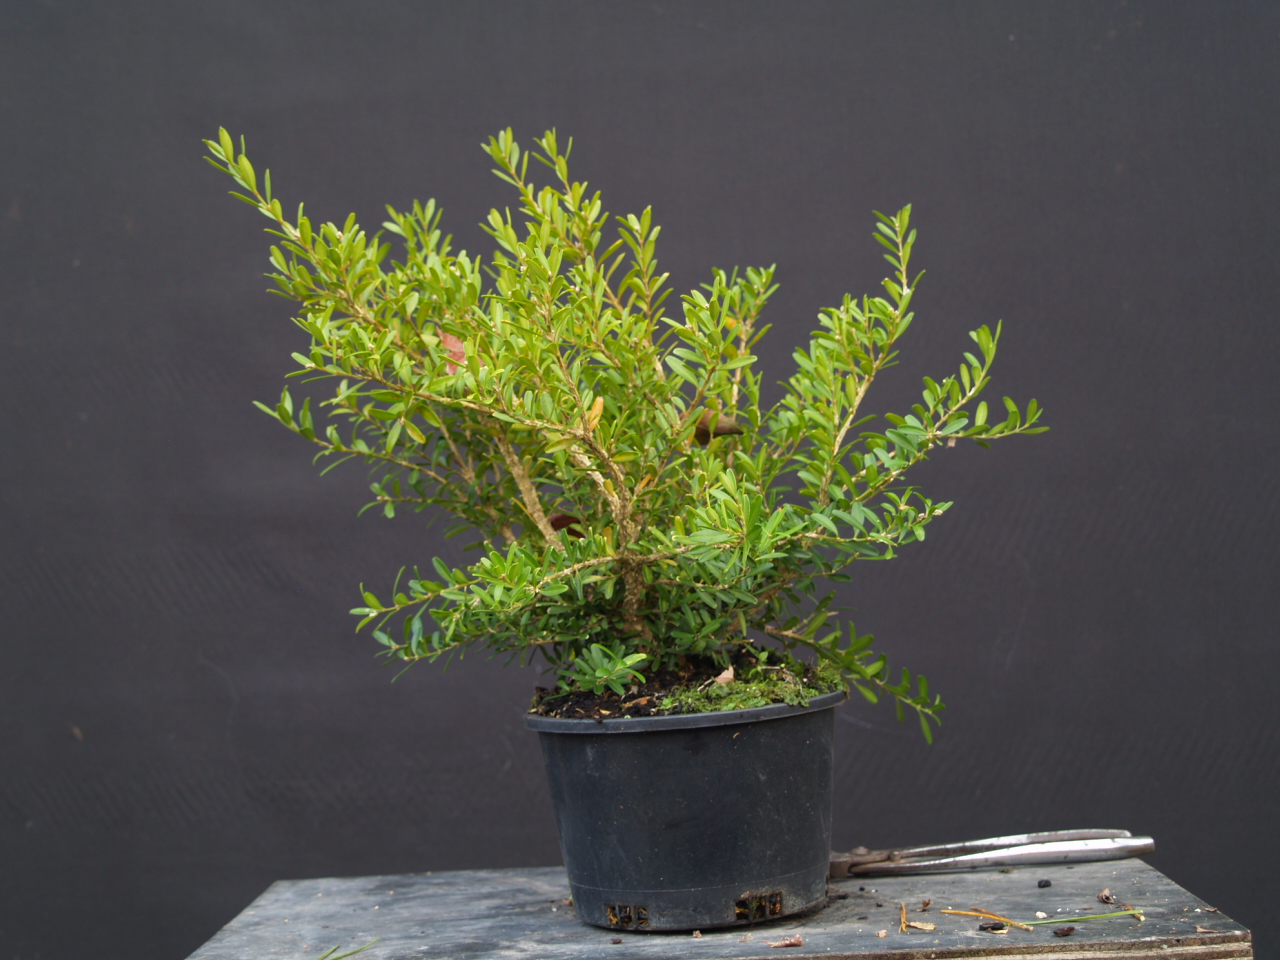
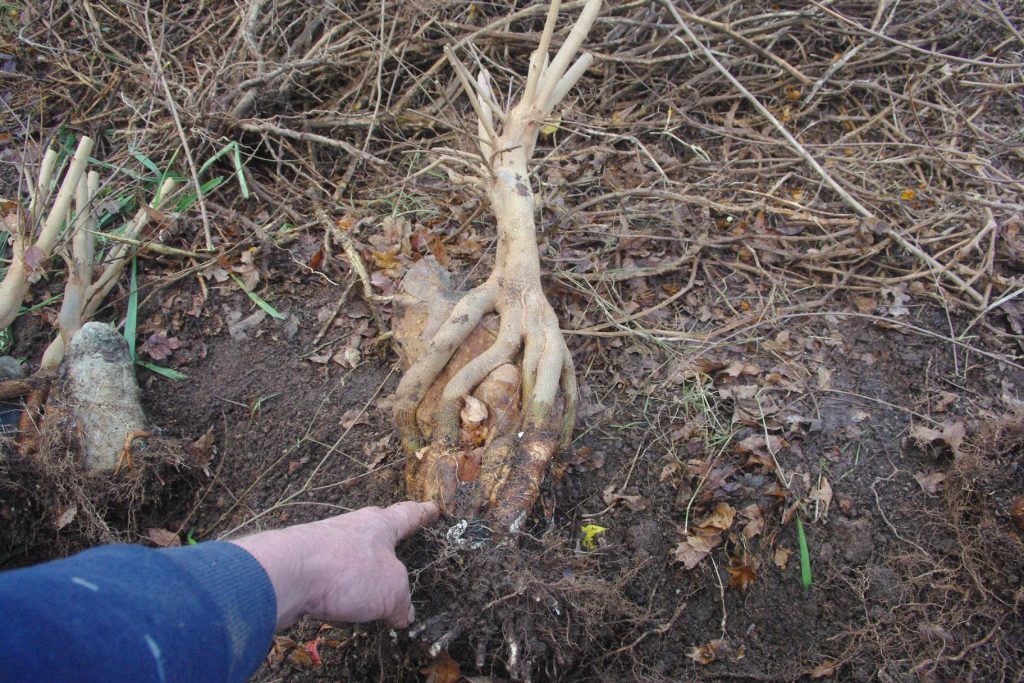
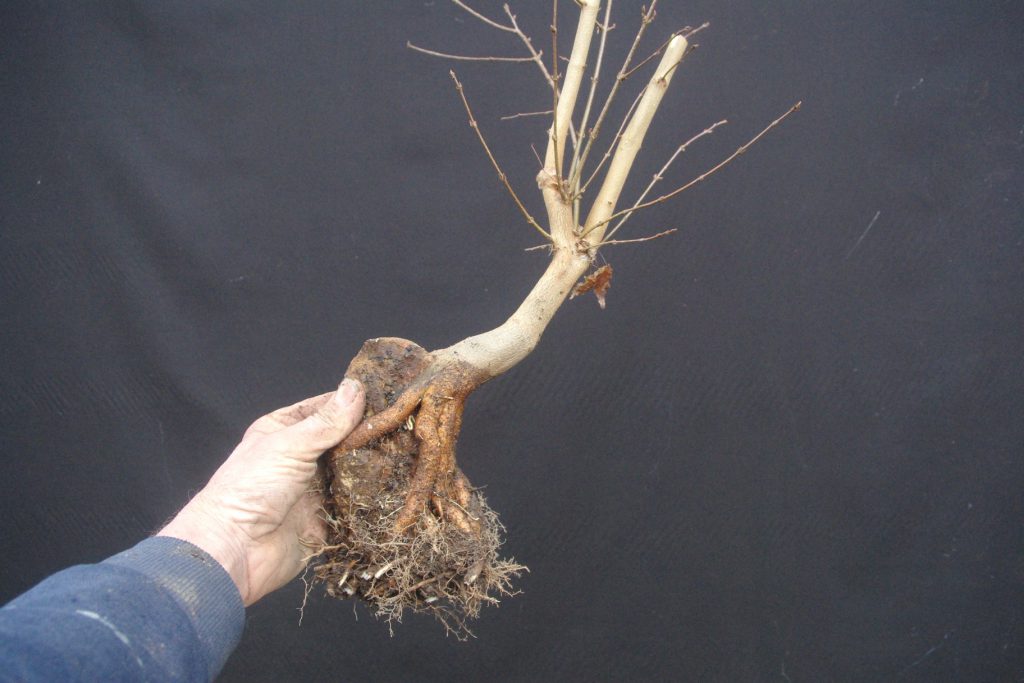
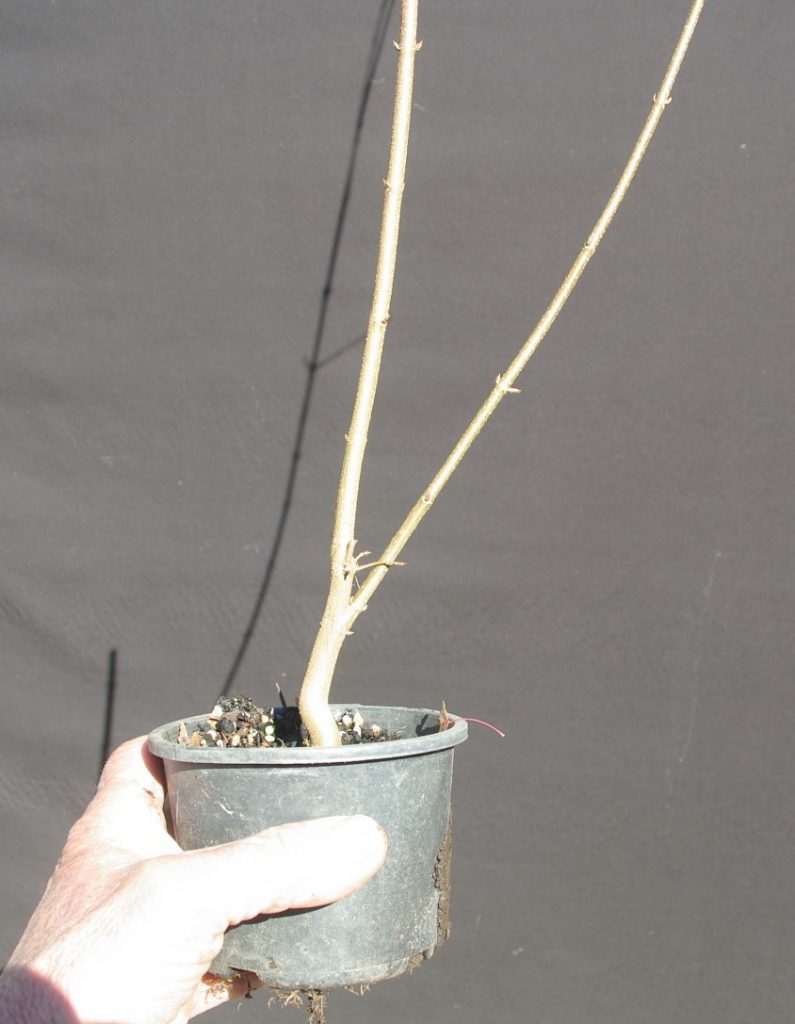
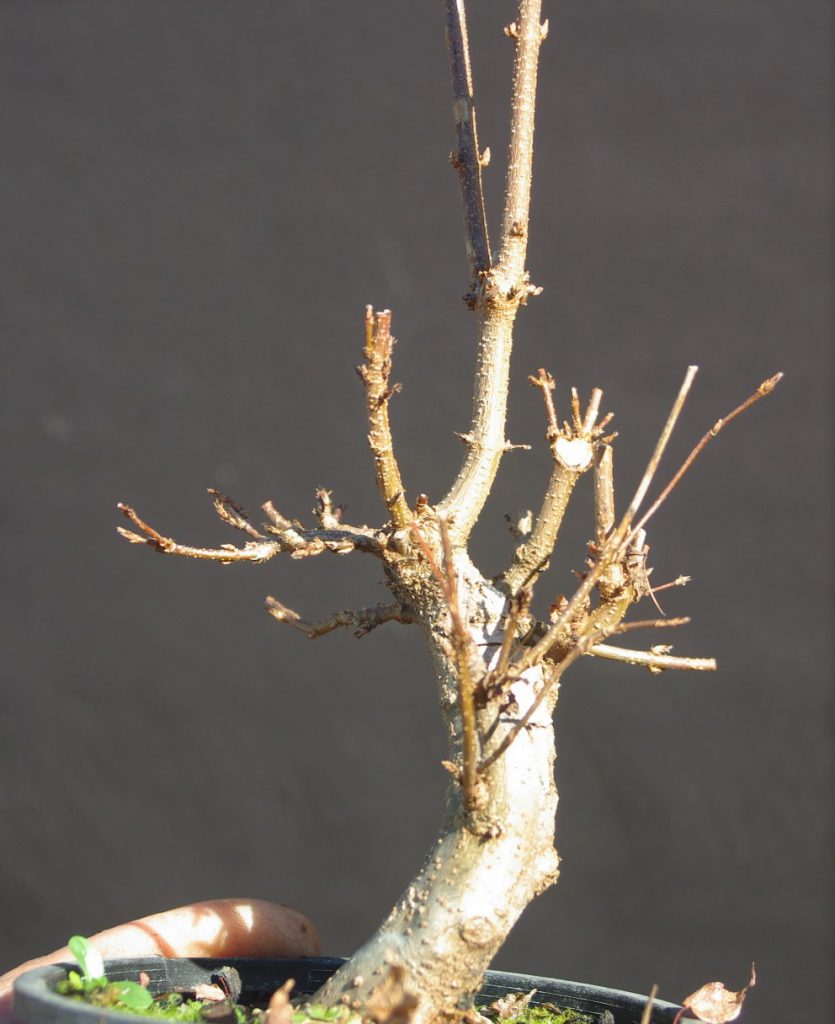
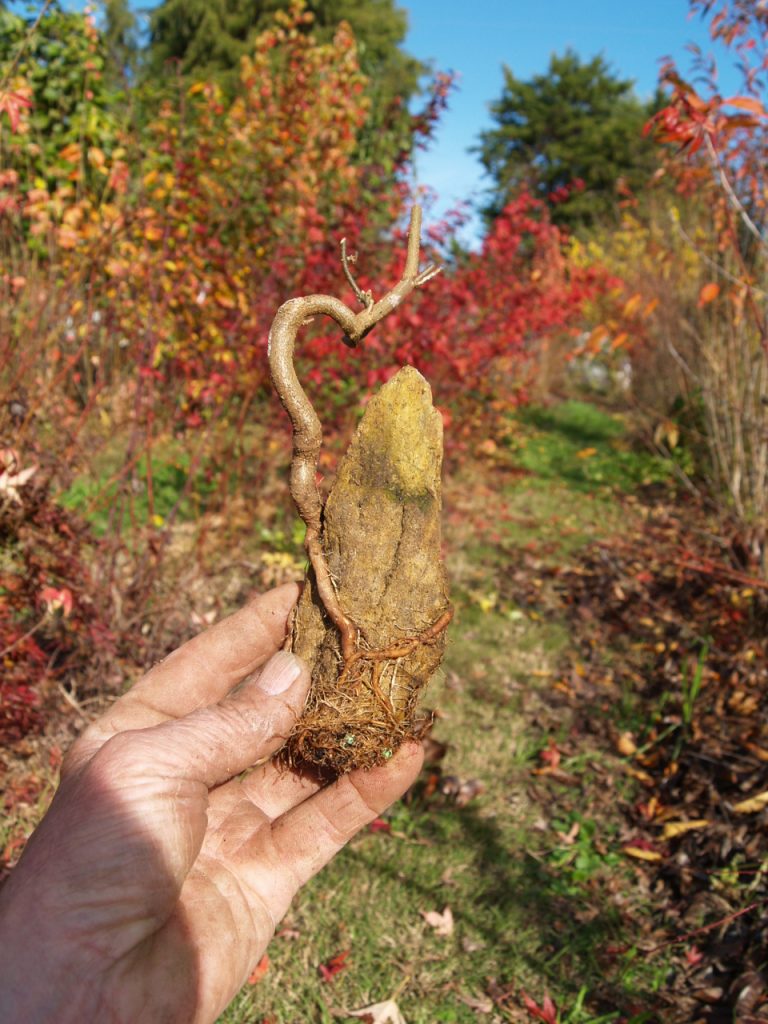
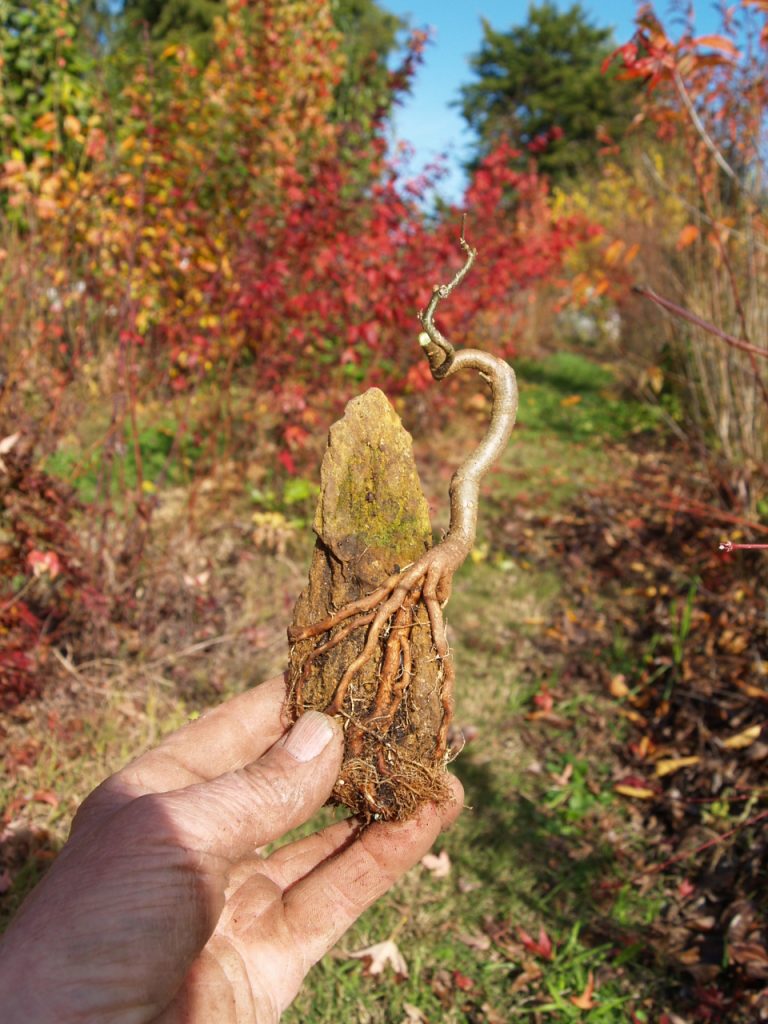
This one has also grown a few strong new shoots over summer which have done a great job of thickening both roots and lower trunk.

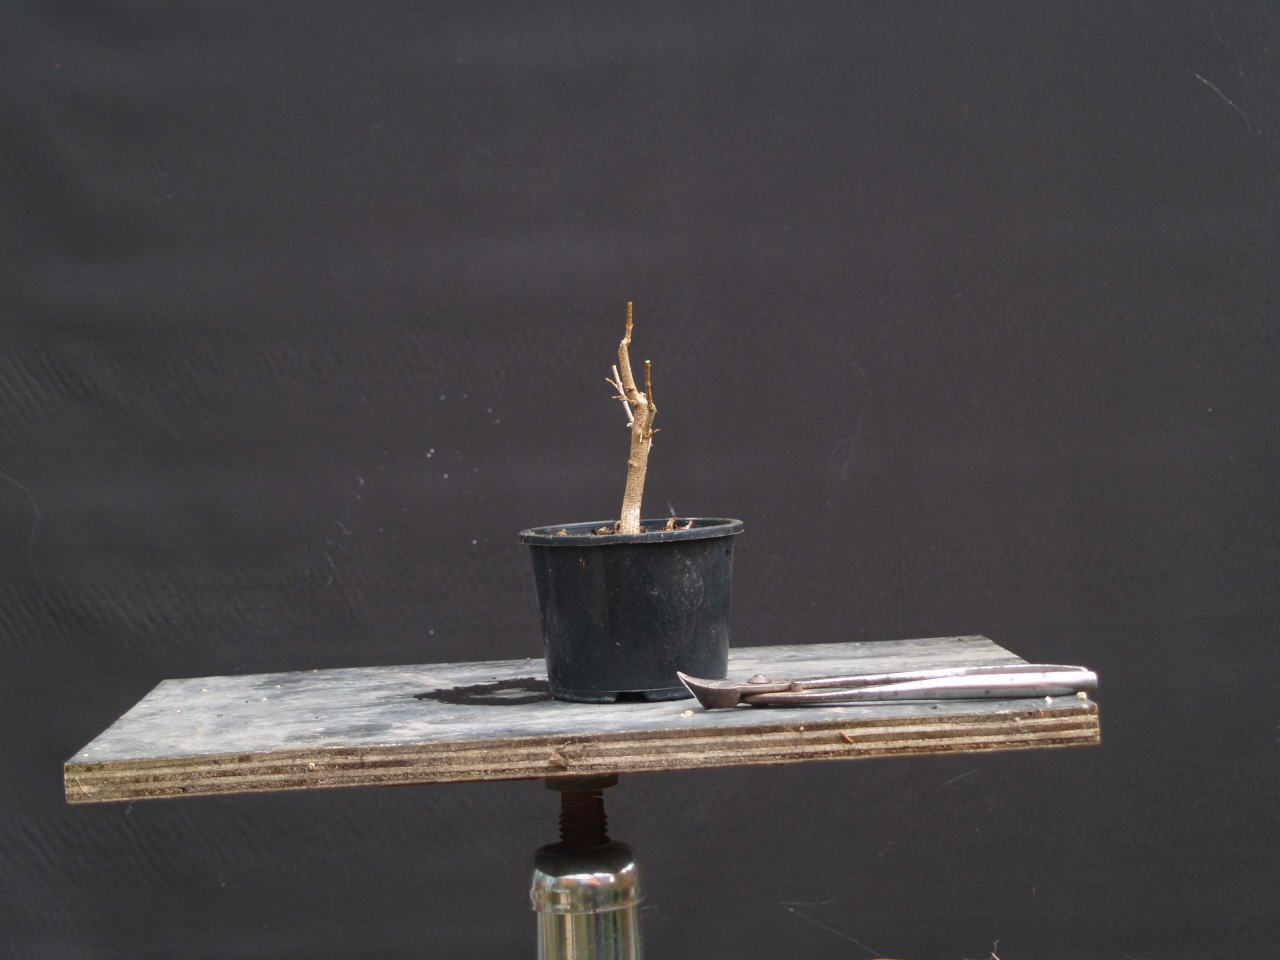
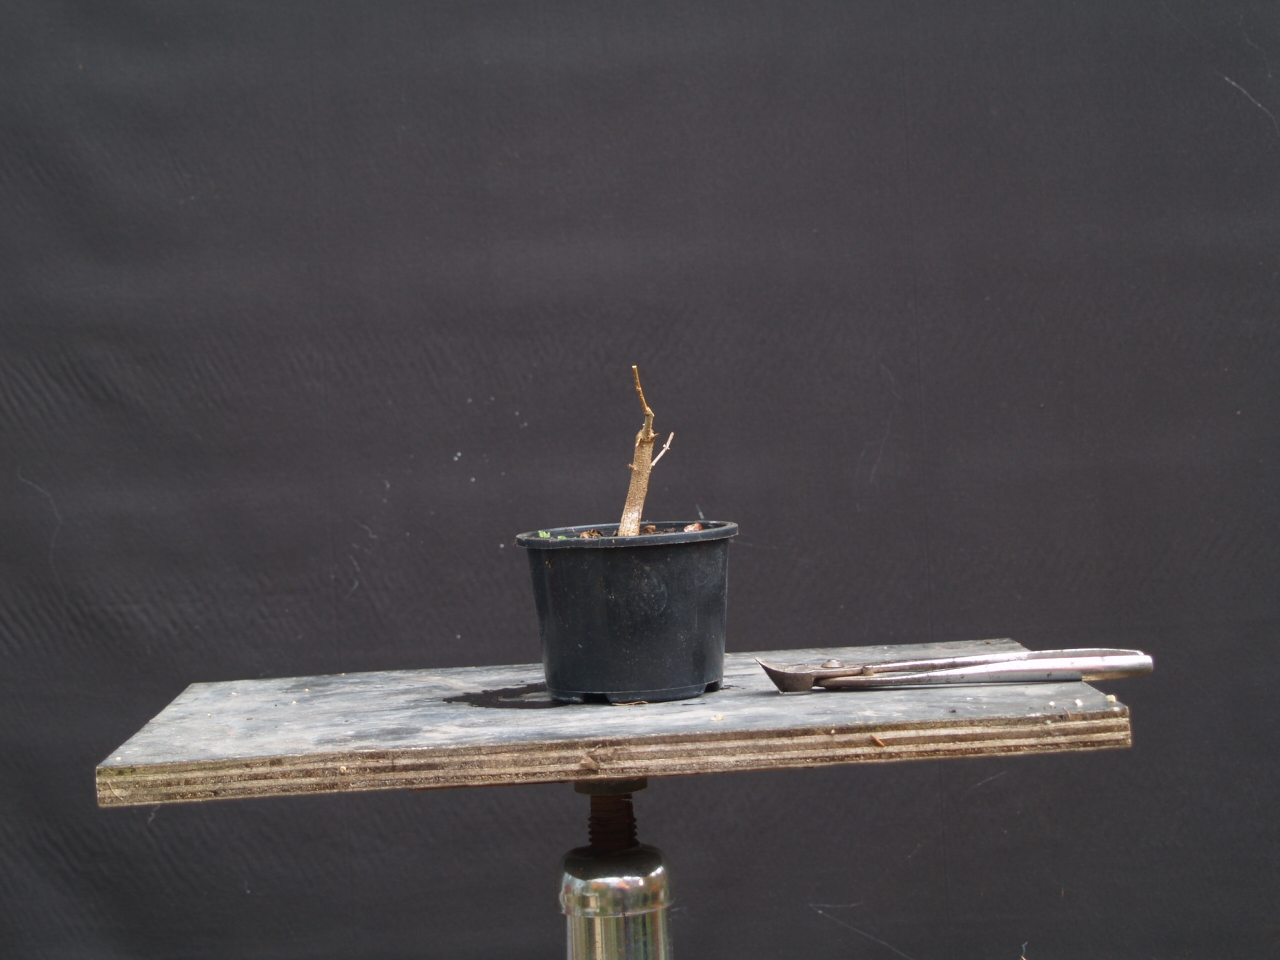
The new lower left branch is not a good candidate as new leader because it would make the new trunk line too straight and leading in the wrong direction to compliment the shape of rock and roots. It is also way too thick to be a branch on that trunk so I’ll cut it close to the trunk.

Thinner branch to the right is in a position to be a possible branch but the sweep upward won’t work and it also has long internodes so I’ll chop that one above the first node too and hope for better results next season.

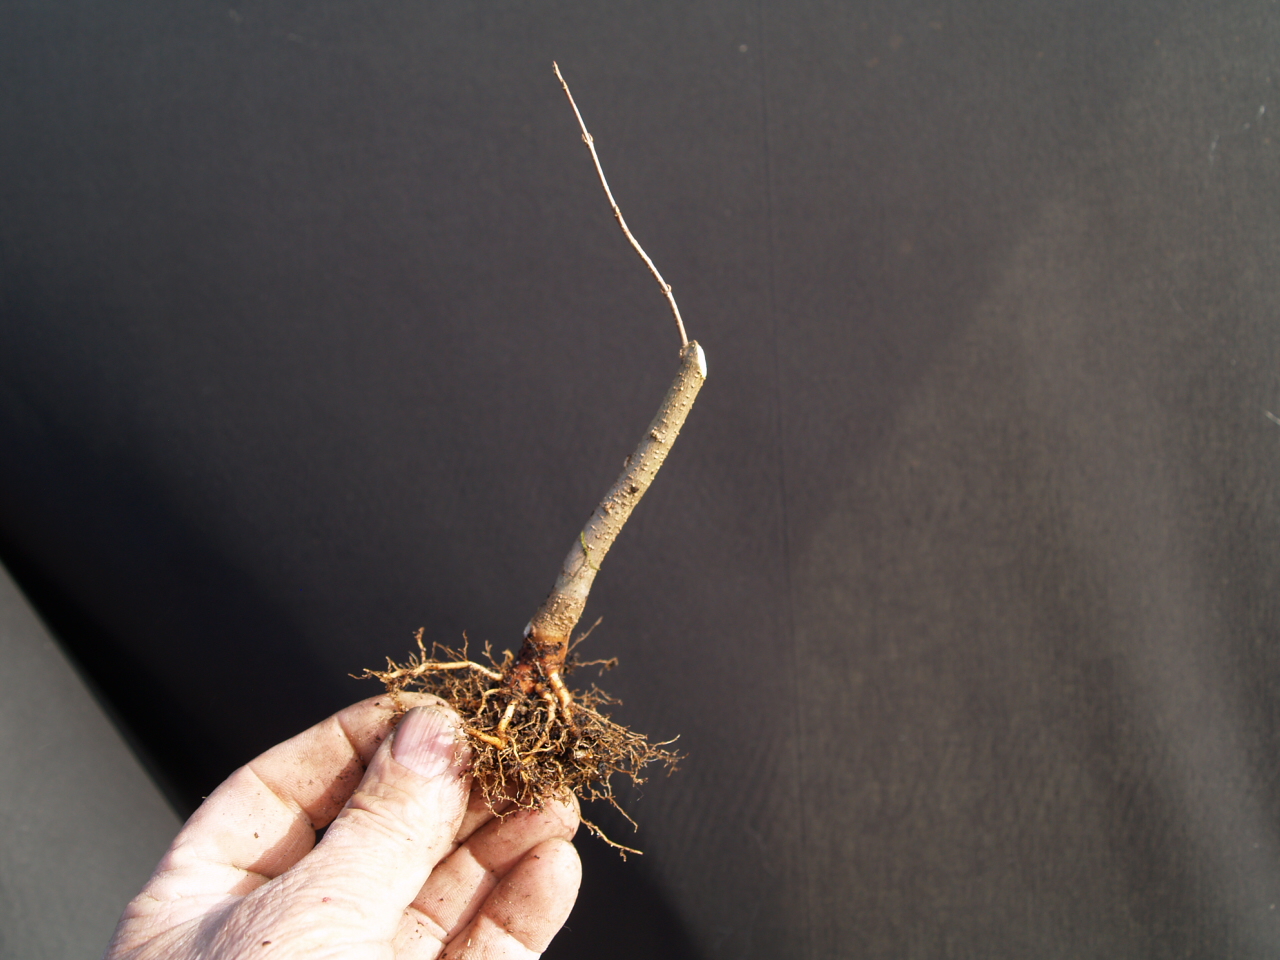
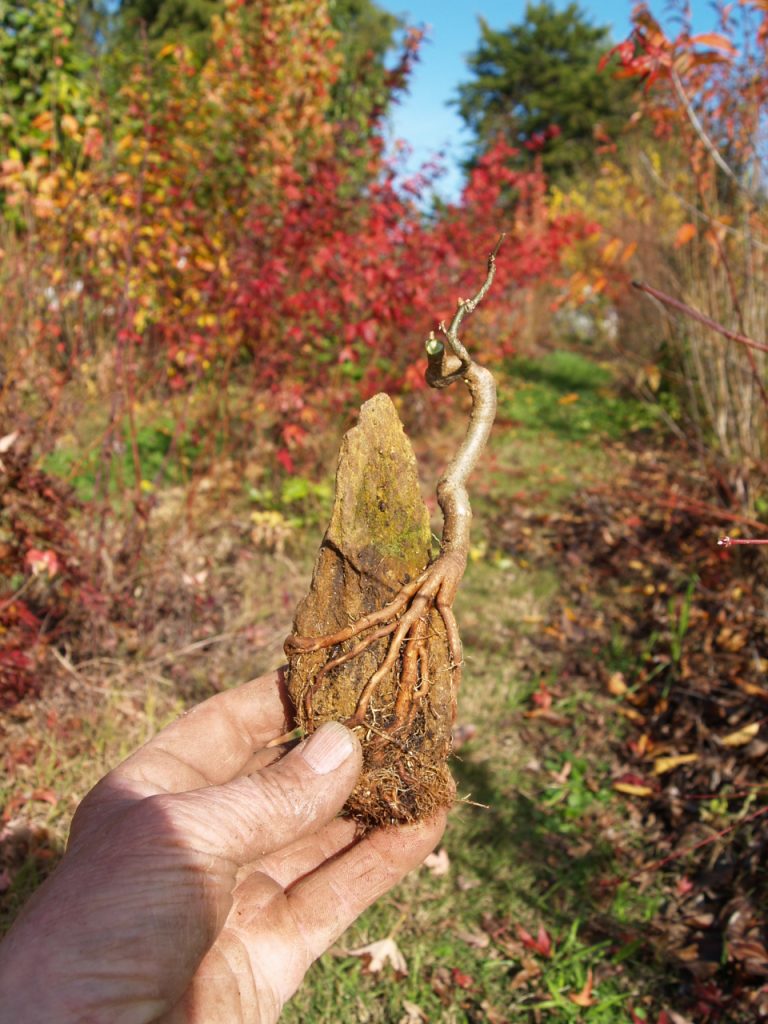
After pruning the top. I’ve elected to leave 2 possible trunks to see which one looks better after another year.

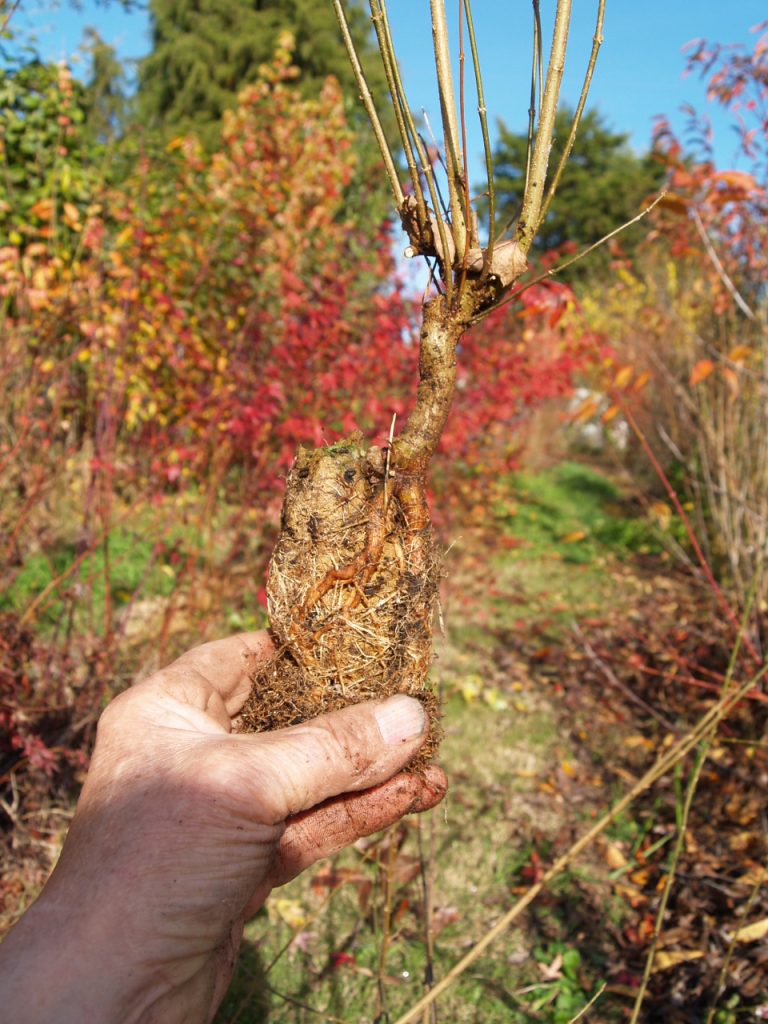
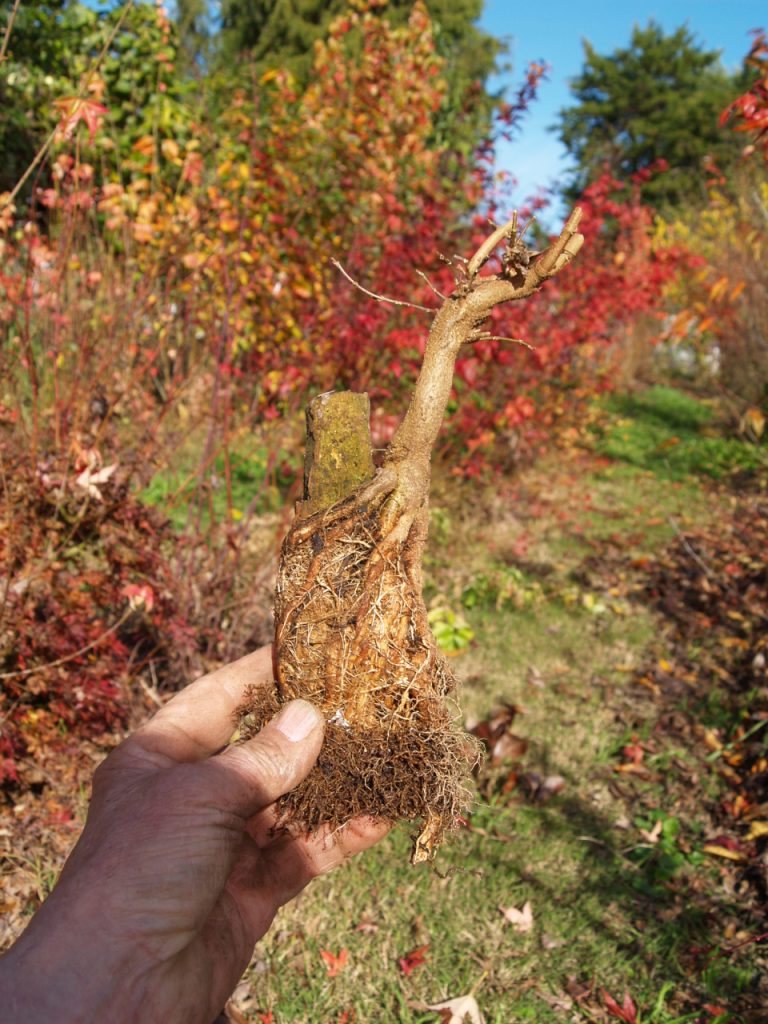
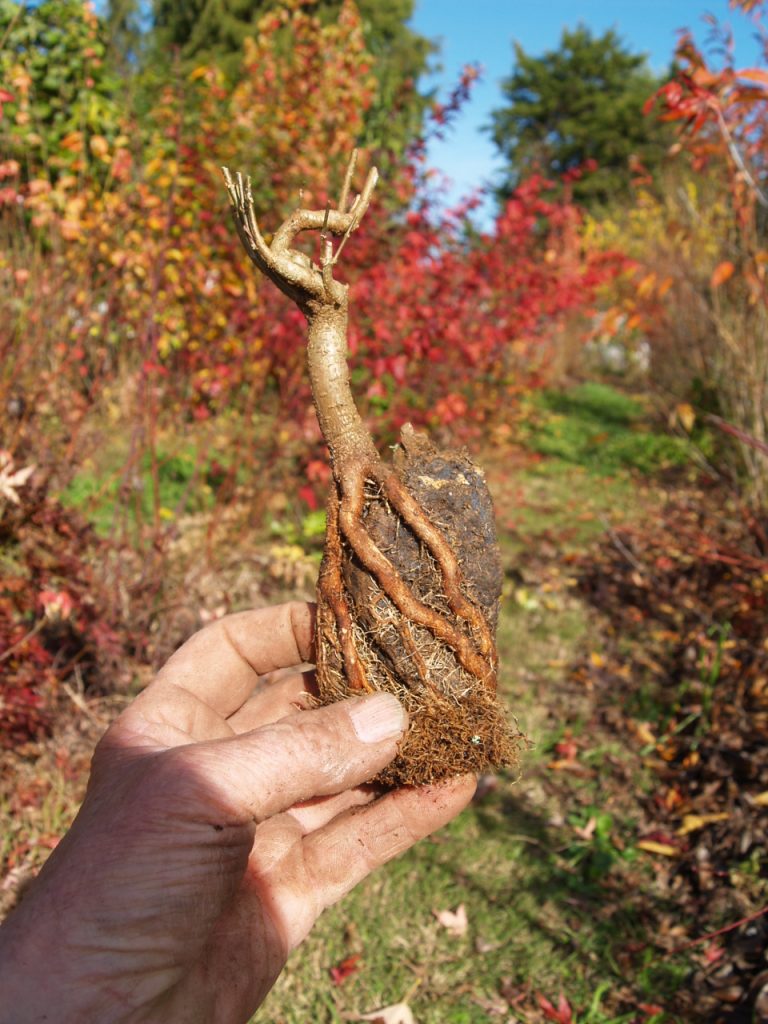
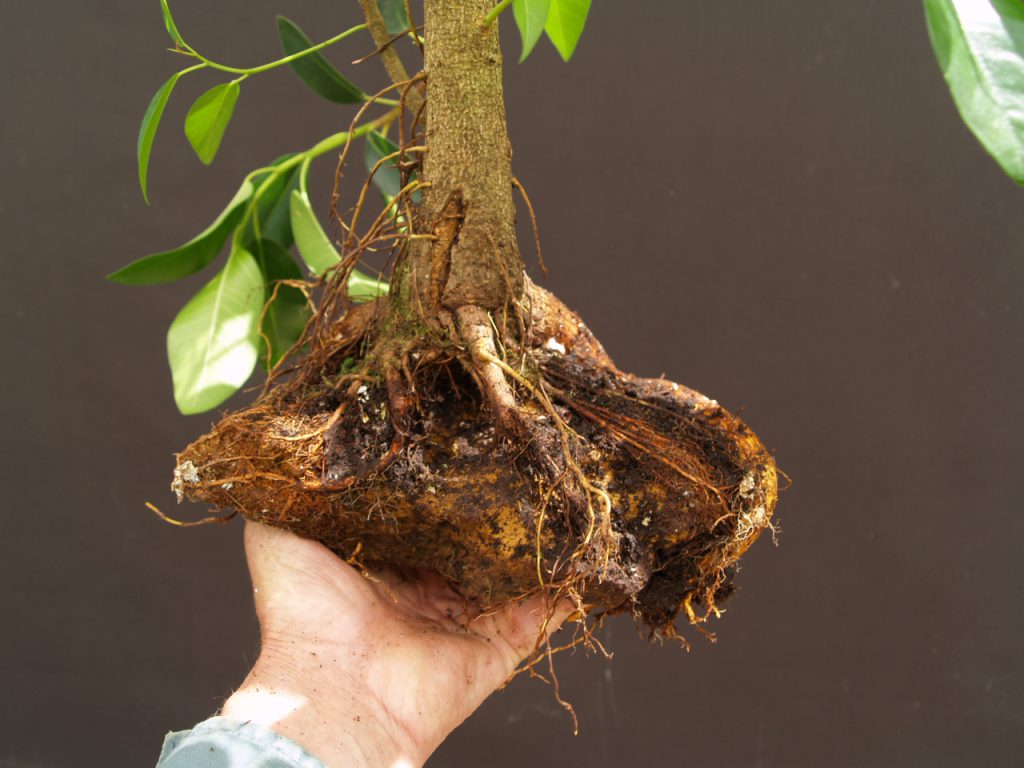
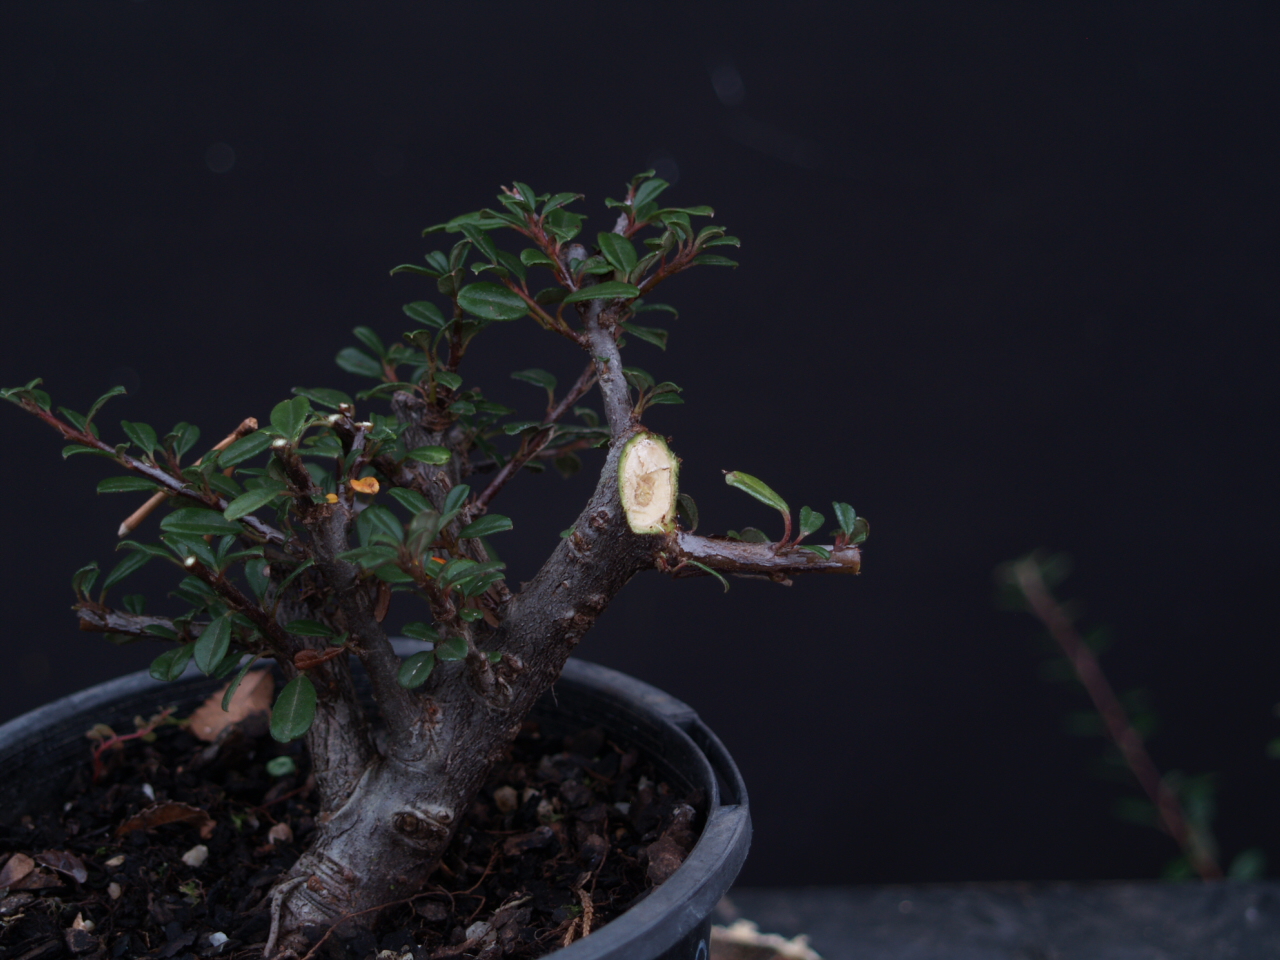
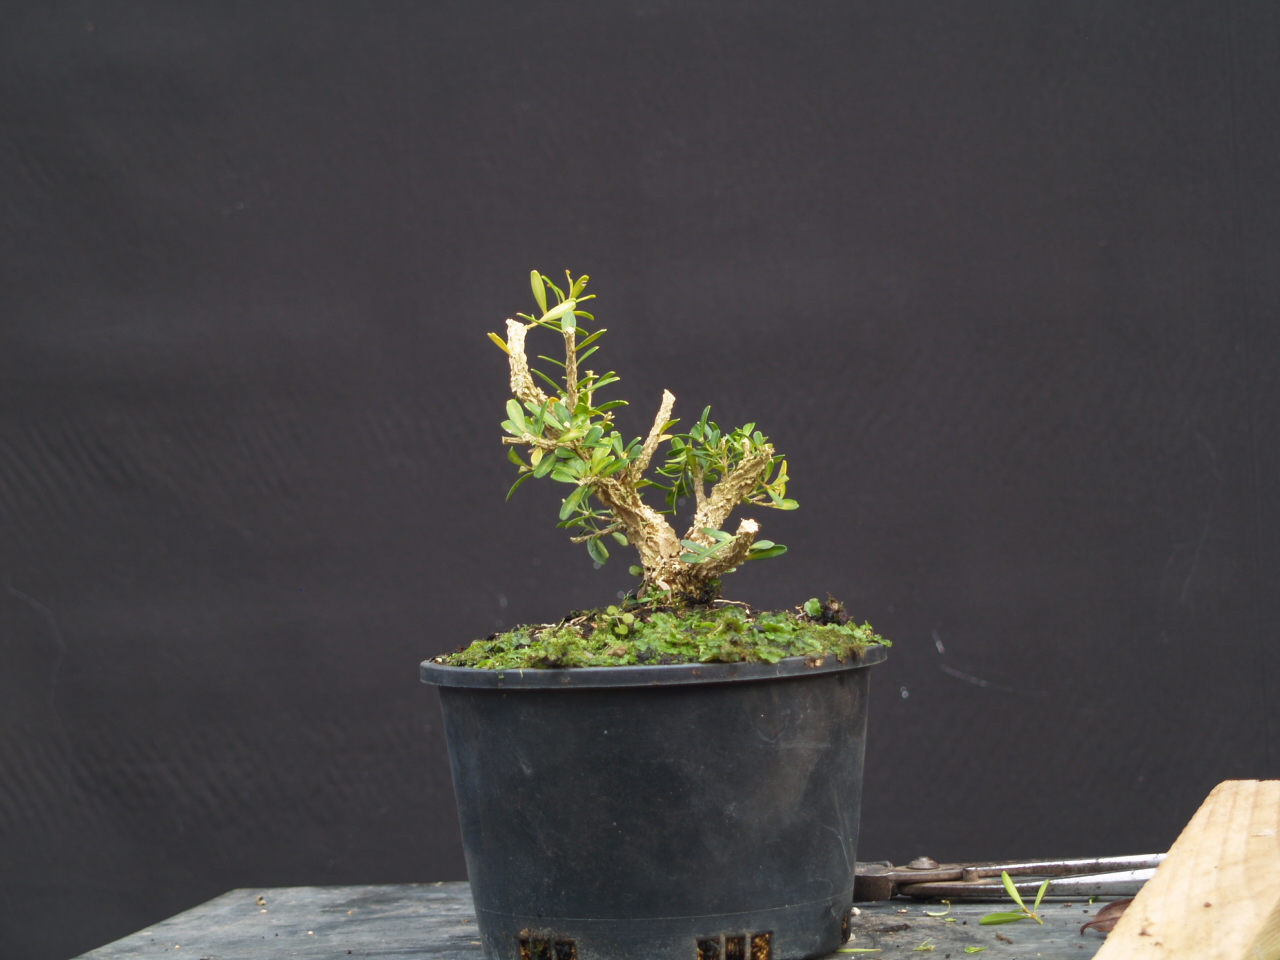
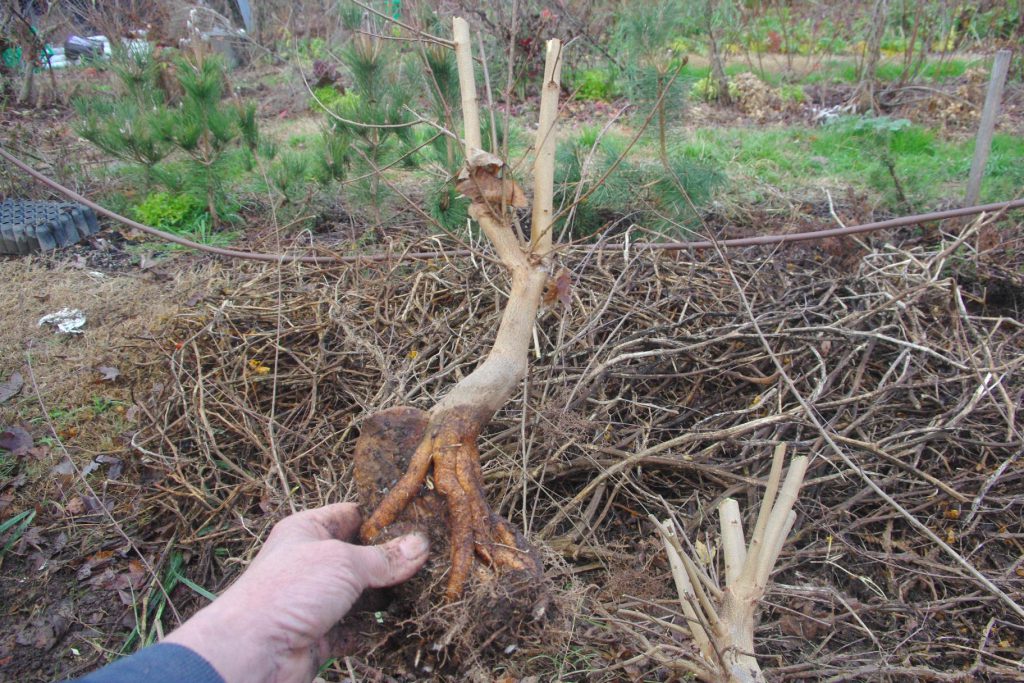
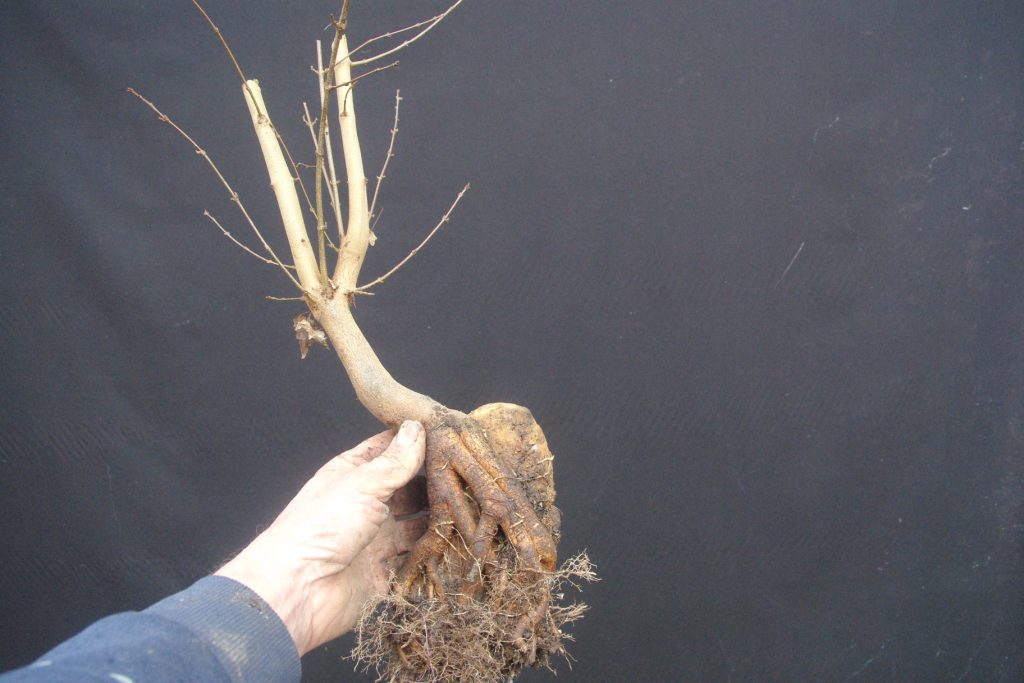
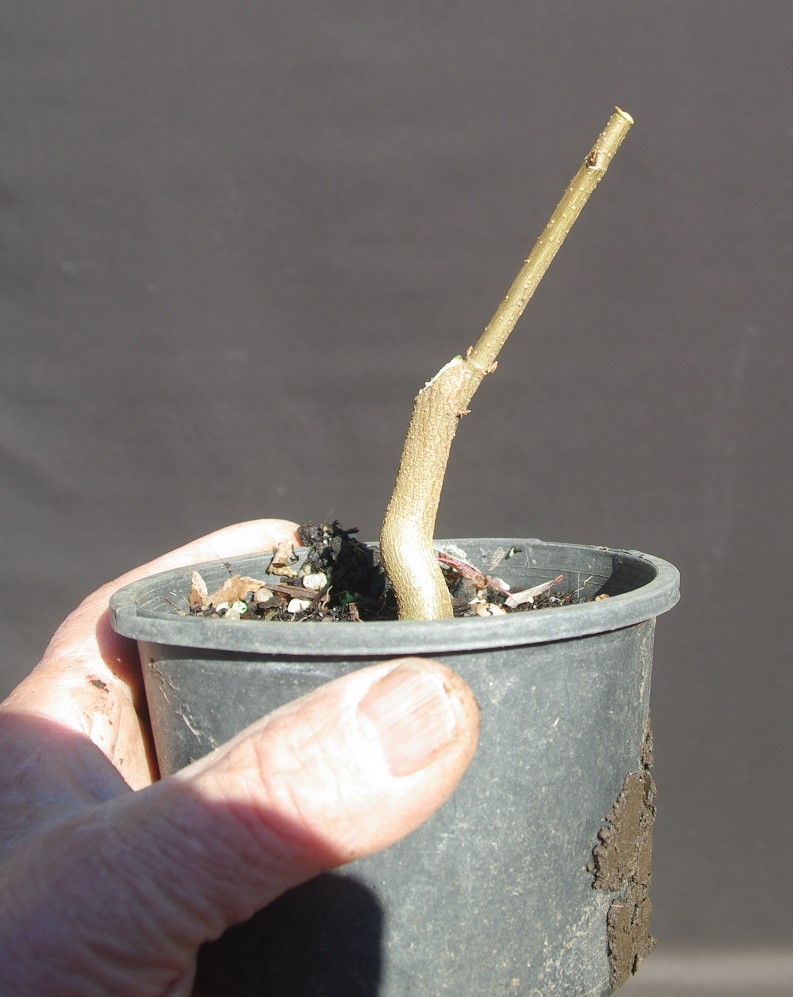
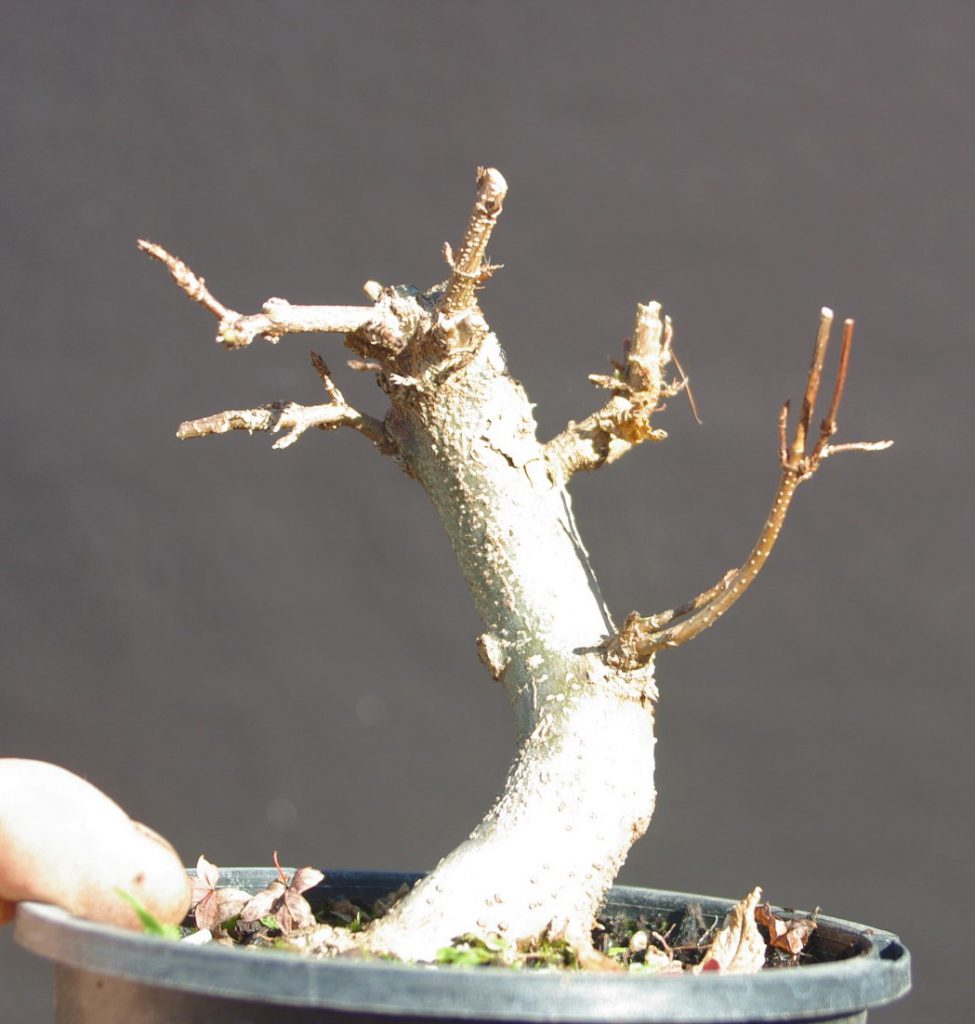
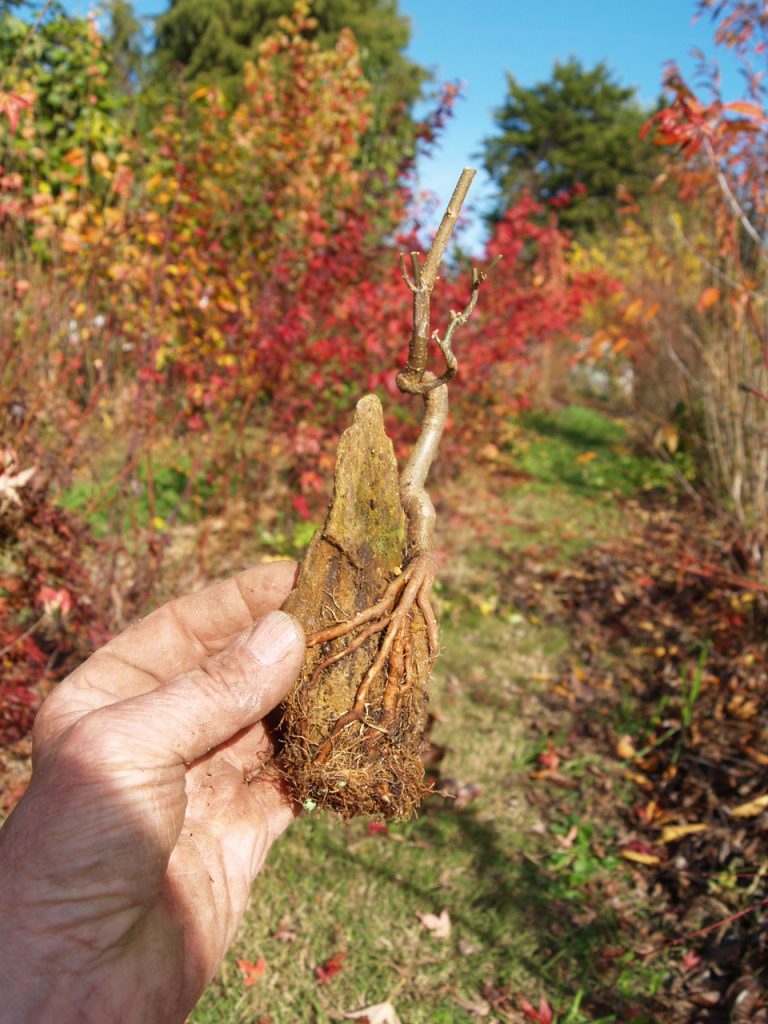
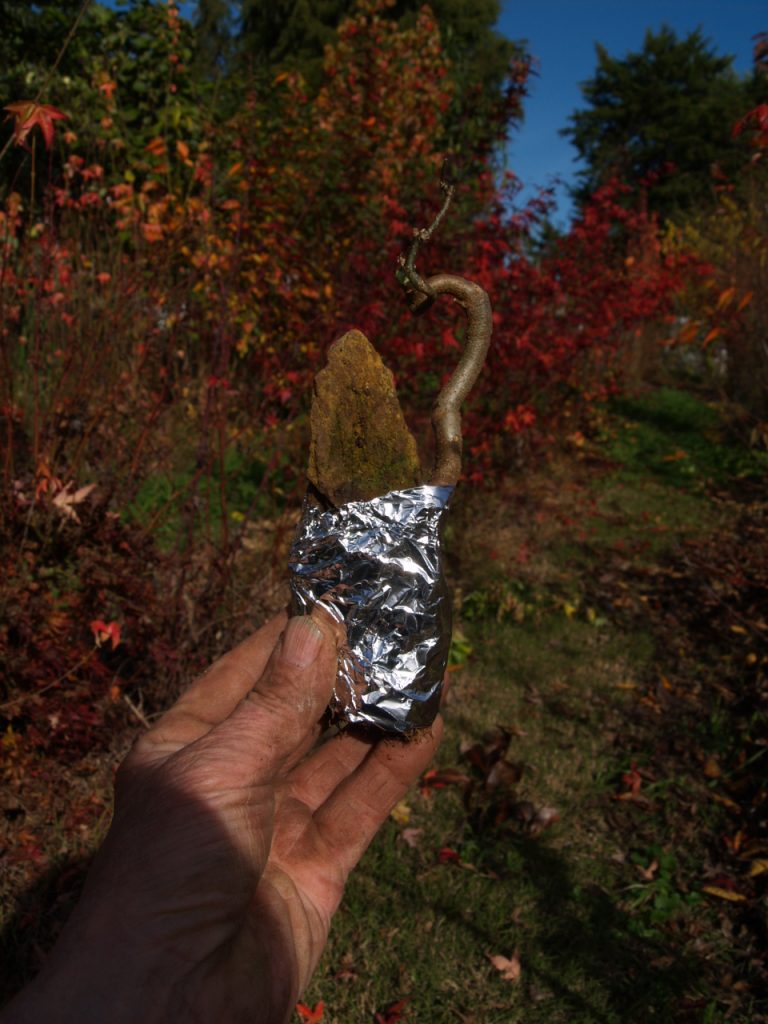
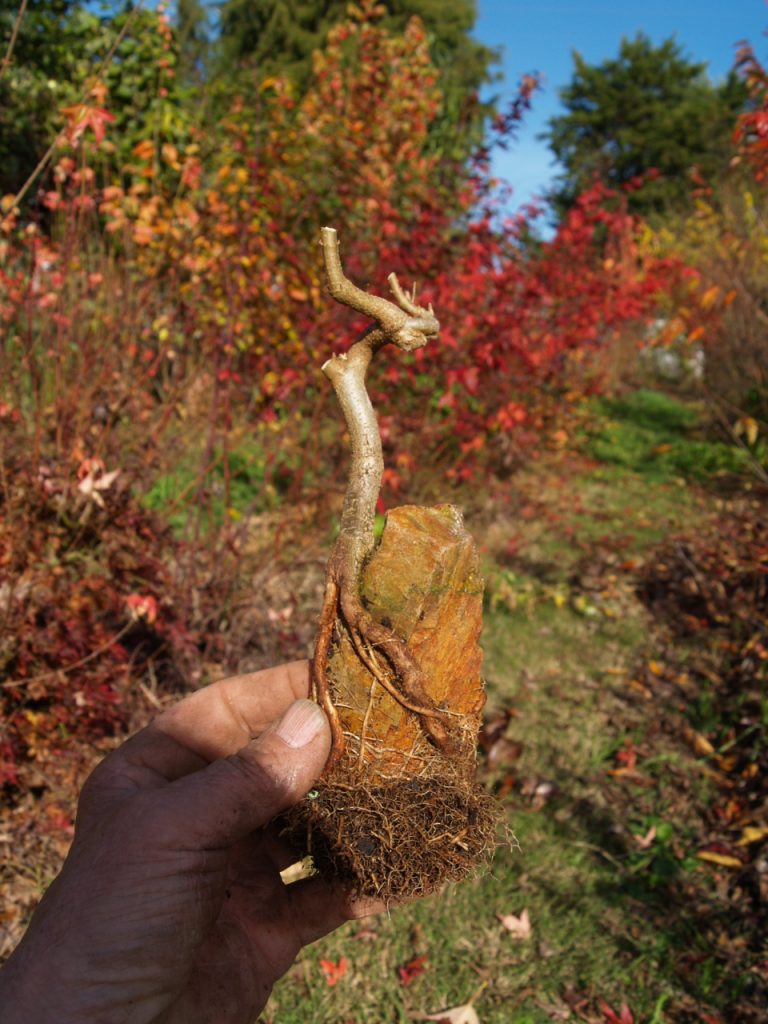
A final tree to look at for this post. Note the thick lower trunk.

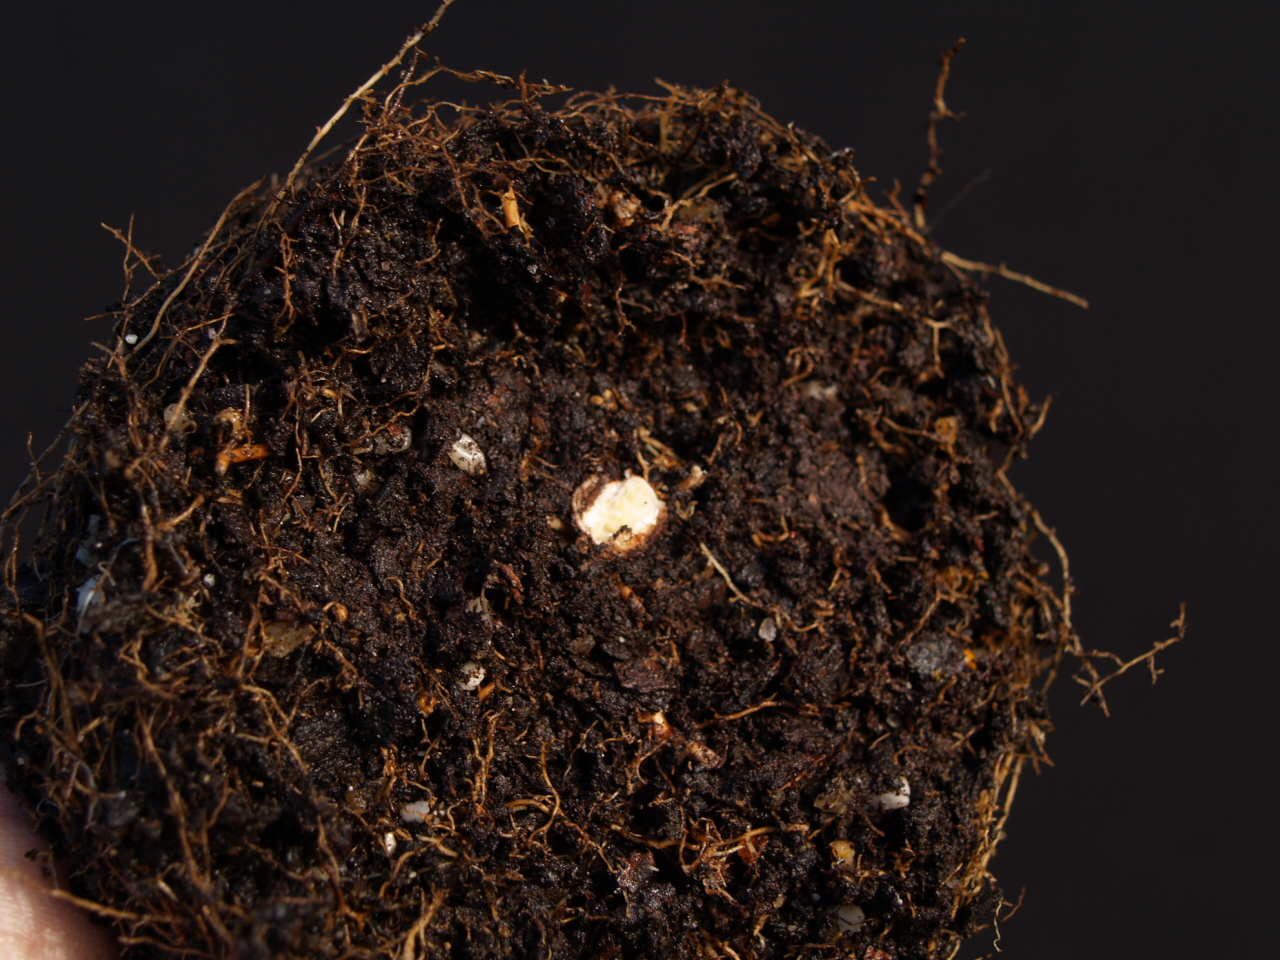
A closer look reveals something interesting.

The thicker trunk has spiral marks. The thinner part has more pronounced wire marks and near the end is a piece of copper wire protruding from the trunk.

This trunk is the result of some experiments with wiring very young seedlings the previous year to get really twisted trunks suitable for shohin sized trees. This is one that grew so quick I was not able to remove the wires in time and the trunk has grown right over the wire. That’s not something I would normally do or recommend but, in this case I think the results might possibly be good.

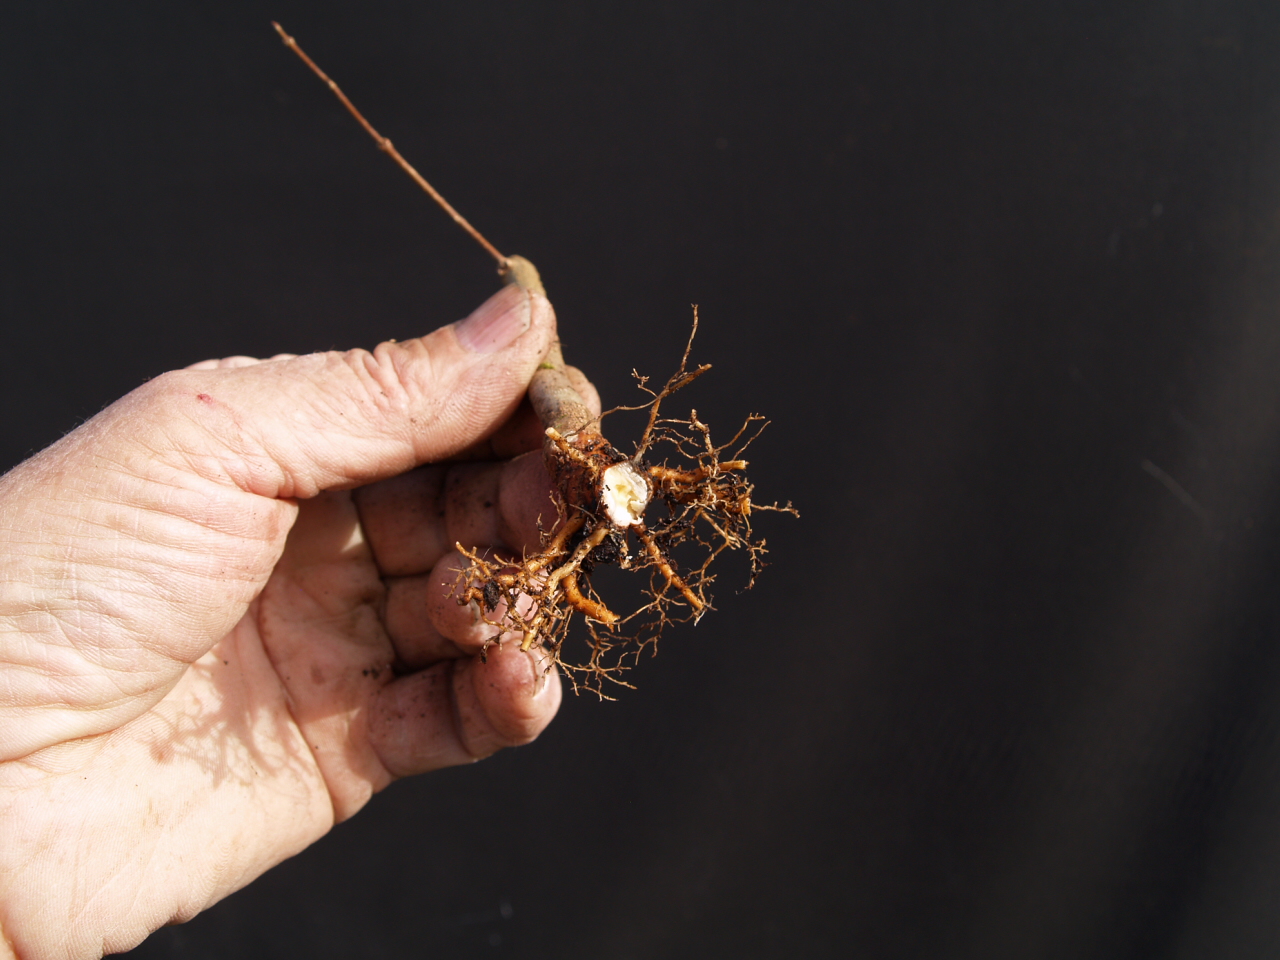
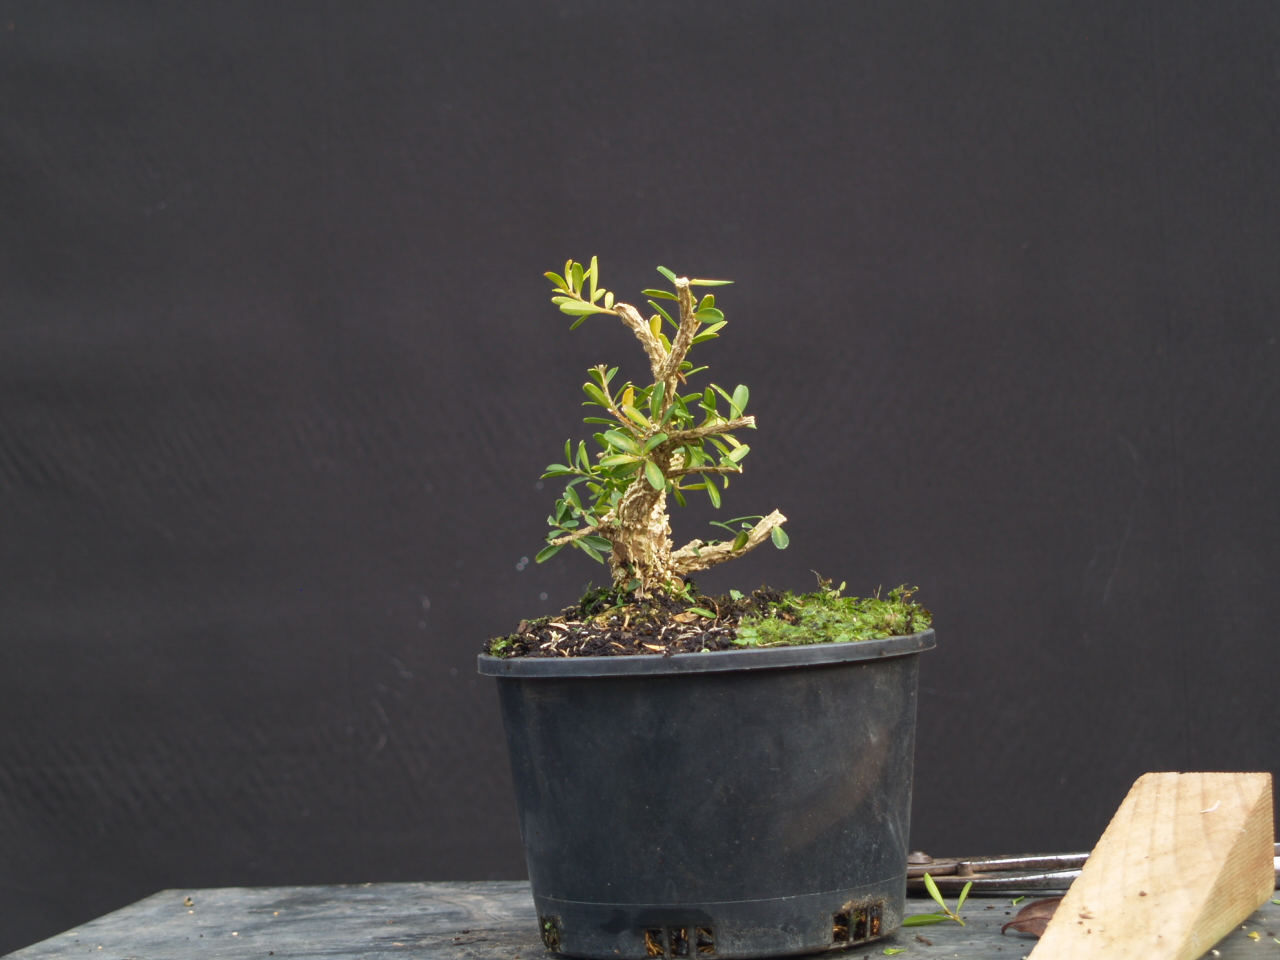
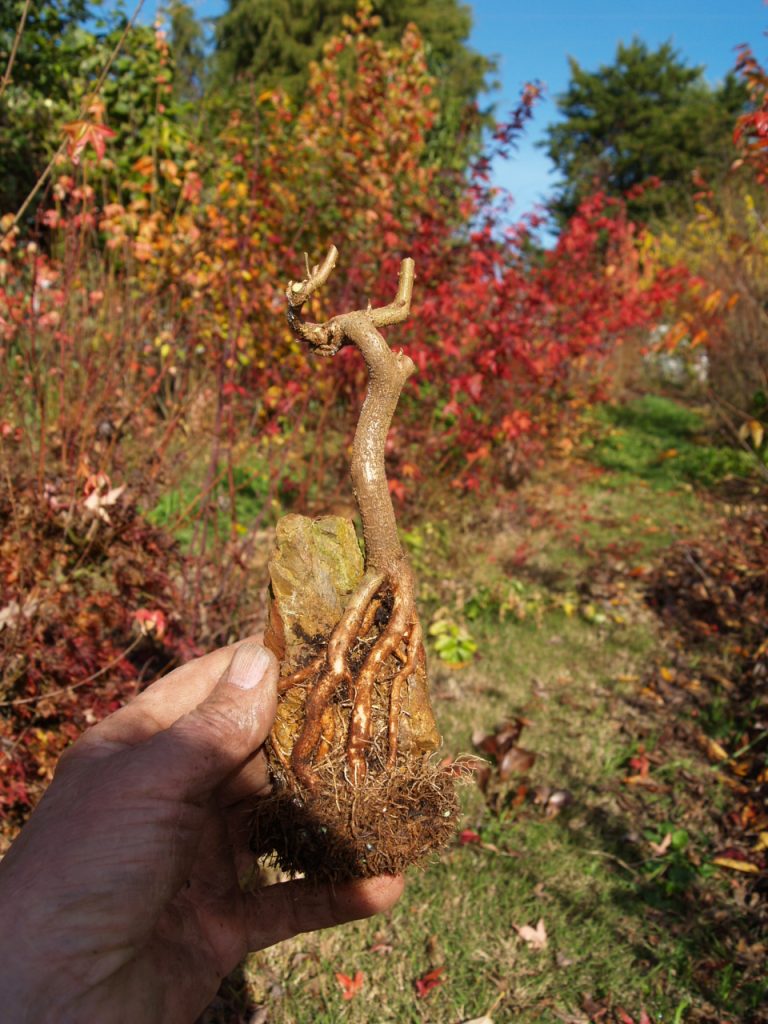
The twisted part of that trunk comes down too close to the top of the rock now. As it thickens it might obscure the view of the top of the rock. The new part is more upright so probably a better trunk line. I chop the thinner section.

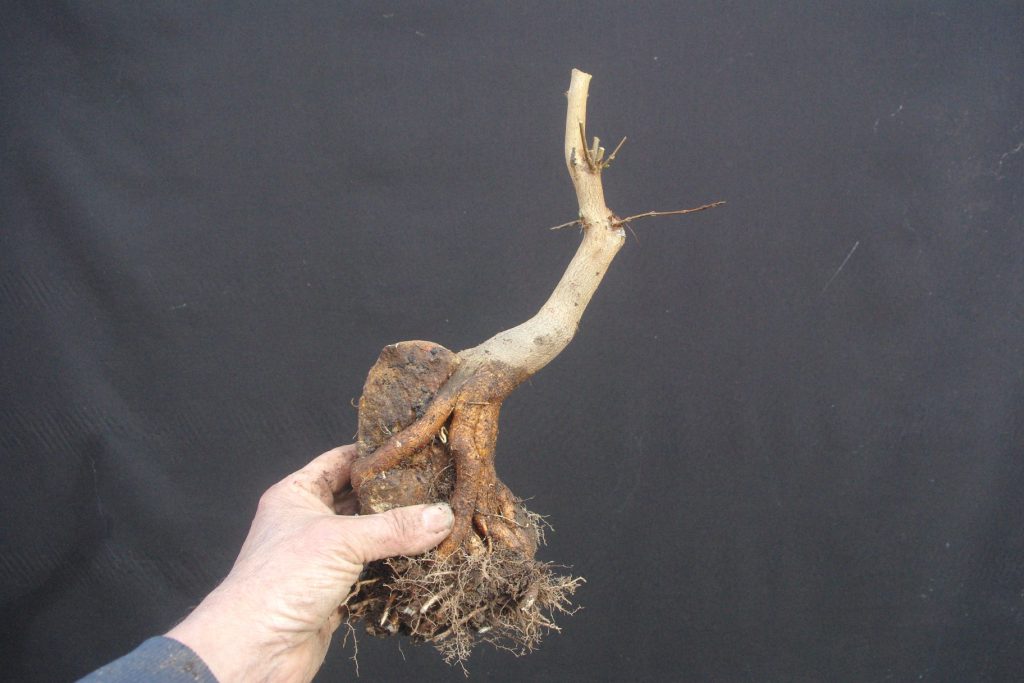
After chopping the thinner part a close look shows the copper wire is now right in the middle of the trunk.

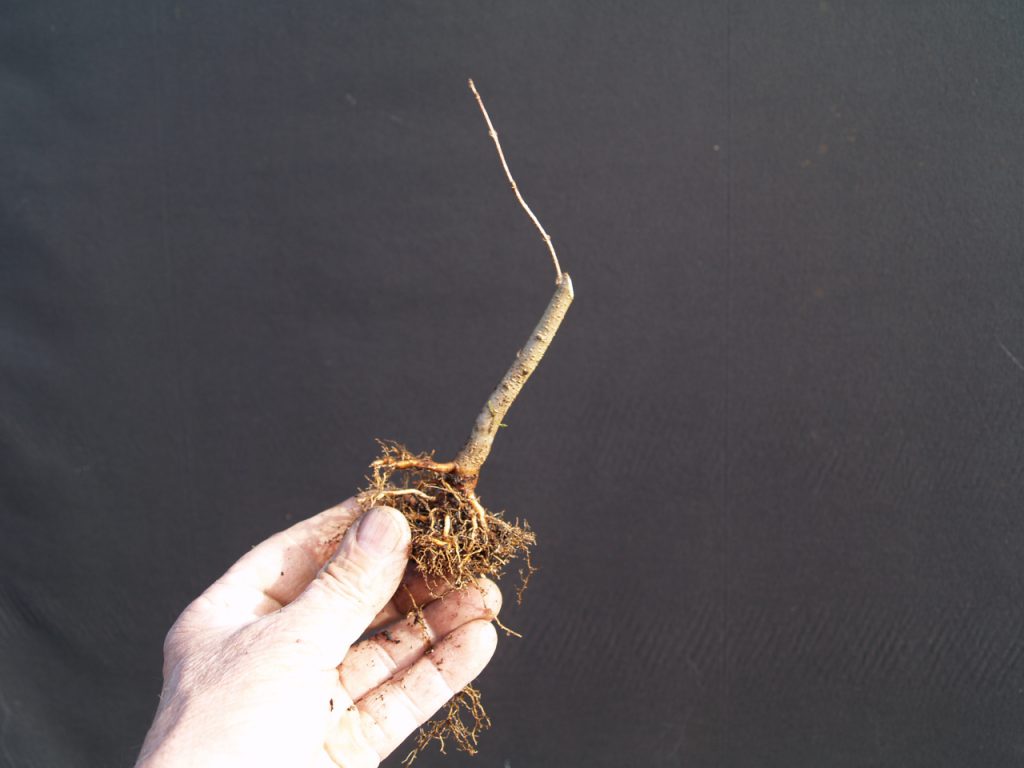
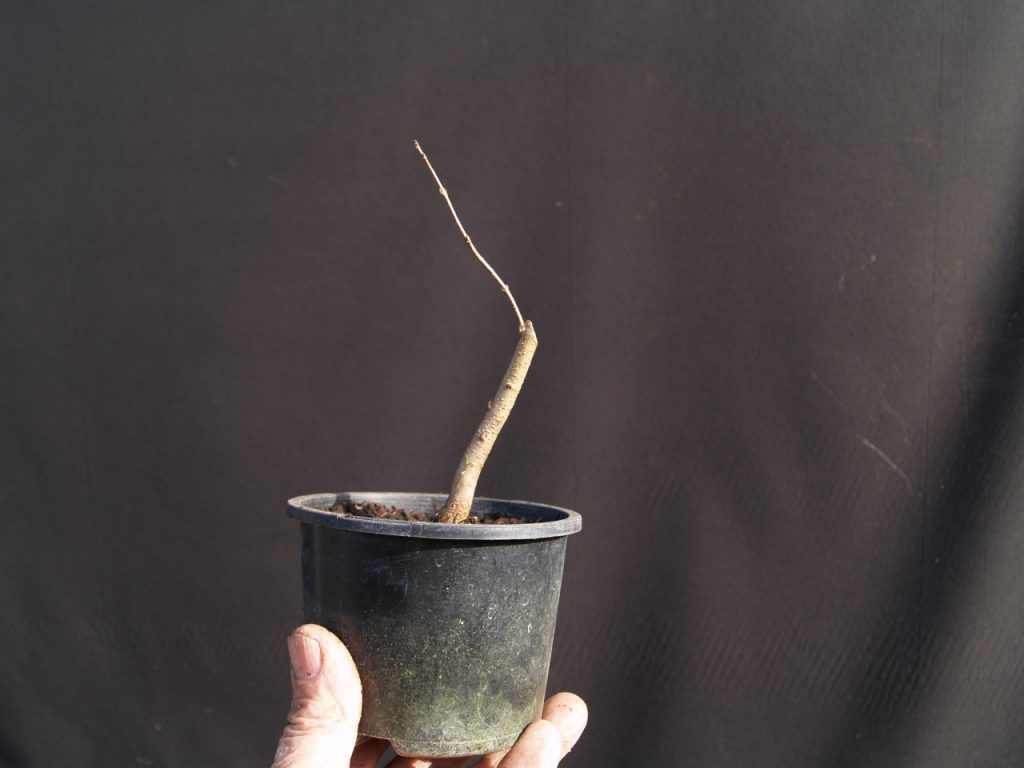
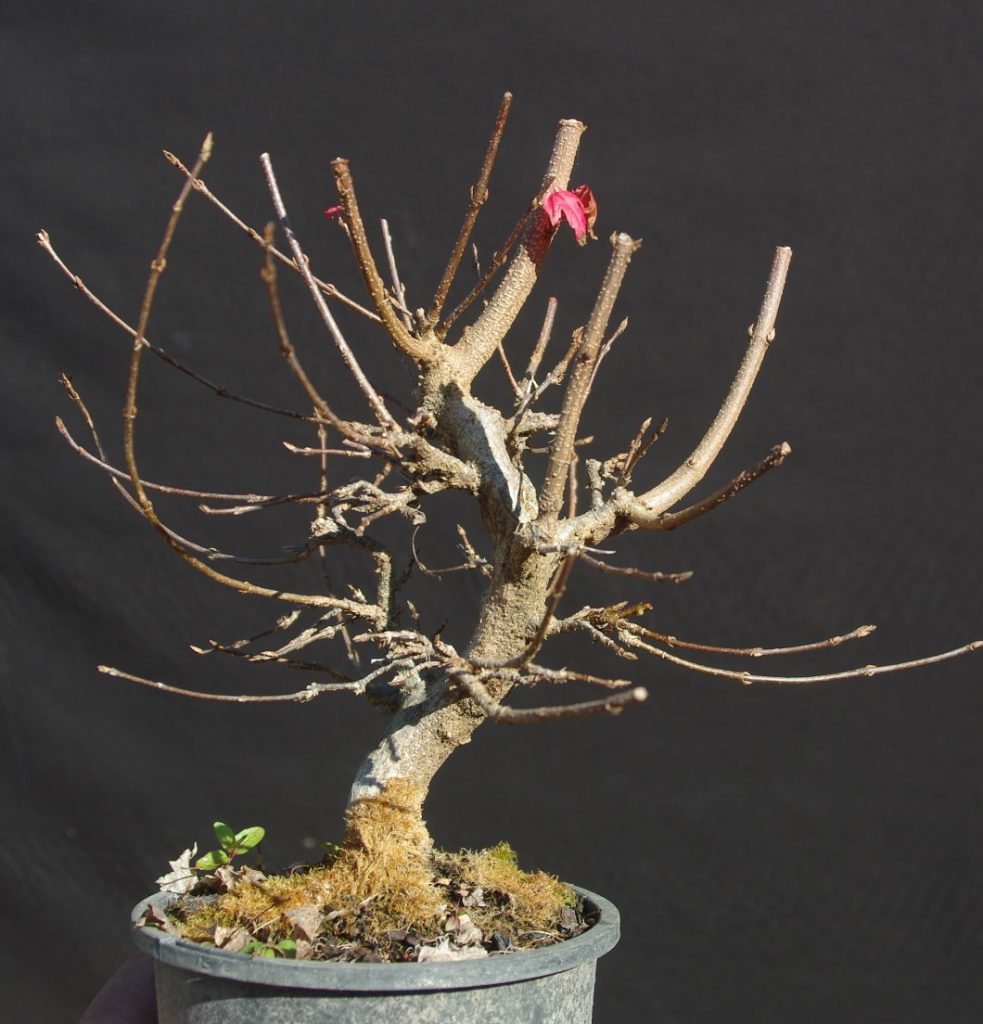
The remaining stronger, upright trunk has little taper or movement so I cut it back hard. Fortunately it does have some shorter internodes as the lower part so I’ve retained 2 nodes this time. Depending how many buds break in spring and which directions they grow I may cut further.

Shohin Root over Rock – the opening

Removing the foil wrap is easy. Unlike some other methods the roots do not get tangled up or grow over and through the bindings.

Here’s the first after unwrapping.

And some more.

Now I can assess the shape better. Look at shape of the rock, flow of the trunk, flow of roots, etc to determine which side looks better. That can determine where the longer shoots will be chopped. These still have some growing to do so they may still change appearance. At this stage I’m just making some guesses and anticipating what may happen in the next few years and trying to direct future growth along the lines that I think will look best.

After preliminary pruning the tops.

Look at the mass of roots. Many of those finer white roots have grown since I wrapped it last winter. Provided moisture levels are adequate conditions between the rock and foil are ideal for root growth.

Roots do not actually need soil to grow. Humid conditions is all they need and that’s what foil wrapped rocks provide in abundance. Some of these did not even have roots sticking out the bottom of the foil last year but have since grown down and out into the soil.

From experience I know it is important to assess and manage the roots now. Too many roots may seem a good problem to have but over time they will all thicken and spread to completely hide the rock. No point having a root over Rock planting if nobody can see there’s a rock!

Also need to deal with crossing roots. As well as being confusing to the viewer, a root growing under another will push the overlying root out away from the rock as it thickens and spoil the arrangement.

After cleaning many of the new, smaller roots and removing some that cross over or under. This should allow the rock to show through the spaces even as the remaining roots thicken and spread.

The reverse side of the same tree before cleaning excess roots

and after cleaning the roots on that side.

Here’s another case of crossing roots.

A closer look at the root marked with blue….

Shows that it comes from the other side of the tree, ender the base of the trunk, under another important root then down the front of the rock.

That’s one root I will definitely remove now, before it gets the chance to start lifting the entire tree away from the rock.

A few of these little ROR starters are already good enough to pot up and begin training trunk and branches. Others still need some more grow time so those are rewrapped with fresh foil and will go back into pots or boxes so the roots and trunks thicken a little more next summer.

Wrapped ready for another year’s growth and development.

Ficus bonsai

Summer is a great time to work on ficus and other sub tropical plants. They respond quickly and recover far better if pruned or root pruned while they are still actively growing.

This old ficus has been posted before. It is now a bit too large for me to manage comfortably so I’ve offered it for sale. Earlier in spring I gave this one a really hard trim as trimming had been neglected for a year or 2 and branches were becoming too long.

The tree has responded with masses of new shoots, some from the existing branches and more from the trunk. Now it is time to select best new shoots, thin out excess shoots and trim the good ones.

Ficus before selecting new shoots
After

The dwarf green tree frog was not impressed that I removed all his cover but stayed put while I worked. Now safely back in the poly house.

The above tree (with or without the frog) is still available if you fancy owning an old, impressive trunk bonsai. Still priced at $3,300

For those who would rather invest some time instead of money Shibui Bonsai also has smaller starter Port Jackson figs. In just 30 years you could have something like the tree above for an investment of just $15 or $20.

I also repotted some starter root over rock ficus to check the roots. These trees were started just last year which shows how quickly ficus can grow.

What do I do with it?

Lots of beginners struggle to decide what to do after selecting a starter.

One of the biggest problems is there’s always a range of options offered so it gets confusing. Different options is not surprising as there’s usually more than one way to achieve results with plants and for any individual tree there’s a range of possibilities depending what size and shape you are aiming for.

Let’s start with worst case scenario. A beginner has selected this trident maple seedling because it is cheap but now struggling to work out what to do next.

No wonder you cannot decide how to style this tree. There’s nothing to style. The best we can do for trees like this is to grow them on to get something that we can work with. Be realistic about timeframes. This will take at least 3 years to develop a simple mallsai type bonsai and 5-20 years to develop a show worthy trident bonsai.

Even at this stage there’s a range of options on how to grow on trees like this.

Some growers prefer to just plant the whole root ball into a larger container or in the garden and allow it to grow. This approach might achieve a fat trunk quicker but can take more years after a major trunk chop to grow a new leader and heal the large scar.

I prefer to start with some trunk reduction. Pruning early leaves smaller scars that heal quickly. It also encourages more shoots to grow and I’ve found that those extra leaders will still give me great trunk thickening but thickening is staggered along the trunk as each successive shoot adds more thickening. That means the trunks end up with even better taper right from the start. Extra leaders also gives me options when pruning later. I can prune for more or less taper and for more or less trunk bends. Any reduction in trunk thickening during the growing phase is more than made up in les years spent healing large chops and growing new leaders to match the stump that’s formed using the previous grow fast method above.

Hera are some photos of initial pruning for a couple of similar tridents. Both these already had side branches to cut back to but even if there’s no side shoots just chop the trunk at about the height you’ lime your first bend or branch to be eventually. The examples below are intended to develop as quite small shohin sized bonsai.

Note the change of angle for the second tree. Just because it has been planted vertical does not mean it must always stay that way. Always look for possible improvements from tilting your trees one way or another.

Next step is to check the roots. There are growers who feel that root pruning will slow growth and development. My theory is that nebari (surface roots) is a very important part of most bonsai. A thick trunk is great for bonsai but if the roots are tangled or malformed it won’t matter how thick or how good the trunk is. Layering a trunk is possible but that process adds several years to the development timeline. Growing good roots start as early as possible and regular root pruning promotes even better nebari. Even if regular root pruning does slow growth (and I’m not convinced it does) a few extra years will pay off when you don’t need to layer to improve the nebari later.

Plenty of good roots from just one year in the pot.

Start by uncovering the upper roots. Never cut through a root ball as in the next step unless you are sure there are good roots above your cut

Cut the lower half of root ball off then trim around the trunk. This removes most tangled roots and makes it easier to comb out the remaining soil.

After combing out the soil and tilting the trunk where I want it there’s one root too high on the left side.

Fortunately there are good roots just below so the higher root is removed to leave roots on a level plane.

Finally the freshly root pruned trees is potted up – at the new angle – ready for another year of growth. because I’m aiming to develop smaller, shohin sized bonsai I’ve used another smaller pot to restrict internode size. Feel free to use a larger pot if you’re aiming for larger sized bonsai.

Here are some more initial pruning for small bonsai using other species

Digging 2021

The winter solstice has come and gone and that is a prompt for me to get into the grow beds and start digging the deciduous trees. I don’t think the trees mind when I dig. I just use the solstice as a reminder to get started or I won’t have enough time to dig the beds and do whatever repotting is required in the nursery before spring.

I usually start with the root over rock trees, just because I can’t wait to see what has happened under the soil and foil wrap. Opening these is always like Christmas.

Mulch scraped back and the trees have been loosened with a shovel
Closer look at some of the trunks

After cutting roots with a shovel I can lift the trees and shake the soil off the roots.

as they came out

To make them easier to handle the long roots and long branches are pruned roughly before making any further decisions.

after a rough trim top and bottom

Now comes the moment of truth. Unwrapping the foil will reveal how well the roots have developed over these rocks. these trees have been in this bed for just one year. Note that the aluminium foil wrap is starting to deteriorate. Some have split the foil as the roots and trunk expanded during the growing season. Roots have also penetrated through the foil in a couple of places.

roots escaping!

This is a good reason for checking every year. The closer to the surface the stronger trident roots grow. If this was left another year that escaped root would get huge and would distort the roots closer to the rock, possibly making this a dismal failure.

Now it is time to do some more detailed work on these trees. I assess the whole root/rock/trunk arrangement to find the best possible lines. At this stage I’m just looking for a trunk. branches come later.

from one side – nice possible trunk line, good roots.
This one also looks good from the other side.

I think the curving trunk looks far better than the straighter section so I’ll prune to remove the straight section. Pruning like this also gives some taper.

After final pruning

Now these are ready for potting and the start of the next phase – branches and ramification.

pruning small tridents

The leaves have fallen so it is time to trim and prune the maples. There are quite a lot of small tridents being grown on at Shibui Bonsai. Over summer they are allowed to grow with only occasional rough trims to limit the height of the new shoots. Now it is time to look more closely and prune for direction and taper.

There is not just one way to create bonsai. Much will depend on what style you want to grow, how big the bonsai will be and how well it has grown. With most developing trees there are a number of legitimate alternatives when pruning for shape.

The original tree has a right angle bend at the top which will not give an attractive trunk line so I cut back to a lower shoot with better line. Now the trunk has a slight change of direction and better taper above that cut. That cut would be quite suitable to grow on as a larger sized bonsai. Further down the trunk is another suitable side shoot with good angle. The lower cut provides even better trunk bends and taper starting lower. It can now be grown on as a larger tree or as a possible shohin sized bonsai.

Those tridents will be allowed to grow again next summer. If all goes well some of the new shoots will be selected to develop beginning branches.

This time I am selecting carefully for shorter internodes. As this is intended to become a shohin sized maple bonsai pruning is rigorous. Any straight sections are removed. All long internodes are removed, even if they are growing in desirable locations and angles. Remember that buds can only grow from nodes so long internodes severely restrict ramification of branches. This is particularly important when aiming for smaller sized bonsai where everything must be reduced. The lowest branch on the right above curves up and out and still has a long internode. I have left it this year to strengthen and thicken the start of that branch. With luck some smaller side shoots will emerge from the nodes at the base. If they develop with shorter internodes I will cut back the stronger one next winter. If nothing emerges next summer the long internode will be chopped anyway and the branch developed the following year from new buds.

These photos show a small trident another year on from the previous example. You can see that branches have started to form. Again some shoots were allowed to grow long to thicken selected areas of branches or the trunk. Those thick shoots are now pruned right at the base. Again, long internodes are rigorously removed to give better structure to the developing branches. To save wiring, shoots growing in desirable directions are kept while those growing up or down are generally removed. I try to select thinner shoots further out on branches and near the apex to provide taper where possible. Development of this trident is advanced enough to think about finding a proper bonsai pot for the spring repot.