Most gardeners are aware that some plants are propagated by grafting. There are also many uses in bonsai for grafting techniques. In this post you can read the Shibui Bonsai guide to bonsai grafting.
Bonsai growers can use grafting for a number of purposes. Knowing how can open new options to change and improve your bonsai.
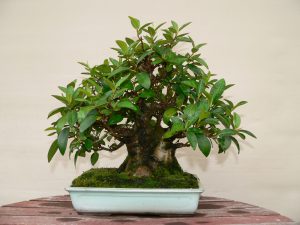
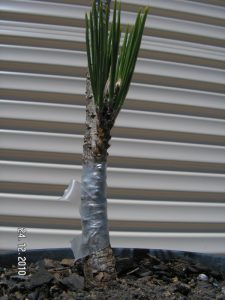
Japanese white pine grafted onto black pine rootstock
Propagating different varieties: Some types of plant are difficult to produce by cuttings or seed but we can grow new ones by grafting a piece of the desired plant onto a similar rootstock. This is how most fruit trees and many ornamental garden trees are produced commercially. Bonsai growers tend to steer clear of grafted plants because a graft union in the middle of your trunk often looks ugly. Grafting right down low near the roots and making very neat grafts can overcome this problem.
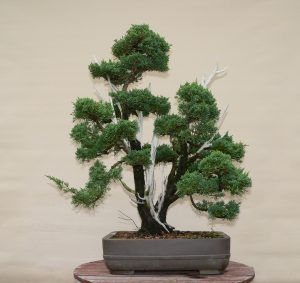
All these branches have been added by approach grafting
Adding branches: Most bonsai growers have been frustrated at some stage by an otherwise great tree that would look even better if it had another branch in a different spot. Sometimes we can induce a tree to grow new buds by pruning but grafting has the potential to add branches exactly where we want them. As well as the normal way of grafting a shoot where you want it, there are several other grafting techniques that can be used – approach grafts and thread grafts.
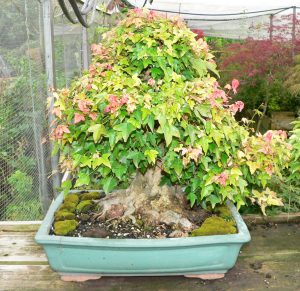
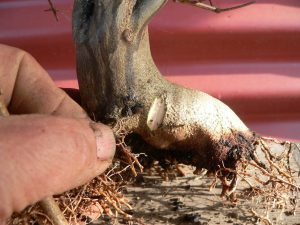
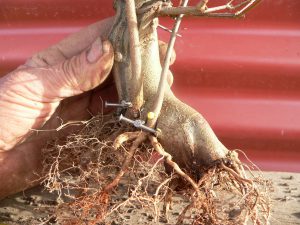
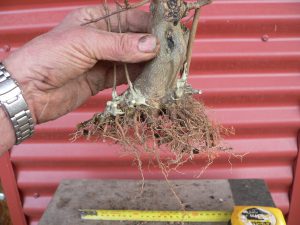
new roots have been grafted into the nebari to improve this trident maple
Adding roots: It may come as a surprise to some but roots respond just as well to grafting as shoots so if your bonsai has a glaring gap in the nebari you should consider grafting one or more roots to improve the look of your tree. We can use any of the techniques mentioned for grafting branches above
twin trunk ficus created by joining 2 seedlings.
Making multi trunk trees: Individual trees can be induced to join together to create attractive multi-trunk style bonsai. The approach graft technique is usually used for this.
Some grafting terms:
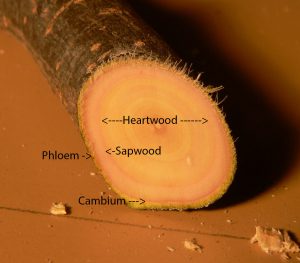
parts of a woody stem
Cambium: is a very thin layer between the bark and woody part of a tree. Cambium cells are actively dividing and are the part of the tree that causes growth. Cambium cells can transform into different types of tissue depending on the need and conditions. Near the woody centre, cambium cells add more layers of sapwood to the core of the tree. Near the outside more phloem forms to replace the older phloem which dies and adds to the outer layers of bark. Cambium cells that are exposed to moisture can become roots which allows us to make cuttings or layers from many plants.
Rootstock: is the part of our graft that provides the roots of the new, united tree.
Scion: is the term used for the shoot which is grafted onto the rootstock. The scion becomes the new branch or, often, the entire top of the tree.
Compatibility: There are limits to what plants can be grafted together successfully. The scion and rootstock must be from the same or closely related species.
The techniques in detail:
Grafting new shoots: Adding shoots, roots and propagating selected varieties all use modifications of standard grafting techniques.
Approach graft: Both scion and rootstock exist on their own roots while the graft union heals. The roots of the scion are usually removed after the graft is successful. Because both parts are supported by roots you can be much more certain of success with approach grafting.
 Decide where the new scion will be grafted. Remove a layer of bark from both the rootstock and scion to expose the cambium. If you are grafting onto a larger trunk this may mean cutting a narrow strip of bark out of the trunk to make a slot the same width as your scion. Place the 2 cut surfaces together and secure the scion in place with tape, pins or nails. It is important that the scion is held firmly and cannot move. Sealing the grafted area will help speed up the healing process. Grafting tape provides a good seal but various waxes and sealers can also be used, especially in areas the tape won’t cover.
 Keep both plants well watered and fertilised to maintain health and maximum growth while the graft heals. Union can take anywhere from a few weeks to several years. A good indication is the wood starting to bulge under the sealing layer.
When you are confident that the union is healed cut the root section of the donor scion off and your approach graft is complete.
For slow growing plants like junipers or if your technique has been a little less than perfect it can pay to remove the roots of the scion a bit at a time. Scrape the bark off part of the donor stem below the new graft to reduce sap flow from the old roots to the grafted area of the scion. This will encourage sap flow from the rootstock plant through the new graft union into the new scion.
Thread graft: is a modification of the approach graft so both parts are sustained by their own roots for as long as it takes for the graft to unite. Thread grafting seems to have been developed just for bonsai. It gives more flexibility in the direction the new grafted branch or root will grow and also minimises scarring. Scions for thread grafting can be growing on the same plant or from a suitable plant in another pot. Thread grafting is normally done with deciduous trees when they are dormant in winter but it can also be done during the growing season by defoliating the donor shoot so that it will pass through the hole you drill. I have also seen this adapted to pines by compressing the needles of the scion into a split straw or binding the shoot in grafting tape to get the scion thin enough to go through the hole you’ve drilled.
Determine the location of your new graft and the angle you would like it to grow. Drill a hole through the trunk of the rootstock tree using a sharp drill bit. Use slow speed on your drill so the plant tissues don’t get overheated. You will need to choose a drill bit large enough so that the scion can pass through the new hole. You will probably find that the bit needs to be thicker than you imagined to make allowance for all the buds along the shoot you are grafting. You can always drill out the hole with a larger bit if your first try is not large enough. Clean up any torn edges with a sharp knife or chisel so it will heal better. Thread your chosen scion through the hole so that it passes right through the trunk. Tie the scion in place so it cannot move while healing takes place. As the scion grows and thickens and the hole heals and closes up the 2 parts will come into contact and begin to squeeze together. Eventually the growing tissues should begin to unite. Thread grafts done this way can take from 6 months to 2 years to form a good union.
Many growers modify this technique to speed up the grafting process. Cut a small area of bark away from the shoot that you are threading through. Position the threaded shoot so the cut area is in contact with the cambium at the exit hole and secure it in place with a small wedge or stick before sealing up both entry and exit holes. The exposed cambium should ensure that the graft heals up a lot quicker.
Wait until the scion that forms your new branch is thicker on the exit side. This is a good indication it is taking nutrients from the trunk and the entry side can now be cut leaving a new branch at the ideal location and angle.
There are some good pictures to show thread grafting here: internet bonsai club – thread graft and a more detailed thread on Ausbonsai.com.au thread grafting a maple (you may need to sign in to see the pictures)
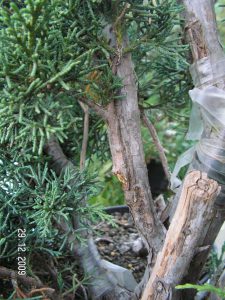
Side wedge grafting: can be used to add new shoots onto bare branches. It is also used to propagate different varieties, particularly conifers. see below.
Grafting a new variety: Select a healthy young plant as the rootstock. I usually use 2-3 year old plants. You will also need some healthy shoots from the variety you wish to grow.
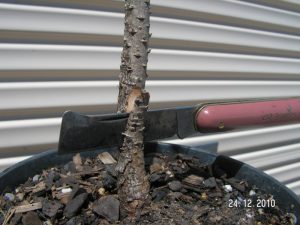 Make a downward cut 2-3cm long into the trunk of the chosen rootstock. The cut is at a slight angle but be careful not to cut right through the trunk.
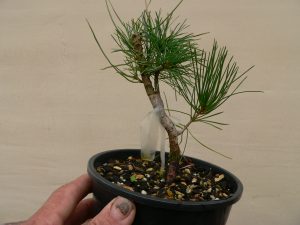
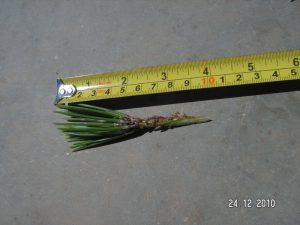 Make 2 sloping cuts at the base of the scion to form a wedge. The picture shows a scion of ‘yatsubusa’ black pine which I’m grafting onto a black pine seedling.
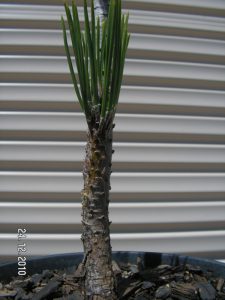 Insert the scion into the cut in the rootstock. Make sure that the cambium is aligned on one side. I normally assume that the bark of both rootstock and scion are similar and line up the outside edges along one side.
 Tape the area with grafting tape to seal the graft and hold it tightly together while the graft heals.
 As there are no roots supporting the scion we need to ensure that the scion does not dehydrate before the wound unites. Dormant deciduous scions will not usually need any help as they are using very little water while dormant but the leaves of evergreens are transpiring water and will die if not protected. There are a number of ways to protect leafy scions – plastic Ziplok bags make great covers. Simply open the bag, wet the inside and place the bag over the scion. Press the edges together to enclose the scion in its own tiny greenhouse which will maintain high humidity. Some growers bind the entire scion with grafting tape. ‘parafilm’ or similar plastic wrap. Be careful not to expose your new scions to direct sun which may dry them out or overheat them inside the plastic wrap.
 Grafting new roots: You can use any of the above methods to add roots to your bonsai. Thread grafts can be put right through the base of the trunk or through a nearby root to give feeder roots in the desired place.
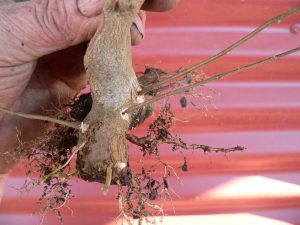
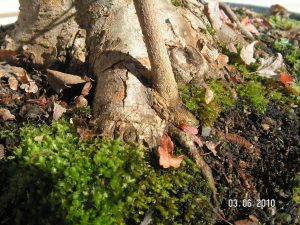
 I find that many seedlings have an L shaped bend at the base of the trunk. These are ideal to approach graft new roots.
 Prepare the 2 surfaces by removing bark to expose cambium. It is unlikely you will be able to bind the area with grafting tape.
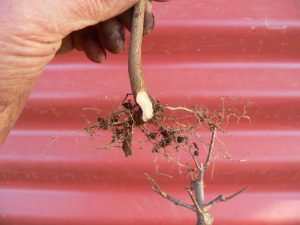
 Root grafts are routinely held in place with pins or nails then covered with some wound sealer or grafting wax. When the graft has healed remember to cut off the TOP of the scion this time – its the roots we want to leave alive!
It is also possible to use a modified wedge graft to add roots in some cases. A chisel is usually used to open up the angled cut in the trunk and, because we are grafting roots, the cut should be angled upward.